
You hear it before you fully see it. A faint drip, the hum of a struggling appliance, then that cold, damp smell rolling up the stairs. You open the basement door, flick on the light, and your stomach drops. Water is spread across the floor, boxes are soaking from the bottom up, and you're trying to think clearly while your brain jumps straight to ruined drywall, mould, and insurance headaches.
Take a breath. A flooded basement is serious, but panic makes people do dangerous things fast. The right move is to slow down for a minute, make the area safe, stop more water from entering, and then deal with removal, drying, and cleanup in the right order. That order matters more than most homeowners realise.
If you searched for Flooded Basement What to Do, you likely need calm, practical steps right now. That's exactly what follows.
Table of Contents
- That Sinking Feeling Discovering a Flooded Basement
- Your First 15 Minutes Immediate Safety Actions
- Stopping the Source and Documenting the Damage
- The First 24 Hours Removing Water and Initial Cleanup
- Drying Sanitizing and Preventing Mould Growth
- Navigating Insurance and Professional Restoration Services
- Preventing the Next Flood in Your Vancouver Home
That Sinking Feeling Discovering a Flooded Basement
A Richmond homeowner comes home after a long day of rain, heads downstairs for a freezer item, and steps onto a wet stair tread. By the time they reach the bottom, they've got standing water around storage bins, a musty smell in the air, and no idea whether it came from outside, a burst pipe, or a failed sump pump. That's a common moment. It feels chaotic because it is.
The first mistake people make is charging in with a mop, a shop vac, or bare feet. The second mistake is trying to save everything at once. Neither helps. A flooded basement has to be handled like a small emergency. Safety first. Water source second. Documentation third. Extraction and drying after that.
You do not need to solve the whole problem in the first ten minutes. You do need to avoid making it worse.
A practical example: if you walk down and see water touching an extension cord, appliance, or outlet, stop at the stairs. Don't take another step. If you also smell sewage or see dark, murky water coming up from a floor drain, keep everyone out of the area until you know exactly what you're dealing with.
The good news is that there is a clear path through this. It's not glamorous, but it works. Handle the dangerous stuff first, move in a logical order, and you'll protect both your home and your claim.
Your First 15 Minutes Immediate Safety Actions
Treat the first 15 minutes like scene control. Slow down, keep people back, and remove hazards in the right order. Homeowners get into trouble when they rush downstairs to start saving boxes or furniture before they know whether the area is energized, contaminated, or still filling with water.
Stop people from entering the basement
Set one rule immediately. Nobody goes into standing water until you know the power is off and the air is safe.
If water is anywhere near an outlet, extension cord, appliance, or baseboard heater, stay at the top of the stairs. Shut off the breaker to the basement only if you can reach the electrical panel without stepping into water or touching wet surfaces. If you cannot do that safely, leave it alone and call an electrician or emergency service. A flooded basement is not the place for guesses.
If you smell gas, get everyone out of the house right away and call the gas utility or 911 from outside. Do not touch switches, plugs, thermostats, or garage door openers.
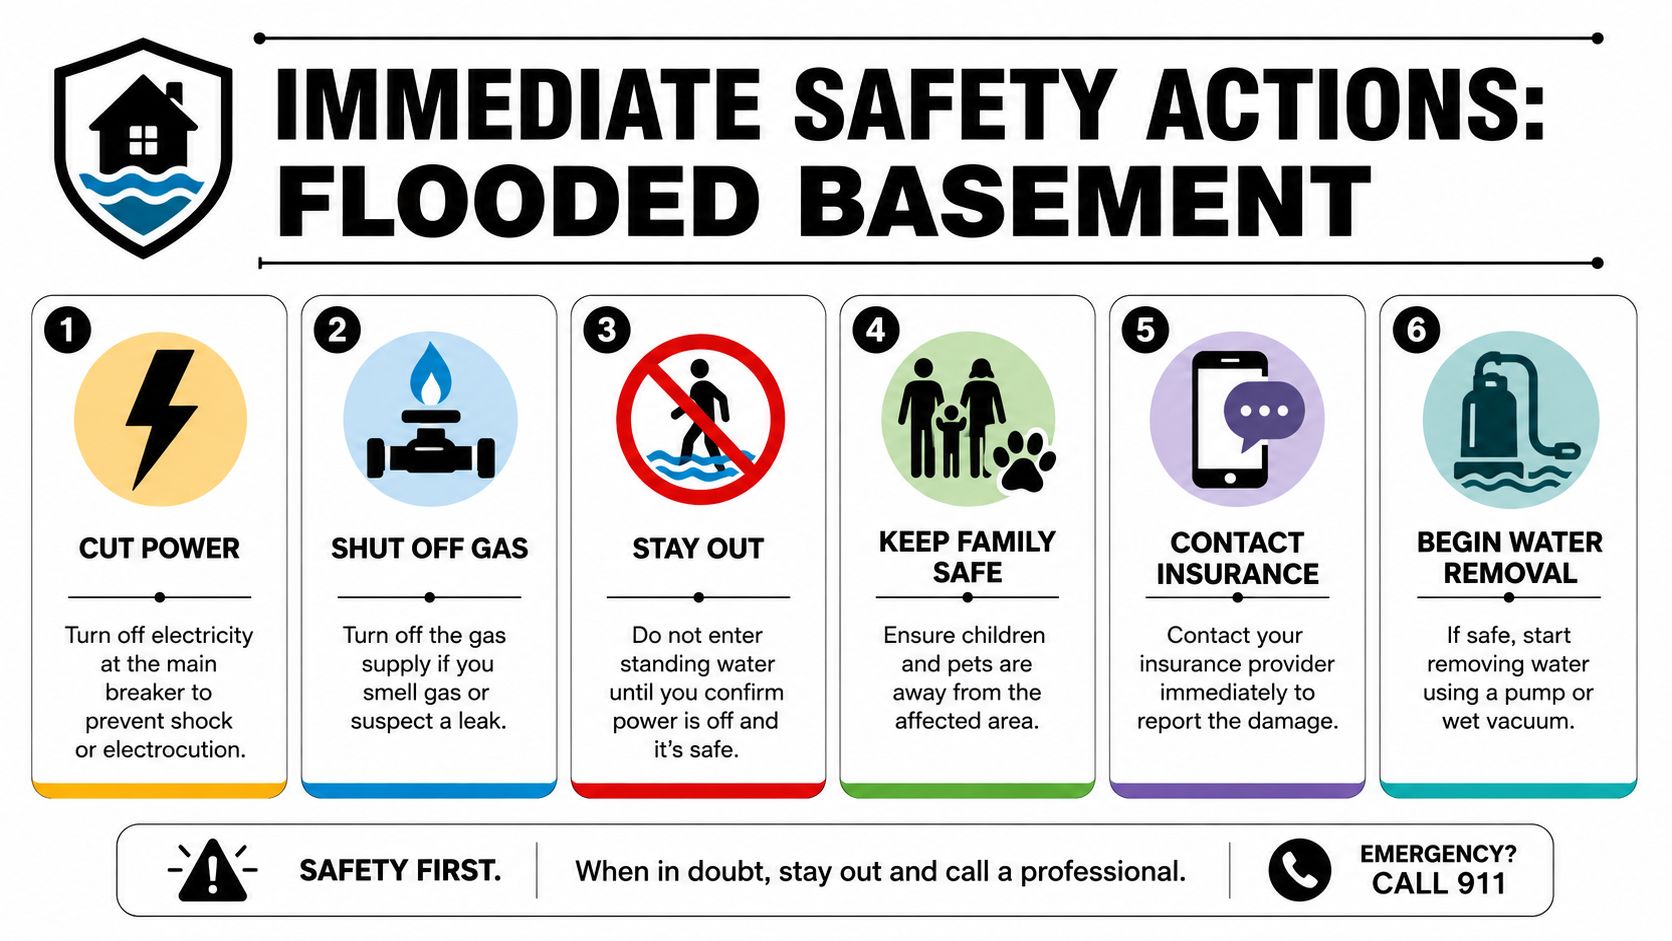
Once the immediate hazards are controlled, do these in order:
- Keep children and pets upstairs: Do not let anyone wander down for a look.
- Put on proper protection: Rubber boots, waterproof gloves, and old clothes are the minimum for brief entry.
- Leave electronics where they are: Do not pick up wet power bars, lamps, or appliances.
- Shut off the house water if plumbing is feeding the flood: Use this guide on how to shut off your water main safely.
- Open the basement door only as needed: You want access, not extra traffic.
Identify the water before you touch anything
Clear water from a supply line is one problem. Water that rose from a floor drain or toilet is a different job entirely.
If the water is dark, cloudy, foul-smelling, or came up through a drain, toilet, or shower, treat it as contaminated. That means no bare hands, no sneakers, no laundry-room heroics. Keep everyone out except the person handling the emergency with proper protection. If sewage is involved, professional cleanup is the right call.
Here is the missed step that saves people from making a bad situation worse. Do not start pumping a basement dry just because you found a pump. If outside groundwater is pressing against the foundation, removing water too fast can increase the pressure difference and stress basement walls or floors. The safer approach is to secure power, stop active inflow if you can, identify the water type, and then remove water in a controlled way.
A common mistake proves the point. A homeowner sees six inches of rainwater, rents a pump, and tries to empty the basement fast before work. By afternoon, water is still seeping in, boxes have been dragged through contaminated puddles, and the cleanup is now bigger than it needed to be. Fast is not the goal. Safe, controlled, and documented is the goal.
Practical rule: If you do not know what is in the water, treat it like it can make you sick or shock you.
If the water is rising, the smell is strong, or you cannot shut off power safely, stop there and call for help. That is the correct move, not a failure.
Stopping the Source and Documenting the Damage
You do two jobs here, in this order. Stop the water if you can do it safely. Then document everything before cleanup changes the scene.
Find the source before you touch the contents
Do not start dragging boxes, peeling up carpet, or hauling out furniture until you know where the water is coming from. If the source is still active, every minute spent moving belongings instead of stopping the flow adds damage.
Start with the simplest clues. Water along one wall after rain points to exterior drainage, groundwater pressure, or a window leak. Water rising from a floor drain points to a blockage or backup. Water dripping from the ceiling or hissing behind a wall points to plumbing. Water around the sump pit points to pump failure, power loss, or inflow the system cannot keep up with.
Use this quick check:
| Likely sign | Most likely source | Immediate action |
|---|---|---|
| Water spraying or dripping from plumbing | Burst or leaking pipe | Shut off the main water supply |
| Water rising from floor drain | Drain blockage or backup | Stop using sinks, toilets, showers, and laundry |
| Water collecting near walls after heavy rain | Groundwater or exterior drainage issue | Check downspouts and move outside water away from the foundation if safe |
| Water around sump pit | Failed sump pump or power loss | Check the pump and float only if you can reach it without entering unsafe water |
A common mistake is chasing the wrong problem. A homeowner hears rain outside, assumes the storm caused the flood, and spends twenty minutes stacking bins while a split washing machine hose keeps feeding the basement. Find the source first. Then act on the right shutoff.
If it is a plumbing leak, shut off the main water. If it is a drain backup, stop all water use in the house. If it is storm or groundwater intrusion, reduce outside runoff only if you can do it safely from dry ground. Do not wade in and start experimenting.
Document it like you may need to defend every line of your claim
Photos and video come before cleanup. Once you start pumping, wiping, or throwing things out, you erase evidence. Insurance adjusters were not standing there with you. Your records need to show what happened, where the water went, and what it damaged.
Be methodical. Start with wide shots of the whole room. Then take medium shots of each affected area. Finish with close-ups of damaged items, water lines, stained drywall, swollen baseboards, buckled flooring, and any visible entry point.
Capture these clearly:
- Water height: Show the high-water mark on walls, posts, stairs, stored items, and appliances
- Damaged materials: Flooring, drywall, insulation, trim, furniture, boxes, and contents
- Source clues: Drain openings, sump pit, pipe leaks, cracks, windows, wall-floor joints
- Item identification: Brand labels, model tags, and serial numbers on appliances or electronics if visible
- Temporary actions: Photos of shutoff valves, tarps, buckets, or emergency measures you used to limit further damage
One good habit saves arguments later. Narrate your video. State the date, time, room, where the water entered, and what you shut off. Clear, boring documentation wins claims.
Leave damaged items where they are until you have recorded them, unless they create a safety hazard or block access to the shutoff. Keep every receipt tied to the emergency, including gloves, contractor bags, pump rentals, batteries, hotel stays, and temporary repairs. Write down every call with your insurer. Include the date, time, claim number, and the name of the person you spoke with.
A practical example: if a freezer, storage shelf, and carpet edge are all wet, photograph each one in place, then take a wider shot showing all three in the same area. That proves location and context, not just damage.
If you cannot identify the source, or the source will not stop, call a 24/7 emergency plumber right away. The professional approach is simple. Isolate the cause, preserve the evidence, and avoid rushed cleanup decisions that create bigger problems later.
The First 24 Hours Removing Water and Initial Cleanup
Many homeowners, at this point, get aggressive and make the situation worse. Fast action matters. Reckless action doesn't.
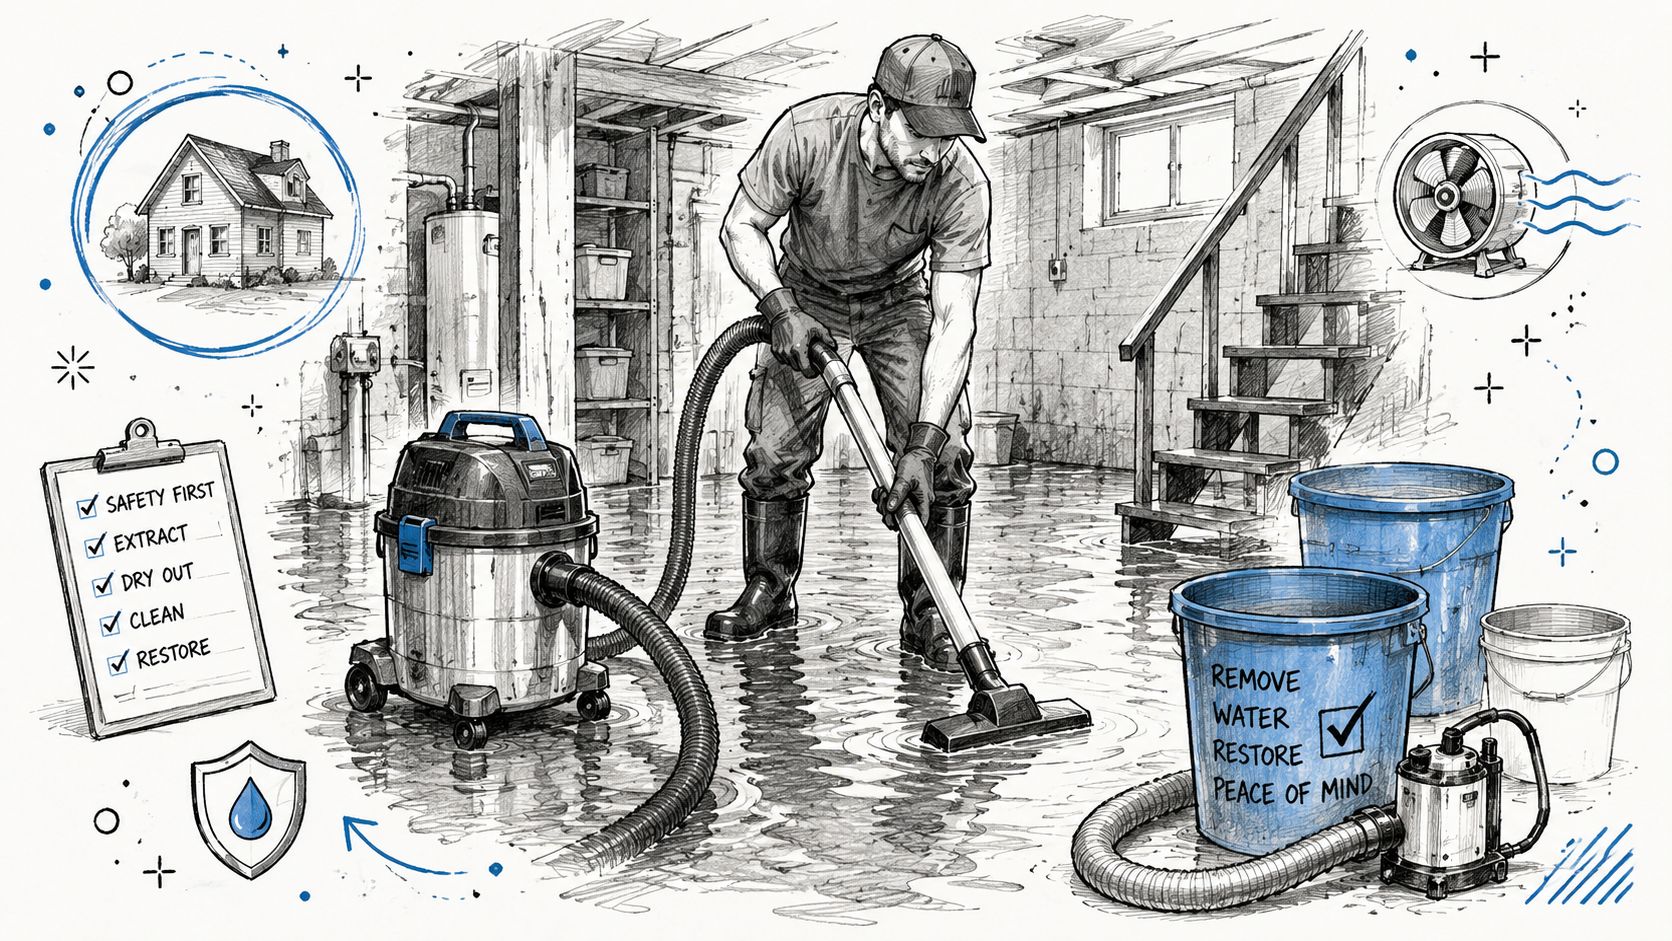
Use the right tool for the amount of water
If you have a thin layer of water, a wet vac can help. If standing water is deeper, you need a sump pump or a more substantial pump. If the water is over 2 inches deep, use a wet-dry vacuum or sump pump immediately, as noted in Farm and Fleet's flooded basement cleanup guidance. Water that sits for more than 24 hours can damage wood floors, drywall, and foundation materials in that same guidance.
Use this rough tool guide:
- Small puddling or shallow spread: Wet-dry vacuum
- Several inches of water: Sump pump or rental pump
- Clogged floor drain with incoming water: Pump out while also arranging drain service
- Sewer backup: Professional extraction and disinfection, not casual DIY cleanup
A practical example: a Surrey homeowner finds about 3 inches of storm water in a finished basement. They shut off the basement breaker, use a wet-dry vacuum on the perimeter, then switch to a sump pump when the vacuum can't keep up. That's the right progression.
Do not pump too fast
This is the step most basic checklists miss. A basement full of water doesn't just hold water inside. The soil outside may also be saturated and pressing against the foundation. If you pump the basement out too quickly while groundwater outside is still high, you can create a pressure imbalance.
A King County basement cleanup safety guide warns that draining too fast can push foundation walls inward or cause floor heaving. That's not theory. It's a structural risk.
Slower is safer when outside groundwater is still high.
If the flood followed heavy rain or widespread groundwater saturation, pump gradually. Match the drainage pace to conditions outside as best you can. If you see new cracking, wall movement, or unusual floor lifting, stop and bring in a qualified professional.
Here's a useful technical walkthrough on flood recovery tools and moisture checks:
Triage your belongings fast
You do not need to decide the fate of every item emotionally. Sort by material and condition.
- Move out first: Rugs, loose textiles, cushions, cardboard boxes, paper goods, and small furniture that can dry elsewhere.
- Leave in place to dry safely: Wet electronics should stay unplugged and remain where they are until fully dry.
- Expect to discard: If flooded items remain damp for more than 48 hours, they should be thrown out to prevent mould growth, as explained in Redfin's flooded basement cleanup article.
A practical example: a Burnaby homeowner removes a soaked rug and a box of books to the garage with fans running. Two days later both are still damp. Those items should be discarded rather than kept in the house hoping they'll improve.
Initial cleanup also means removing mud, debris, and any obvious contamination from hard surfaces. Don't scrub blindly before the water is out. Extract first, remove wet contents, and clear the room enough to start the drying phase properly.
Drying Sanitizing and Preventing Mould Growth
The flood looks over once the water is gone. It is not. This is the stage where a wet basement either recovers properly or turns into a mould and odour problem behind walls, under flooring, and inside trim.
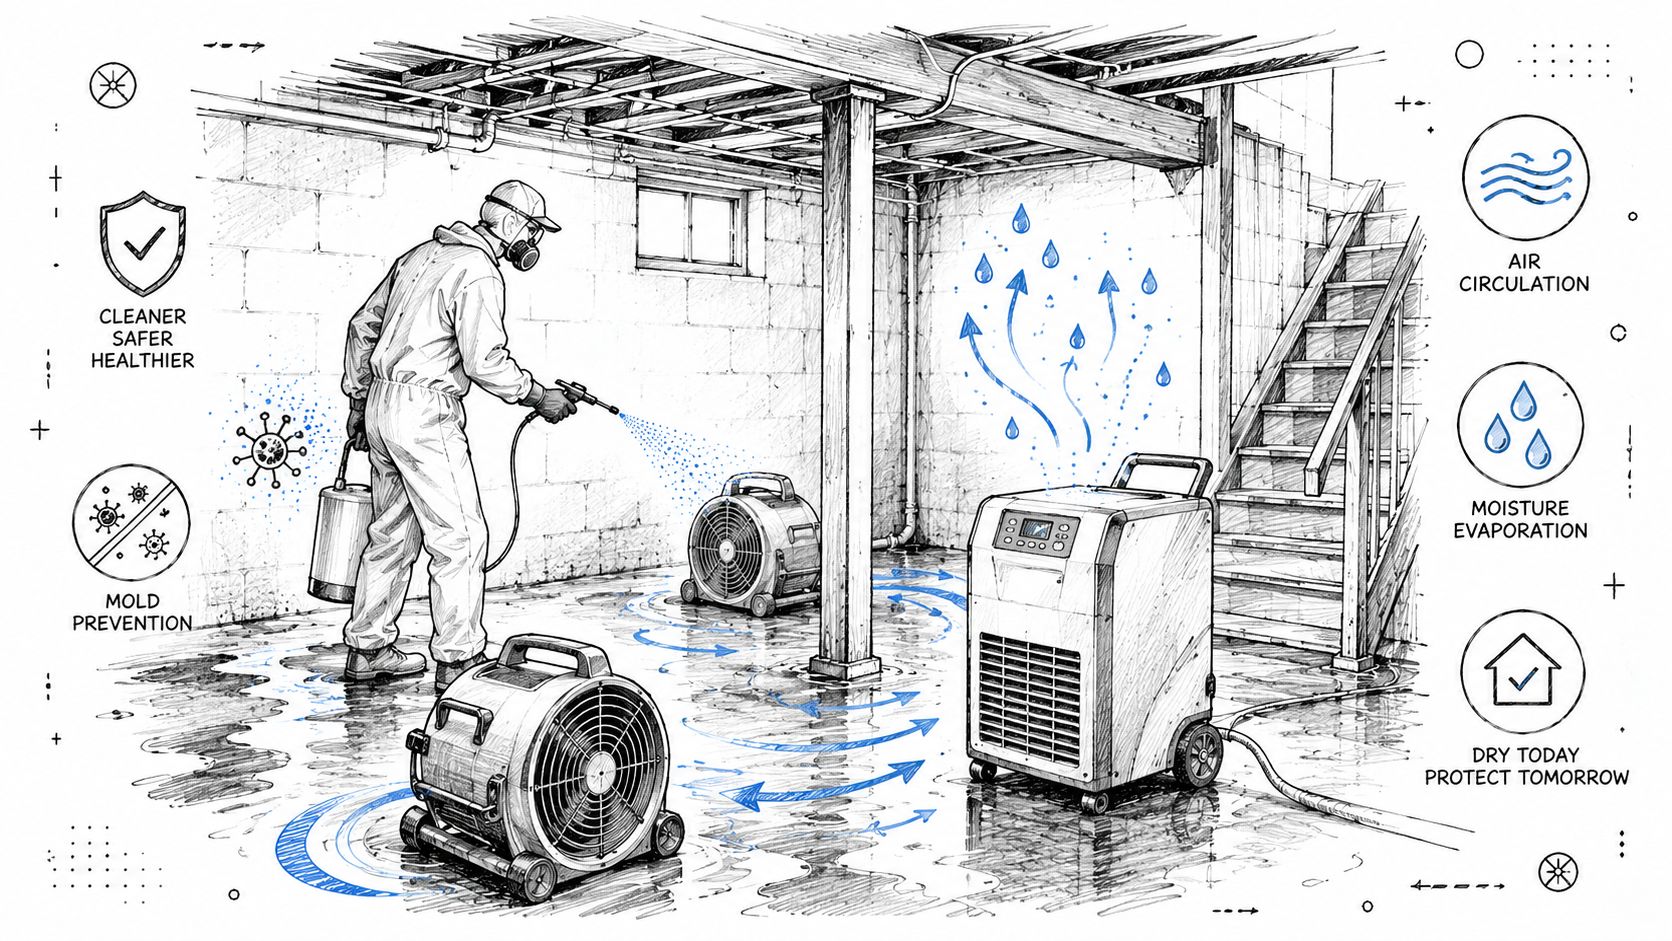
The order matters more than people think
Homeowners often drag in fans, crack windows, and hope airflow fixes everything. That is the wrong first move if floodwater contaminated the area. Clean first. Disinfect next. Dry after that. Drying dirty, contaminated surfaces can leave bacteria, residue, and odours in place while moisture gets pushed deeper into hidden areas.
So use this order:
- Remove debris and any remaining water.
- Cut out and bag unsalvageable wet materials.
- Wash hard surfaces to remove dirt and residue.
- Disinfect flood-affected framing and other hard, cleanable surfaces.
- Set up drying equipment and keep it running without interruption.
If the water involved a sewer backup, treat the whole area as contaminated. Wear gloves, boots, eye protection, and a proper mask. Keep kids and pets out. Disinfect exposed framing, concrete, and other hard surfaces before you start aggressive drying.
A practical example: a Vancouver homeowner removes wet baseboards after a floor drain backup and finds splashed contamination on the framing. The right move is to clean and disinfect those exposed surfaces first, then start fans and dehumidifiers. That sequence prevents a dirty drying job that smells bad a week later.
Soft materials need a hard decision. Carpet underlay, cardboard, insulation, and low-grade pressed wood usually do not come back well after flooding. If they stay damp for more than 48 hours, throw them out. Keeping wet porous material in the basement is how a small flood becomes a much bigger repair.
Know when materials are actually dry
Dry-looking is not dry. Drywall can hold moisture inside. Bottom plates stay wet long after the floor looks fine. Baseboards hide damp wall edges. Vinyl can trap water underneath.
Use a moisture meter if you have one. If you do not, rent one. As a working target, wood and drywall should be dry enough to match normal indoor conditions before you close walls, reinstall trim, or bring stored items back. Guessing is how hidden mould starts.
This is also where many homeowners make another expensive mistake. They try to speed everything up with maximum heat and random fan placement. Aim airflow across wet surfaces, not into the middle of the room. Run dehumidifiers continuously. Open windows only when outside air is drier than the basement air. In Vancouver, that is not always the case.
Use this field checklist:
- Open trapped areas: Remove baseboards early and open small sections of wall where water wicked up or got trapped.
- Dry with intent: Place air movers to sweep along walls, framing, and floor edges.
- Pull moisture out of the air: Run dehumidifiers full-time and drain them properly.
- Check hidden zones daily: Behind trim, inside closets, under stair corners, beneath vinyl edges, and around stored shelving.
- Watch for early warning signs: Musty odour, staining, new spotting, or dampness returning after the surface feels dry. If you are unsure, review these signs of mould problems in a home.
One more point matters. Do not rush to close everything back up. A basement that stays open and dries fully for a few extra days is far cheaper than reopening walls because moisture was trapped inside.
A practical example: a homeowner dries the visible concrete floor, leaves the baseboards in place, and stacks boxes back against the wall two days later. By the weekend, the room smells earthy. Moisture was still sitting behind the trim and had nowhere to go. Pulling the trim, checking the wall edge, and keeping air moving across that area would have shortened the job and lowered the chance of mould.
Navigating Insurance and Professional Restoration Services
You need two things here. A clear claim file and the right pros in the right order.
Homeowners waste time when they call everyone at once. Start with the person who stops the immediate problem. Then bring in the team that prevents that water from turning into hidden damage, odour, and a second round of demolition.
Who does what after a basement flood
An emergency plumber stops plumbing-related sources. That includes burst pipes, failed shutoffs, leaking fixtures, drain issues, and sump problems. A restoration company handles water extraction, contaminated material removal, drying equipment, sanitation, and tear-out where materials cannot be saved. Your insurer opens the claim, assigns an adjuster, and tells you what records they want.
Call your insurer early. Do it before cleanup gets far enough that the original damage is hard to prove. Ask three direct questions: Is this loss likely covered, what photos or item lists do you want first, and can I approve emergency mitigation now? Then save every receipt for pumps, dehumidifiers, hotel stays, disposal fees, and emergency plumbing work.
Use this quick triage table:
| Problem | Who to call first | Why |
|---|---|---|
| Burst pipe or active plumbing leak | Emergency plumber | Stops the source before damage spreads |
| Sewer backup | Restoration company and plumber | Contamination cleanup and cause correction |
| Rainwater seepage with standing water | Restoration company, then drainage or plumbing help if needed | Get water out first, then diagnose the entry point |
| Wet drywall, insulation, flooring | Restoration company | These materials hold water and need proper drying or removal |
A practical example: a split washing machine hose floods a finished basement. The plumber shuts the problem down. The restoration crew extracts water, checks how far it wicked into drywall and underlay, and sets the drying plan. That order saves time and lowers the chance of trapped moisture getting missed.
When DIY makes sense and when to stop
Handle it yourself only when the water is clearly clean, the source is fully stopped, the area is small, and you can dry every affected material fast. Bare concrete in an unfinished utility room is one thing. Finished walls, insulation, laminate, and any sewage exposure are another.
This is the line I want you to hold. If you cannot confirm what is wet, how dirty the water is, or whether the room can be dried completely, stop and call professionals.
Use this decision test:
- DIY is reasonable: Small clean-water incident, no hidden wet materials, no sewage, no electrical hazard, and no finished assemblies holding moisture.
- Call professionals now: Sewer backup, recurring flooding, active leak you cannot isolate, soaked walls or flooring, or any uncertainty around contamination.
- Escalate fast: Musty odour, warped finishes, damp materials that stay damp, or signs water reached cavities behind trim or walls.
One mistake homeowners make is treating pumping and drying as simple labour. It is not. Pros are not just bringing equipment. They are deciding what must be removed, what can be saved, how fast water should come out, and when disinfection should happen so you do not seal contamination or moisture into the structure.
If the flooding involved a failed or overwhelmed sump system, have the setup checked before you close the claim. A bad discharge layout or undersized pump can bring you right back here. If you need to understand the system better, review this guide to sump pump installation for basement flood protection.
A practical example: a small water heater leak on concrete may be manageable with a wet vac, fan, and dehumidifier. A sewer backup in a finished family room needs a restoration crew, proper protective gear, controlled demolition, and insurer documentation from day one.
Insurance paperwork matters. The drying plan matters just as much. Get both right before anyone starts putting the basement back together.
Preventing the Next Flood in Your Vancouver Home
The right time to flood-proof a basement is before the next heavy rain, not after the drywall is cut out and the dehumidifiers are running.
Start outside. That is where many repeat floods begin. If downspouts dump water beside the foundation, if soil slopes toward the house, or if one side yard stays saturated after rain, you are feeding water straight back to the basement. Extend downspouts so roof runoff discharges well away from the foundation. Keep gutters clear. Correct low spots that trap water against the wall. If one corner of the basement keeps getting wet, pay attention to the exterior directly above it first.
Small foundation cracks deserve action, especially after a hard rainy season or freeze-thaw damage. Water does not need a big opening. It only needs time and pressure. If seepage keeps showing up along the same wall, stop treating it as a cleanup issue and treat it as a drainage or waterproofing problem.
Inside the home, protect the systems that stand between you and the next flood. A sump pump without backup power is an incomplete setup. Storms can knock out power at the exact moment groundwater rises. If your pump is old, undersized, unreliable, or missing entirely, review your sump pump installation options for basement flood protection.
Focus on the checks that prevent repeat damage:
- Test the sump pump with water: Do not assume it still works.
- Check the discharge line: Make sure it is clear, directed away from the house, and not likely to freeze or recirculate water back to the foundation.
- Inspect gutters and downspouts: Overflow at the roofline often ends up at the footing.
- Fix grading problems: Soil should shed water away from the house.
- Take recurring damp spots seriously: Repeated seepage is an early warning.
- Protect the basement layout: Keep stored items off the floor and avoid finishing assemblies that trap moisture in a basement with a history of water.
Here is the professional view homeowners often miss. Prevention is not just about keeping water out. It is about limiting the scale of damage when something fails. Good drainage outside, a properly set up sump system, and smart material choices inside give you time, reduce contamination risk, and make recovery far less destructive if water gets in again.
If you have money for one upgrade, put it into drainage and pump reliability before cosmetic basement work. New flooring and fresh paint do nothing when water returns. Water management does.
If you're dealing with a basement flood or want to prevent the next one, Encano Plumbing & Drainage Ltd. can help with emergency plumbing, drainage diagnosis, sump pump work, and fast response across Vancouver and Greater Vancouver. When the water's rising or the cause isn't clear, get a qualified team involved early. It saves time, limits damage, and gives you a much better chance of getting your home back to normal quickly.