

You finish the dishes, pull the plug, and the water just sits there. Maybe it creeps down slowly with bits of food circling the drain. Maybe it doesn't move at all. Either way, a clogged sink has a talent for showing up when you're busy and turning a normal routine into a messy job.
The good news is that most sink clogs can be tackled in a sensible order without jumping straight to harsh drain cleaners or tearing plumbing apart. The trick is to work from the easiest, lowest-risk fix to the more hands-on ones. That usually means checking the obvious blockage points first, using pressure where pressure helps, and only then opening the drain assembly or snaking farther down the line.
A lot of articles stop at “pour this in” or “use a plunger”. That's only half the job. If you want to know how to fix a clogged sink properly, you also need to know what likely caused it, why one method works better than another, and when the clog is trying to tell you there's a bigger issue in the drain system.
Table of Contents
- That Sinking Feeling When the Water Won't Go Down
- Your Pre-Plumbing Checklist and Diagnosis
- Quick Fixes for Minor Sink Clogs
- How to Clean the P-Trap for Stubborn Blockages
- Using a Drain Snake for Deeper Clogs
- When a Clogged Sink Is a Sign to Call a Professional
That Sinking Feeling When the Water Won't Go Down
A sink rarely goes from perfect to completely blocked without leaving clues. Usually there's a stage where it drains slowly, burps air, or leaves murky water around the strainer. In a kitchen, the usual culprits are grease, soap residue, and food scraps. In a bathroom sink, hair and soap film are more common.
That difference matters because the fix should match the kind of clog. A greasy kitchen blockage often responds to flushing and plunging before anything else. A bathroom sink full of hair usually needs mechanical removal at some stage. The more closely you match the method to the clog, the less time you waste.
Practical rule: Start with the parts you can reach and the methods that don't leave corrosive residue behind.
That's the approach plumbers use in homes every day. You don't begin by assuming the pipe inside the wall has failed. You start with the stopper, the drain opening, the trap, and the immediate line. Those are the places where everyday buildup collects, and they're the parts most likely to give you a clean, simple win.
A quick example. If a double kitchen sink backs up on one side when you run water on the other, many people assume the whole line is blocked deep in the wall. Sometimes that's true. Often, though, the blockage is still close by, sitting in the trap or just beyond it, and a proper plunging setup clears it without much drama.
Start with the least invasive fix
The safest path is simple:
- Check the visible drain opening: Pull out food scraps, hair, or sludge near the strainer or stopper.
- Try a flush or pressure method: Hot water, light fizz treatment, or a plunger can move soft buildup.
- Open the trap only if needed: If the easy methods fail, the next likely stop is the P-trap.
Most homeowners can handle that sequence with basic tools and patience. The key is not rushing past the step that matches the problem.
Your Pre-Plumbing Checklist and Diagnosis
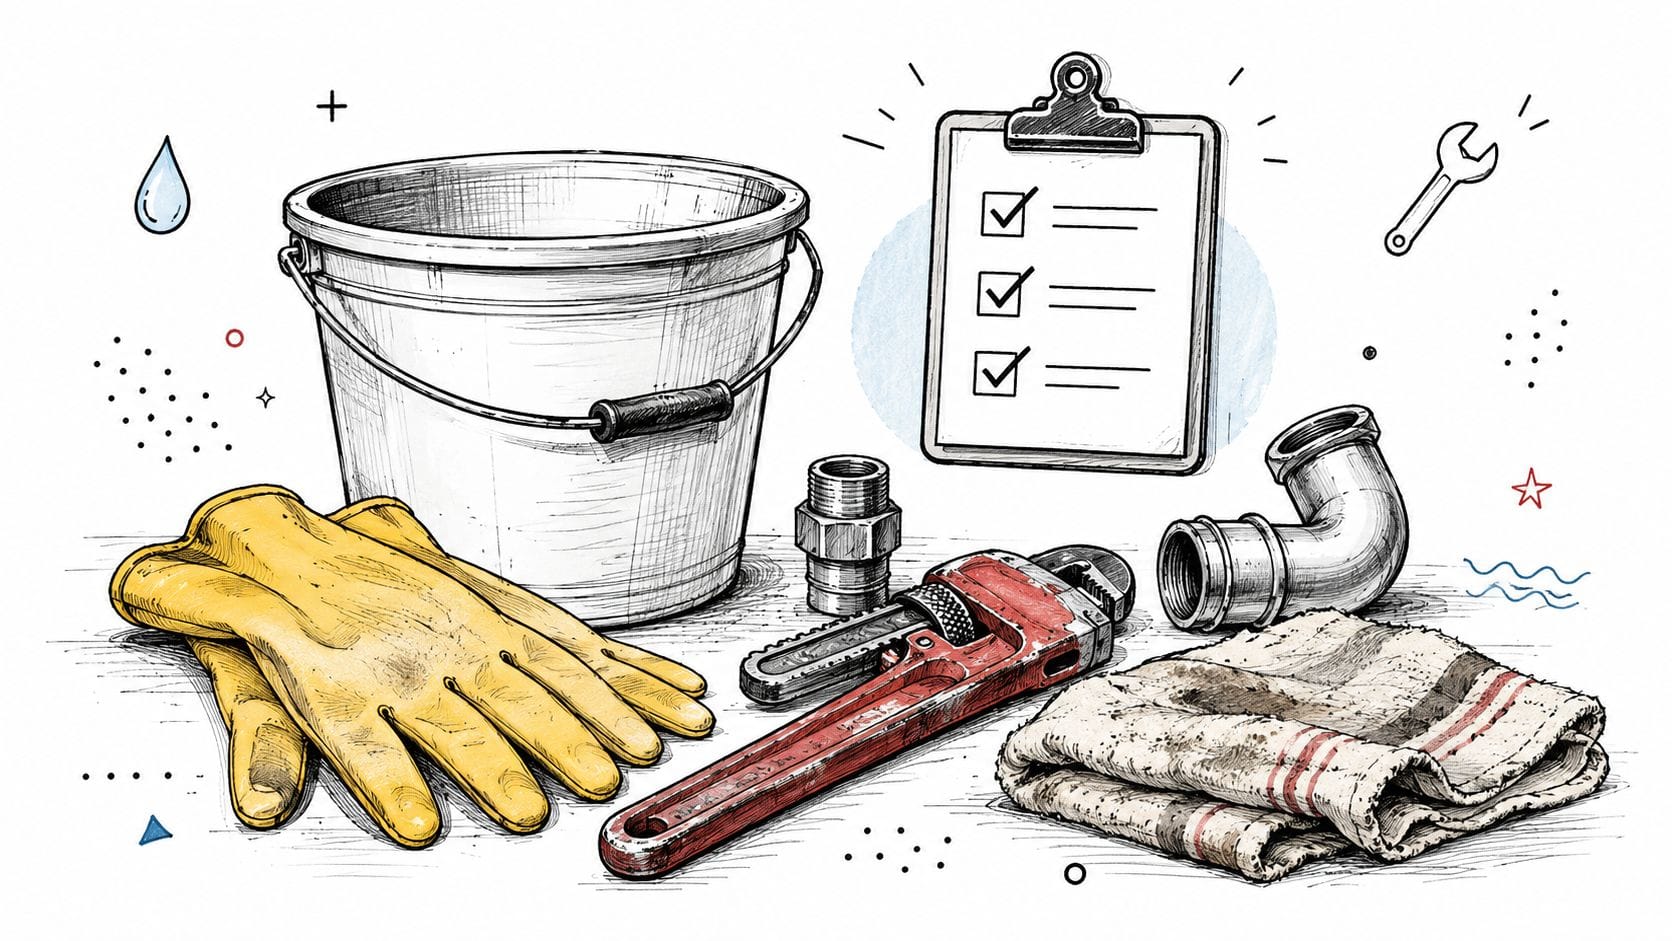
Before you loosen a single nut, set yourself up so the job stays controlled. Sink work isn't usually difficult, but it gets annoying fast when you're missing gloves, there's no bucket under the trap, or dirty water spills into the cabinet.
Start with what kind of sink you're dealing with
Think about where the sink is and how it's been used.
- Kitchen sink: Look for grease, food scraps, coffee residue, or soap buildup.
- Bathroom sink: Expect hair, toothpaste sludge, and soap scum.
- Single-bowl versus double-bowl: A double sink needs one drain sealed when you plunge the other, or you lose pressure.
In British Columbia, the code framework around sink drainage helps explain why the first fixes are usually straightforward. Kitchen sinks in dwellings connect through a trap, and plumbing systems must be designed so fixtures can be serviced without damaging the system. That's why the usual first steps focus on accessible parts like the stopper, plunger action, and trap cleaning, rather than jumping immediately to invasive work, as noted in this kitchen sink drain guidance.
Gather the tools before you touch anything
A good basic kit includes:
- Bucket and old towels: You'll want both under the sink before removing any trap piece.
- Rubber gloves: Not glamorous, but useful when you pull out sludge or food waste.
- Cup plunger for sinks: A sink plunger works by seal and pressure, not brute force.
- Adjustable pliers: Helpful if slip nuts are stuck, though many can be loosened by hand.
- Small brush or old toothbrush: Good for cleaning trap walls and threaded fittings.
- Flashlight: Cabinet interiors hide leaks well.
If you've had the same sink clog return more than once, the issue may be beyond what you can see under the basin. In that case, a look inside the line with drain camera inspection services can answer a more useful question than “how do I clear it today?” It can show whether the problem keeps forming farther down the branch line.
Put the bucket in place before loosening anything. Even a “dry” trap usually holds unpleasant water.
Quick Fixes for Minor Sink Clogs
When the sink is draining slowly or has only just stopped, start with the methods that are fast, low-risk, and easy to reverse. Don't expect every trick to work on every clog. The point is to use each one where it makes sense.
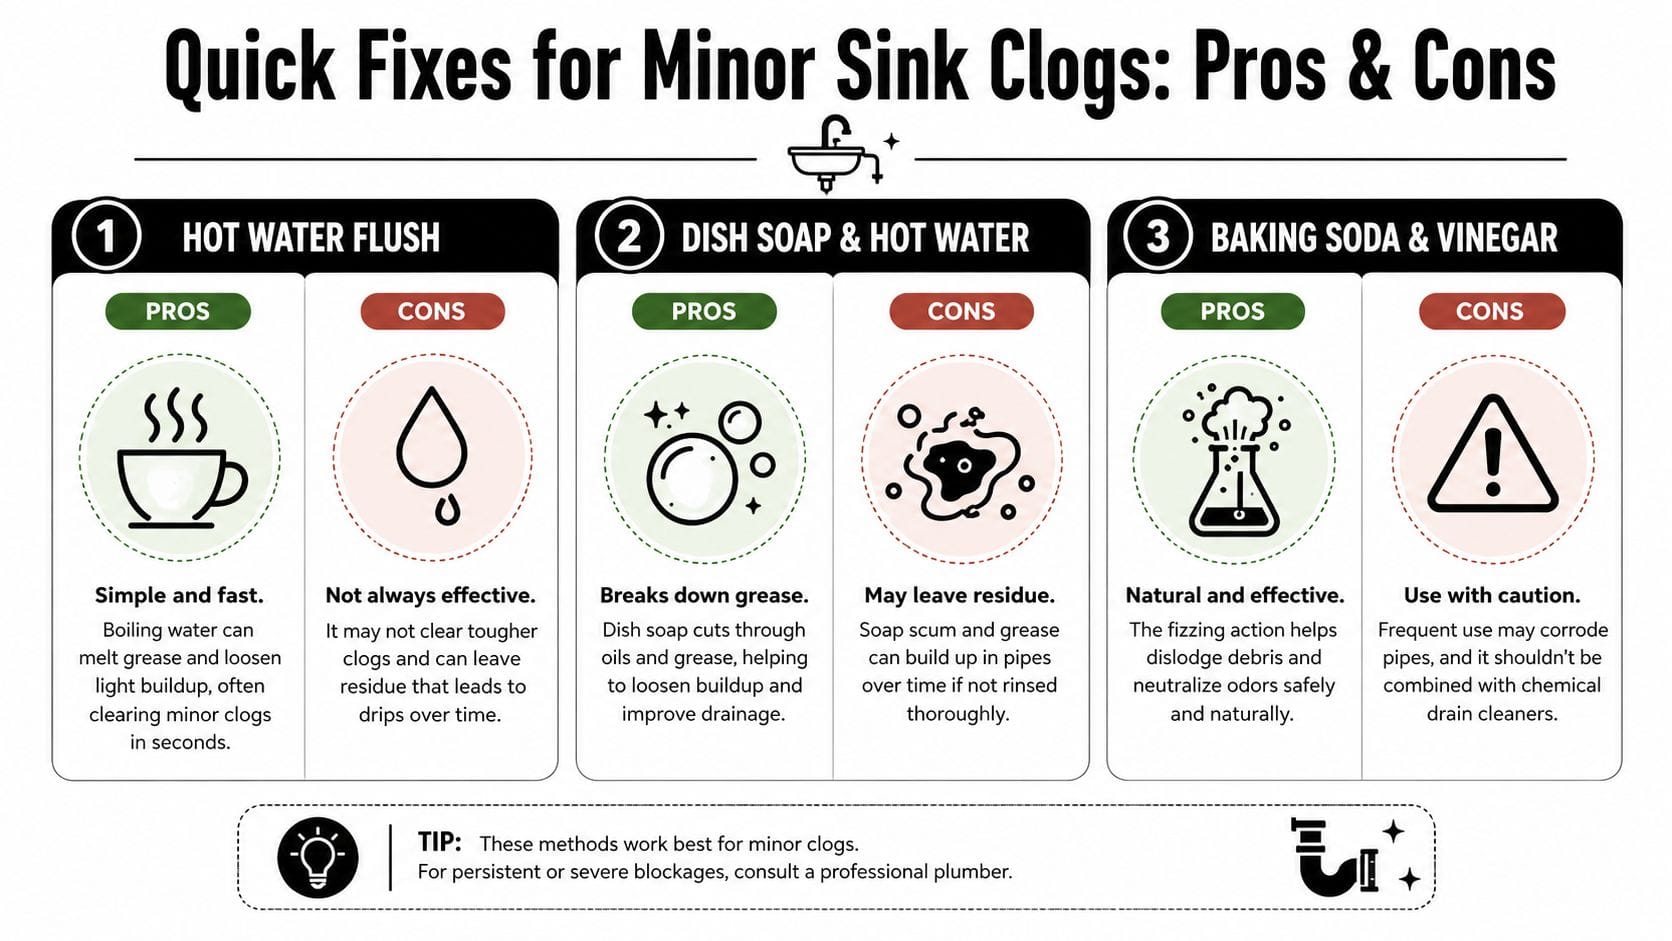
Try the easiest flush first
For a slow-draining kitchen sink, hot water is often a sensible first move. It's most useful when grease and soap residue are starting to congeal near the trap or just downstream. It's less useful when the sink is completely blocked and the water has nowhere to go.
If you add dish soap before hot water, you may loosen greasy residue a bit more effectively than water alone. That said, this is still a light-duty method. It helps soft buildup. It won't usually punch through a hard obstruction.
A practical example from a kitchen callout that many homeowners recognise. The sink still drains, but only after dinner cleanup, and it leaves a greasy ring around the bowl. That's a good candidate for a careful hot-water flush. A bathroom sink packed with hair around the stopper is not.
Use baking soda and vinegar for light buildup
For residential drains in Canada, safety guidance treats chemical drain openers as a last resort because they can create heat and corrosive residue in pipes. Many North American consumer guides instead suggest a staged process that starts with hot water, baking soda and vinegar, plunging, and then a snake or wet/dry vacuum if needed. One published home-maintenance source advises waiting roughly 15 minutes before testing the drain again, while another suggests about an hour for tougher buildup, as described in this consumer drain-clearing guide.
That timing matters. This method isn't instant. It's better treated as a gentle maintenance flush or a way to loosen soft residue before you move to a plunger.
Use it when the sink is sluggish, not when the basin is packed with standing water and nothing is moving.
Plunge it the right way
When clearing clogs, technique often outweighs brute effort. For a mechanical sink clog, strong plunging works because pressure changes can dislodge soft blockages in the trap or branch line. Authoritative DIY guidance recommends removing standing water as needed, sealing the other side in a double sink, keeping about 3 to 4 inches of water above the drain, and plunging vigorously for 20 to 30 seconds before repeating if necessary, according to this sink plunging reference.
If you've got a double kitchen sink, seal the second drain with a stopper or a wet cloth. If you don't, pressure escapes there instead of driving into the clog.
Here's a useful comparison:
| Method | Best use | Not ideal for |
|---|---|---|
| Hot water | Slow kitchen drains with grease residue | Fully blocked sinks |
| Baking soda and vinegar | Light organic buildup and maintenance | Dense clogs |
| Plunger | Soft mechanical clogs near the trap or branch line | Structural drain issues |
If minor clogs keep showing up in the same sink, prevention matters as much as clearing them. This guide on how to prevent frequent drain clogs in your home is worth a look after you get the water moving again.
How to Clean the P-Trap for Stubborn Blockages
If the plunger didn't solve it, the next likely spot is the P-trap, the U-shaped bend under the sink. This part is meant to hold water and block sewer gases from coming back into the room, but it also catches debris. That's why it's often the first place to inspect when a sink won't drain.

What the P-trap usually catches
Bathroom traps often hold a rope-like mix of hair and soap. Kitchen traps are more likely to contain greasy sludge, bits of food, and residue that narrows the opening until water can barely pass.
That's why cleaning the trap manually is often more effective than pouring more products into the drain. You're not hoping the clog dissolves. You're removing it.
A trap cleaning is ugly in a very satisfying way. When the blockage is there, you usually know it as soon as the trap comes off.
Before you start, lay towels in the cabinet and put a bucket directly underneath the trap.
Later in the process, it helps to see the layout before reassembly.
Remove, clean, and reinstall without making a mess
Follow this order:
- Loosen the slip nuts carefully: Most traps have one nut at each end. Turn slowly and support the trap with your other hand.
- Lower the trap into the bucket: Dirty water and debris usually come out right away.
- Empty and inspect the contents: If you find a dense wad of food, grease, or hair, you've likely found the main restriction.
- Clean the inside thoroughly: Use a bottle brush, old toothbrush, or gloved hand.
- Check the washers and gaskets: Make sure they stay in place and aren't twisted during reassembly.
- Reattach by hand first: Hand-tight is the right starting point. Over-tightening can distort fittings or make the next leak worse.
- Run water and watch closely: Check each connection while the sink drains.
A practical example. Say your bathroom sink has been slow for weeks, and plunging only gave temporary relief. You remove the trap and find a thick clump of hair wrapped around toothpaste residue. Once that's out and the trap is rinsed clean, the sink often drains normally again without any further work.
If the trap is clean and the sink still backs up, the blockage is probably farther into the wall line. That's when a hand auger becomes the right tool.
Using a Drain Snake for Deeper Clogs
Once the trap is clean and the sink still won't drain, you're no longer dealing with a simple trap blockage. The obstruction is likely farther down the branch line, where your hand can't reach and a plunger may not generate enough force to help.
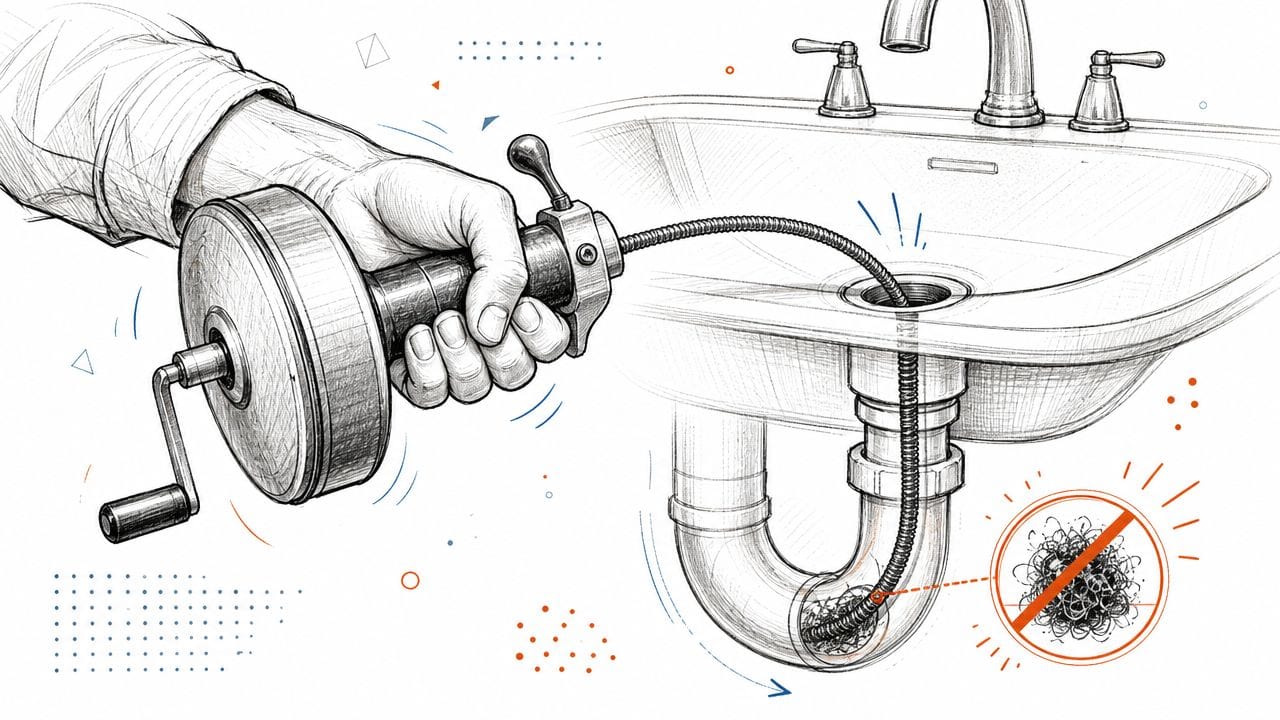
A hand auger, often called a drain snake, is built for this exact situation. Feed the cable into the drain opening or wall stub after removing the trap. Advance it slowly. If you rush and jam it forward, you can compact soft debris instead of pulling it out.
How to tell a clog from a bend
This is the part that feels unfamiliar the first time.
A pipe bend usually feels firm and expected. The cable stops, then moves again as you rotate and guide it through. A clog often feels softer, springier, or grabby. You may feel resistance, then a slight give as the head starts to bite into the blockage.
Use a slow rhythm:
- Feed a little cable
- Rotate gently
- Pull back slightly if it binds
- Advance again
If you bring the cable back and it's carrying sludge, hair, or food residue, you were in the clog. Clean the cable, then repeat until the line feels clearer.
A practical example with a bathroom sink
A common bathroom situation goes like this. You clean the stopper and remove the trap, but the sink still drains poorly. You feed the snake into the wall line and feel resistance after a short distance. After a few turns, the cable comes back with hair and soap paste on the tip. Run water, and the basin finally empties without rising.
Don't force the snake. If you're fighting the tool, you may be hitting a fitting or pushing the blockage tighter.
After snaking, run water steadily and watch how the sink responds. If flow improves but still feels weak, there may be more debris farther in, or the line may have a venting or design issue instead of a simple clog.
When a Clogged Sink Is a Sign to Call a Professional
Some sinks don't just clog. They keep clogging. That's the point where the question changes from “how do I fix a clogged sink?” to “what's causing this sink to fail over and over?”
Signs the problem isn't at the sink anymore
A recurring slow drain can point to more than routine buildup. Public DIY advice often skips the deeper causes, but recurring clogs can be linked to poor venting, improper trap geometry, or a blockage farther into the branch line, as noted in this discussion of recurring kitchen sink drain problems.
Watch for these red flags:
- The clog returns soon after clearing: That often means you treated the symptom, not the cause.
- The sink gurgles when it drains: Air movement problems can point to venting trouble.
- Water shows up in another fixture: That suggests the issue may be shared farther down the system.
- There's a sewer odour that doesn't go away: That deserves a proper inspection, not another bottle of drain cleaner.
Why recurring clogs deserve a proper diagnosis
If you're in Vancouver, Richmond, or nearby communities, professional diagnosis is particularly sensible. A plumber can determine whether the problem is trapped debris farther inside the branch line, a venting issue, or a drain layout problem that keeps encouraging backups. For those situations, top signs you need professional drain cleaning services can help you judge when DIY has reached its limit.
Encano Plumbing & Drainage Ltd. handles clogged and slow drains as one available service option when the sink problem turns out to be deeper than a simple basin blockage.
If the sink still won't drain, or it keeps backing up after you've cleaned the trap and tried a snake, it's time for a proper diagnosis. Encano Plumbing & Drainage Ltd. helps homeowners across Greater Vancouver identify the root cause of recurring sink clogs and clear the line safely without guessing.