A running toilet in British Columbia can waste 20–40 litres of water every hour, or 175,200–350,400 litres in a year, according to the Capital Regional District's toilet leak guidance. In Greater Vancouver, that isn't harmless background noise. It's a continuous leak that can raise utility costs, complicate strata water management, and hide a mechanical failure that will eventually need more than a quick flapper swap.
The good news is that most running toilets can be diagnosed logically. Shut off the supply, confirm the leak with a dye test, then inspect the flapper, chain, float, overflow tube, and fill valve in that order. The important distinction is knowing when you're dealing with a straightforward adjustment and when a repeat-running toilet points to a damaged flush valve, a seized shut-off valve, or another problem best handled by a plumber.
Table of Contents
- The True Cost of a Running Toilet and Quick Temporary Fixes
- Diagnosing the Leak with the Dye Test Method
- Adjusting and Replacing Internal Tank Components
- When to Stop Troubleshooting and Call a Plumber
- Long-Term Water Conservation and Fixture Upgrades
- Frequently Asked Questions About Toilet Repairs
The True Cost of a Running Toilet and Quick Temporary Fixes
A toilet may look functional while it wastes a surprising volume of treated drinking water. Municipal guidance from the Capital Regional District notes that toilets account for 24% of indoor water use, and a single flush can use 4.8–20 litres of drinking water. If the toilet keeps running after flushing, the same guidance estimates annual waste of 175,000–350,000 litres, enough to fill a swimming pool. You can review the CRD's leak-detection activity sheet for the regional context.
That matters in a detached home, but it matters even more in a multi-unit building. A strata manager may see one toilet as a minor maintenance item, while several units with silent leaks create a persistent building-wide water loss. Landlords also need to consider the practical cost of repeated service calls, tenant complaints, and damage if an overfilling tank spills onto flooring.
Stop the water before diagnosing the part
Find the small shut-off valve on the supply line behind or beside the toilet. Turn it clockwise by hand until it stops, but don't force a corroded valve with excessive pressure. Flush once to remove most of the tank water, then place a towel near the base of the toilet before opening the tank.
If the valve closes properly, you've stopped the waste while you gather a screwdriver, adjustable wrench, replacement parts, or professional help. If it won't turn, drips around the stem, or fails to stop the flow, leave it alone rather than breaking the valve and creating a larger leak.
A temporary float adjustment
If water is visibly rising into the overflow tube, lower the float enough to stop the tank from overfilling. A cup-style float usually adjusts with a clip or screw on the fill valve. An older ball float often adjusts at the arm or screw connection.
This may quiet the toilet, but it isn't a complete repair if the flapper is leaking. Treat it as temporary control while you identify the actual failure. A toilet that only stops after you lift the tank lid or jiggle the handle still needs a proper inspection.
Practical rule: Stop the supply first. A quiet bathroom doesn't prove the leak is fixed, and a running fill valve can waste water even when the bowl looks normal.
Diagnosing the Leak with the Dye Test Method
Test the toilet before buying a flapper. A dye test shows whether water is slipping past the flush valve or entering the bowl because the tank level is too high. Add dye or food colouring to the tank, wait 15–20 minutes without flushing, and check the bowl. The Manitoba government's running-toilet test instructions outline this method.
Prepare dye tablets or food colouring, a cloth for spills, and a flashlight if the tank is dark. Remove the lid, confirm the water is still, and add the dye. Do not flush, lift the handle, or add water during the test.

Read the result correctly
After the waiting period, inspect the bowl. Coloured water confirms that water is escaping from the tank through the flapper or its sealing surface. Common causes include hardened rubber, mineral deposits, chain interference, or a worn flush-valve rim.
The Regional District of North Okanagan's water conservation guidance recommends food colouring, a 15-minute wait, and a bowl check. It also identifies the flapper valve as a regular leak source.
A clear bowl changes the diagnosis. If water still flows, check whether the tank water reaches the overflow tube. Water spilling there usually points to a float set too high or a fill valve that is failing to shut off. Replacing the flapper will not correct that problem.
Use the result to choose the repair
A tank that refills briefly every few minutes, combined with dye in the bowl, indicates a slow flapper leak. Shut off the supply before removing parts, then inspect the flapper, chain, and sealing rim. If the bowl stays clear while water enters the overflow tube, focus on float and fill-valve adjustment instead.
The dye test identifies the direction of failure, not every underlying defect. If the valve will not close, the overflow tube is damaged, or a new correctly fitted flapper still leaks, stop replacing parts and arrange a professional inspection.
Adjusting and Replacing Internal Tank Components
Once the dye test points to the tank hardware, inspect one component at a time. Use a flathead or Phillips screwdriver, an adjustable wrench, a sponge or towel, and the replacement flapper or fill valve that matches the existing toilet. Universal parts can work, but the shape, mounting points, and flush-valve opening still need to match.

Start with the chain and flapper
The lift chain should let the flapper settle fully onto the flush-valve opening. If it's too tight, the handle keeps the flapper slightly open. If it's too loose, it can tangle under the flapper or catch on another part inside the tank.
Shut off the water and flush the tank. Check the rubber flapper for stiffness, cracks, distortion, or a sticky surface. Wipe grit and mineral deposits from the flapper and the sealing rim with a cloth or non-abrasive pad. Don't scrape aggressively, because a damaged sealing surface can make a new flapper leak as well.
If the rubber is brittle or warped, replace it. Unhook the old flapper, connect the new one, and adjust the chain so the handle lifts it cleanly while leaving enough slack for the flapper to close. Turn the water back on and repeat the dye test after the tank refills.
Check the overflow tube and float
The overflow tube protects the tank from uncontrolled overfilling by directing excess water into the bowl. Inspect it for cracks, poor alignment, or a water level that rises too high. The float should signal the fill valve to shut off before water reaches the top of the tube.
For a cup-style float, use the adjustment screw or clip to lower the shut-off point. For a ball float, adjust the arm mechanism carefully. Make small changes, refill the tank, and observe the result rather than bending an older metal arm repeatedly.
A float adjustment can stop water entering the overflow tube, but it won't repair a flapper that leaks directly into the bowl.
Clean or replace the fill valve
A fill valve that keeps running after the tank reaches its normal level may have debris inside its seal or a failed internal mechanism. Some valves can be cleaned according to the manufacturer's design, but persistent failure usually calls for replacement of the complete valve assembly.
Before removing it, close the shut-off valve and drain the tank. Disconnect the supply line with the adjustable wrench, remove the retaining nut beneath the tank, install the replacement valve, reconnect the supply, and adjust the water level. Keep the wrench controlled around older plastic fittings, which can crack if overtightened.
Test the handle several times, watch the overflow tube, and perform the dye test again. If the toilet still cycles, stop replacing parts randomly. The next suspect may be the flush-valve seat, overflow assembly, handle mechanics, or the supply valve itself.
When to Stop Troubleshooting and Call a Plumber
A flapper replacement is a reasonable DIY repair when the shut-off valve works, the tank is accessible, and the flush-valve seat is intact. A repeat-running toilet deserves a different response. If a correctly fitted flapper leaks again shortly after installation, the flapper may not be the root cause.
Compare the simple repair with the hidden failure
| What you find | Likely direction | Sensible next move |
|---|---|---|
| Chain holds the flapper open | Handle linkage or chain interference | Adjust the chain and retest |
| Water spills into the overflow tube | Float or fill-valve issue | Lower the float, then inspect the fill valve |
| Dye reaches the bowl with a new flapper | Seat, alignment, or incompatible part | Stop repeated swaps and arrange diagnosis |
| Tank or bowl shows a crack | Porcelain failure | Shut off the water and seek professional advice |
| Shut-off valve is seized or leaking | Supply-control problem | Avoid forcing it and call a plumber |
A corroded or rough flush-valve seat can prevent even a new flapper from sealing. Repairing that surface may require specialised tools, and replacing the flush assembly can involve removing the tank. Older toilets may also have brittle connections that fail when disturbed.
Greater Vancouver property considerations
Multi-unit buildings add another layer of risk. A leaking toilet may be inside a private suite, but the water cost and potential floor damage can affect building operations and neighbouring units. A landlord or property manager should arrange service when a tenant reports recurring running, visible moisture, or a problem that returns after a basic adjustment.
Regional guidance warns that ignored indoor leaks can reach up to 163,000 litres per month and more than $550 in monthly water costs, as outlined in this Canadian indoor leak brochure. Those figures make the decision practical. If the diagnosis remains uncertain, professional service can cost less than continued water loss and repeated unsuccessful repairs.
Don't continue troubleshooting if porcelain is cracked, water is reaching the floor, the toilet backs up or gurgles, or the main shut-off is inaccessible. Those symptoms move the job beyond a routine flapper replacement.
Long-Term Water Conservation and Fixture Upgrades
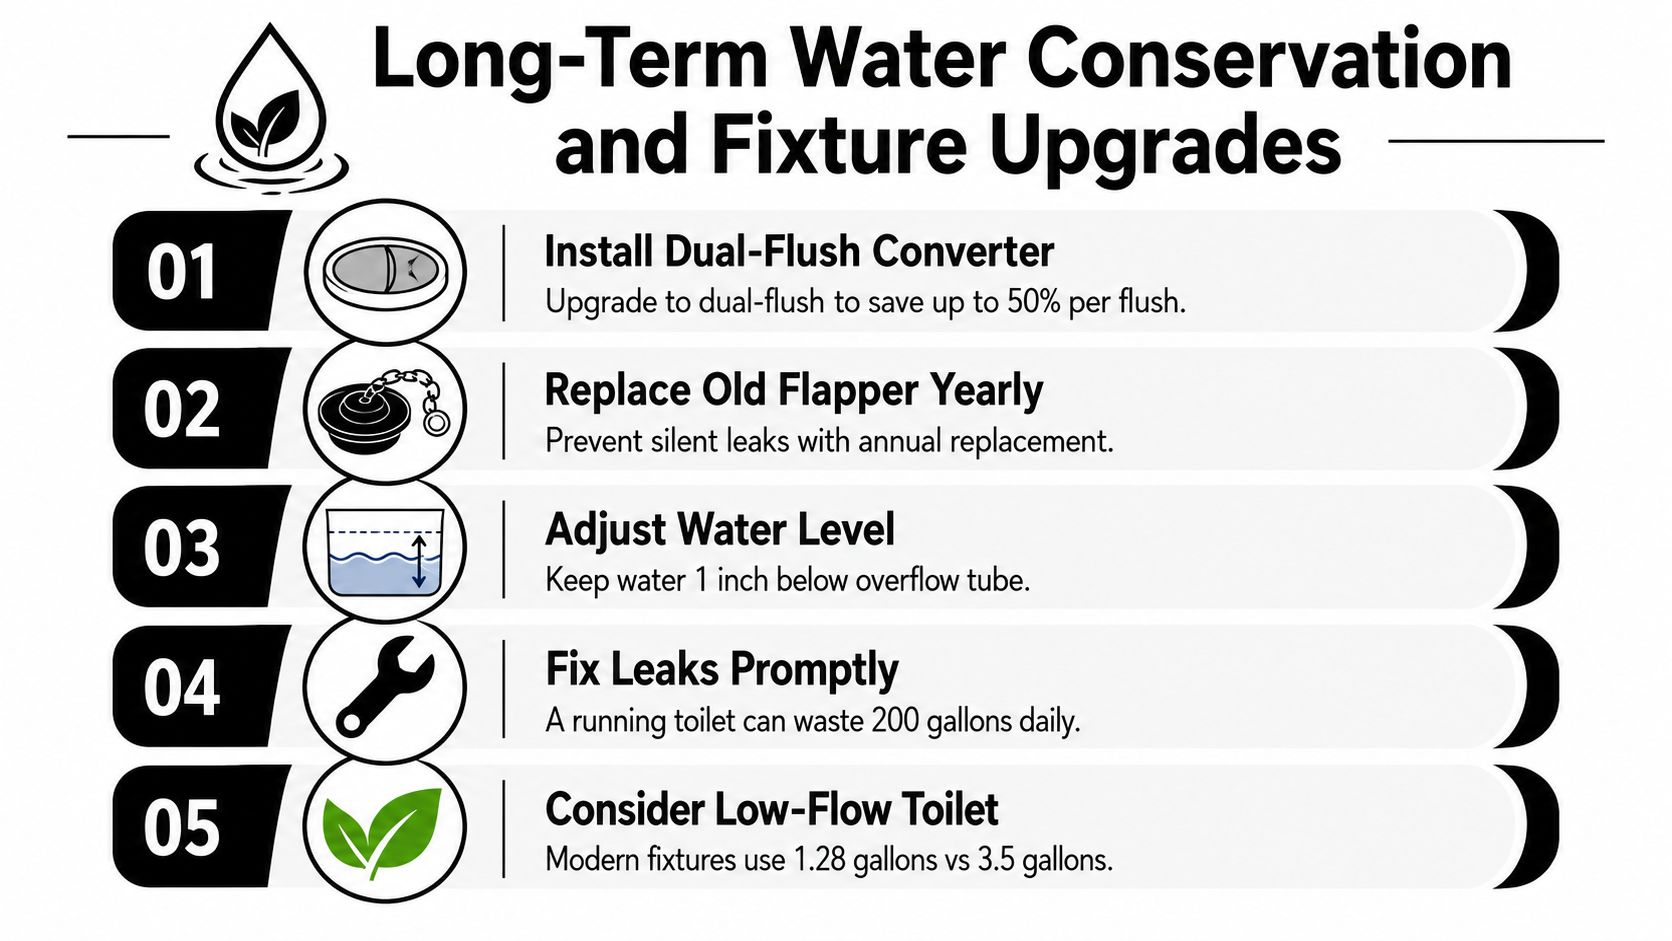
Stopping one leak solves the immediate problem, but it doesn't address an ageing fixture that repeatedly develops faults. In Greater Vancouver homes and strata buildings, the most useful long-term approach combines routine inspection, compatible replacement parts, and fixture upgrades where the toilet is obsolete or difficult to maintain.
A newer low-flow or dual-flush toilet can reduce water use compared with an older high-volume fixture, but the replacement should suit the existing drainage layout and the property's installation requirements. Avoid choosing a toilet based only on the flush button. Bowl shape, rough-in dimensions, access, parts availability, and flush performance all affect whether the upgrade remains practical.
Build maintenance around the parts that fail
For homeowners, an occasional tank inspection can reveal chain interference, mineral buildup, a rising water level, or rubber that has started to harden. For strata managers and landlords, standardising compatible flappers and fill valves across similar units can simplify stock control and reduce delays when repairs arise.
Use the same diagnostic habit every time. Check whether water reaches the bowl, observe the overflow level, and confirm the shut-off valve works before a failure becomes urgent. Avoid in-tank cleaning products that can degrade rubber components, and follow the toilet manufacturer's care recommendations.
For property managers: Record the toilet model and compatible parts after each repair. That small administrative step makes the next service call more predictable.
Water conservation also depends on prompt action. A toilet that runs only occasionally is still signalling that the seal or fill mechanism needs attention. Fixing it while the tank hardware is accessible is usually simpler than waiting until the valve fails completely or water reaches finished flooring.
Frequently Asked Questions About Toilet Repairs
Why does the toilet run briefly, then stop?
A brief refill usually means the tank is slowly losing water. Add dye to the tank without flushing. If colour reaches the bowl, inspect the flapper, chain, and sealing rim first. A clean flapper swap often solves this pattern. If the leak remains, examine the flush valve seat and fill valve rather than replacing parts at random.
Is a chemical leak detector safe?
Use dye tablets or food colouring for the test. The method requires only a small amount in the tank and a waiting period without flushing. Avoid aggressive chemical products, which can damage rubber components and create new leaks.
What should I do if the shut-off valve is seized?
Do not force a seized valve with pliers. It may snap, leak around the stem, or fail to close, leaving the toilet difficult to isolate. If the bowl is overflowing and the local valve will not work, shut off the home's main water supply if it is safe, then arrange urgent plumbing service.
Can I keep using a commercial washroom toilet that runs?
Stop the supply temporarily if the fixture has a working shut-off valve, but do not leave a commercial washroom toilet running unattended. Public use can worsen wear at the handle, chain, flapper, or fill valve, and a concealed leak may continue after staff leave. Facilities teams should record the fixture and arrange repair instead of repeatedly adjusting the handle.
When should a landlord or strata manager book service?
Book service when the problem returns after a flapper replacement, water appears around the base, the tank or bowl is cracked, or the shut-off valve will not operate. Repeated failure indicates that the complete mechanism needs inspection, not another quick parts change.
For a Vancouver homeowner, a toilet that runs after every flush, stops when the handle is lifted, and shows dye in the bowl points strongly to the flapper or chain. A toilet that keeps filling while the bowl remains clear, with the tank level rising, points to the float or fill valve. If neither pattern fits, stop troubleshooting and have the assembly assessed. Small leaks can add to Greater Vancouver water costs and may signal a failure beyond the visible tank parts.
Encano Plumbing & Drainage Ltd. offers toilet repair and installation, including diagnosis of faulty flappers, fill valves, and flush mechanisms, along with emergency service for overflowing toilets. Visit Encano Plumbing & Drainage Ltd. to book help for a stubborn running toilet in Vancouver, Richmond, Burnaby, or nearby communities.