
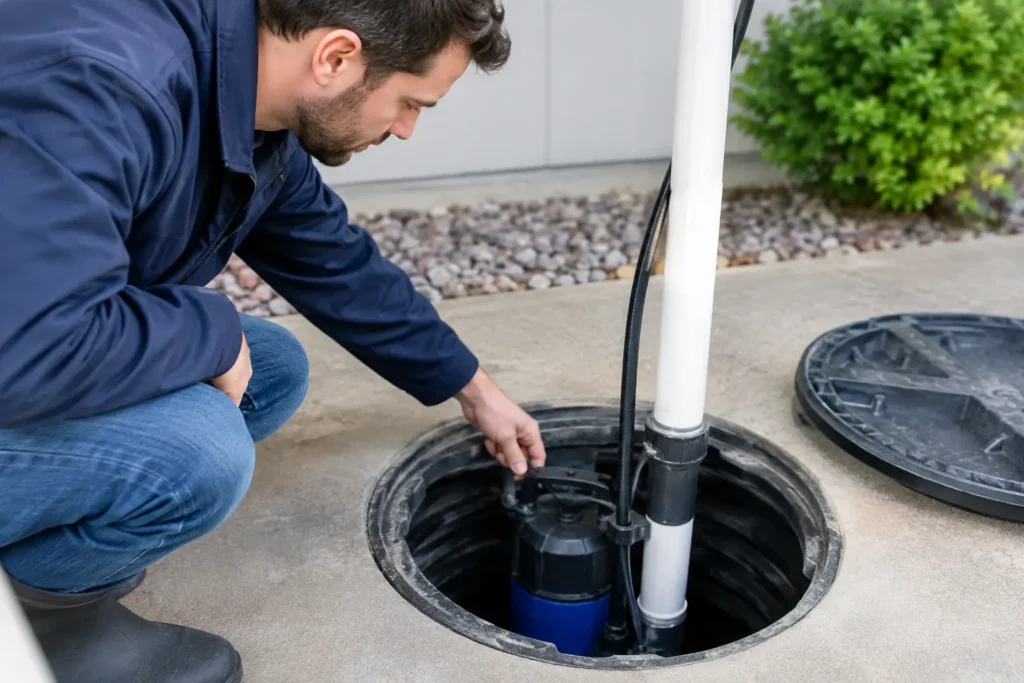
A sump pump can sit quietly for months, then become the one piece of equipment standing between your property and a flooded basement. The time to test sump pump equipment is before a major storm, not when water is already rising around the foundation. A quick check can reveal a stuck float, blocked discharge line, failed check valve, or electrical problem while there is still time to fix it.
For homeowners, landlords, and property managers in areas that see heavy seasonal rain, routine sump pump testing is practical flood prevention. It takes only a few minutes for a basic test, but a thorough inspection can help protect finished basements, stored belongings, electrical equipment, and building materials from expensive water damage.
Why You Should Test a Sump Pump Regularly
Your sump pump removes groundwater that collects in a pit, also called a sump basin, below the floor level of your basement or crawl space. As water reaches a certain level, a float switch tells the pump to turn on. The pump sends water through a discharge pipe and away from the building.
That system sounds simple, but several parts have to work at the same time. The pump needs power. The float must move freely. The impeller must be clear. The discharge line must carry water outside without freezing, clogging, or sending water back toward the foundation.
A pump may appear fine from the outside while a hidden issue prevents it from doing its job. Testing it every three to four months is a sensible routine, with an extra check before periods of heavy rain or snowmelt. If your property has a history of water intrusion, a finished basement, or a pump that handles frequent groundwater, monthly visual checks are worth the effort.
How to Test a Sump Pump Safely
Before touching the unit, look at the surrounding area. The sump pit should be accessible, reasonably clean, and free of loose items that could fall inside. If you see standing water near outlets, damaged cords, exposed wiring, or a burning smell, do not proceed. Keep clear of the area and arrange for professional service.
Start With a Quick Visual Inspection
Remove the sump pit cover if it can be lifted safely. Look for mud, gravel, leaves, or debris inside the basin. Small amounts of sediment are common, but a heavy buildup can interfere with the float or clog the pump intake.
Check that the pump is sitting upright and stable at the bottom of the pit. A pump that has shifted or tipped can operate poorly and may leave water behind. Examine the power cord for cracks, wear, or loose connections. The pump should be plugged directly into a properly grounded outlet, not a power bar or extension cord.
If your system includes a check valve on the discharge pipe, inspect it for leaks or obvious damage. This valve prevents water from flowing back into the sump pit after the pump shuts off. A failed valve can make the pump run more often than it should, causing unnecessary wear.
Test the Float With Water
The most reliable way to test a sump pump is to slowly pour water into the pit. Use a bucket or a hose and add enough water to raise the float switch. Avoid dumping water in too quickly, especially if the pit is small, because you want to observe how the system responds.
As the water level rises, the pump should activate automatically. You should hear the motor start and see the water level drop steadily. The pump should stop once the water reaches its normal low level.
Watch the full cycle. A healthy pump turns on without hesitation, removes water efficiently, and shuts off without repeated starting and stopping. If the pump hums but does not move water, shut it off. The impeller could be jammed, the discharge line could be blocked, or the motor may be failing.
Do not run the pump dry for extended periods. Most residential sump pumps are cooled by the water around them, and running without water can shorten the motor’s life.
Confirm Water Is Leaving the Property
A pump can run perfectly inside the pit while the discharge pipe creates a problem outside. After adding water, check the outdoor discharge point if it is safe and accessible. You should see water flowing away from the building.
The discharge should carry water far enough from the foundation that it cannot drain back toward the house. If water pools near the exterior wall, the discharge extension may need to be adjusted. A buried or concealed line may be blocked by sediment, roots, ice, or damage, particularly after freezing temperatures.
In colder climates, discharge lines require extra attention. Frozen water in an exterior pipe can stop the system even when the pump itself is operating normally. If the pump is running but the water level is not going down, turn it off and arrange for service rather than forcing it to continue.
Check the Power Source and Backup System
Storms often cause the exact condition a sump pump does not want: a power outage during heavy rain. Start by checking that the outlet is working. If the pump is plugged into a ground-fault circuit interrupter outlet, confirm it has not tripped. Press the test and reset buttons only if the outlet and surrounding area are dry and safe.
If your pump has a battery backup, test it according to the manufacturer’s instructions. Many backup systems have a test button, alarm, and battery-status indicator. A backup battery may need replacement every few years, depending on the model, temperature, and maintenance history. Do not assume a backup system is ready simply because it is installed.
Some properties benefit from a high-water alarm. This device alerts you when the water level rises above the normal pump activation point. It cannot remove water, but it can give you valuable time to respond when the primary pump fails or cannot keep up.
Warning Signs Your Sump Pump Needs Service
A sump pump does not have to be completely dead to put your property at risk. Pay attention to changes in how it operates. Frequent cycling, loud rattling, grinding noises, strong vibration, or a cycle that runs much longer than usual can point to a developing problem.
You should also schedule an inspection if the pump does not start when water is added, starts only after tapping or moving the float, or leaves an unusually high water level in the pit. A sour odor from the basin, visible rust, recurring tripped breakers, or water around the sump pit also deserve attention.
Age matters as well. Many standard sump pumps last about seven to 10 years, though service life depends on how often the pump runs, water conditions, installation quality, and maintenance. A rarely used pump can still fail from corrosion or a seized switch. If you do not know the age of the unit, treat a professional inspection as affordable insurance against a basement flood.
When a DIY Test Is Not Enough
Basic testing is appropriate when the system is dry, accessible, and operating normally. It is not the right time for trial and error if the pump is connected to damaged wiring, the pit is overflowing, the discharge pipe is blocked, or the unit trips the breaker.
Property managers should also consider a professional inspection when maintaining multi-unit buildings, commercial spaces, or properties with multiple sump pumps. These systems may have larger basins, alarm panels, backup pumps, or drainage connections that need a more detailed assessment. A small failure can affect several tenants and lead to significant disruption.
A licensed plumber can inspect the pump, float switch, check valve, drainage route, electrical connection, and backup options. If replacement is needed, the right pump size matters. An oversized unit can short-cycle, while an undersized pump may not keep up during severe weather. Encano Plumbing & Drainage can help Greater Vancouver property owners identify the cause of sump pump trouble and make practical repairs before a storm turns a small issue into water damage.
A working sump pump is easy to overlook because its job happens out of sight. Give it a few minutes of attention before the next stretch of wet weather, and you will have far more confidence when the rain starts.