

Plumber glue is not a household adhesive at all, and ordinary glue will never meet plumbing code. It's solvent cement, the kind that chemically fuses compatible plastic pipe and fitting surfaces so the joint cures into one piece.
That distinction matters the moment you're standing over a wet drain in a Richmond basement or trying to finish a small repair before the temperature drops in a Vancouver garage. In plumbing, the product choice, the timing, and the room conditions all affect whether the joint holds or leaks.
Table of Contents
- What Plumber Glue Actually Is and Why Regular Glue Will Fail
- Comparing PVC CPVC and ABS Solvent Cements
- How Temperature and Humidity Change Your Cure Window
- The Correct Step by Step Application Process
- Why Plumbing Joints Fail and How to Prevent It
- When a DIY Repair Makes Sense and When to Call a Professional Plumber
What Plumber Glue Actually Is and Why Regular Glue Will Fail
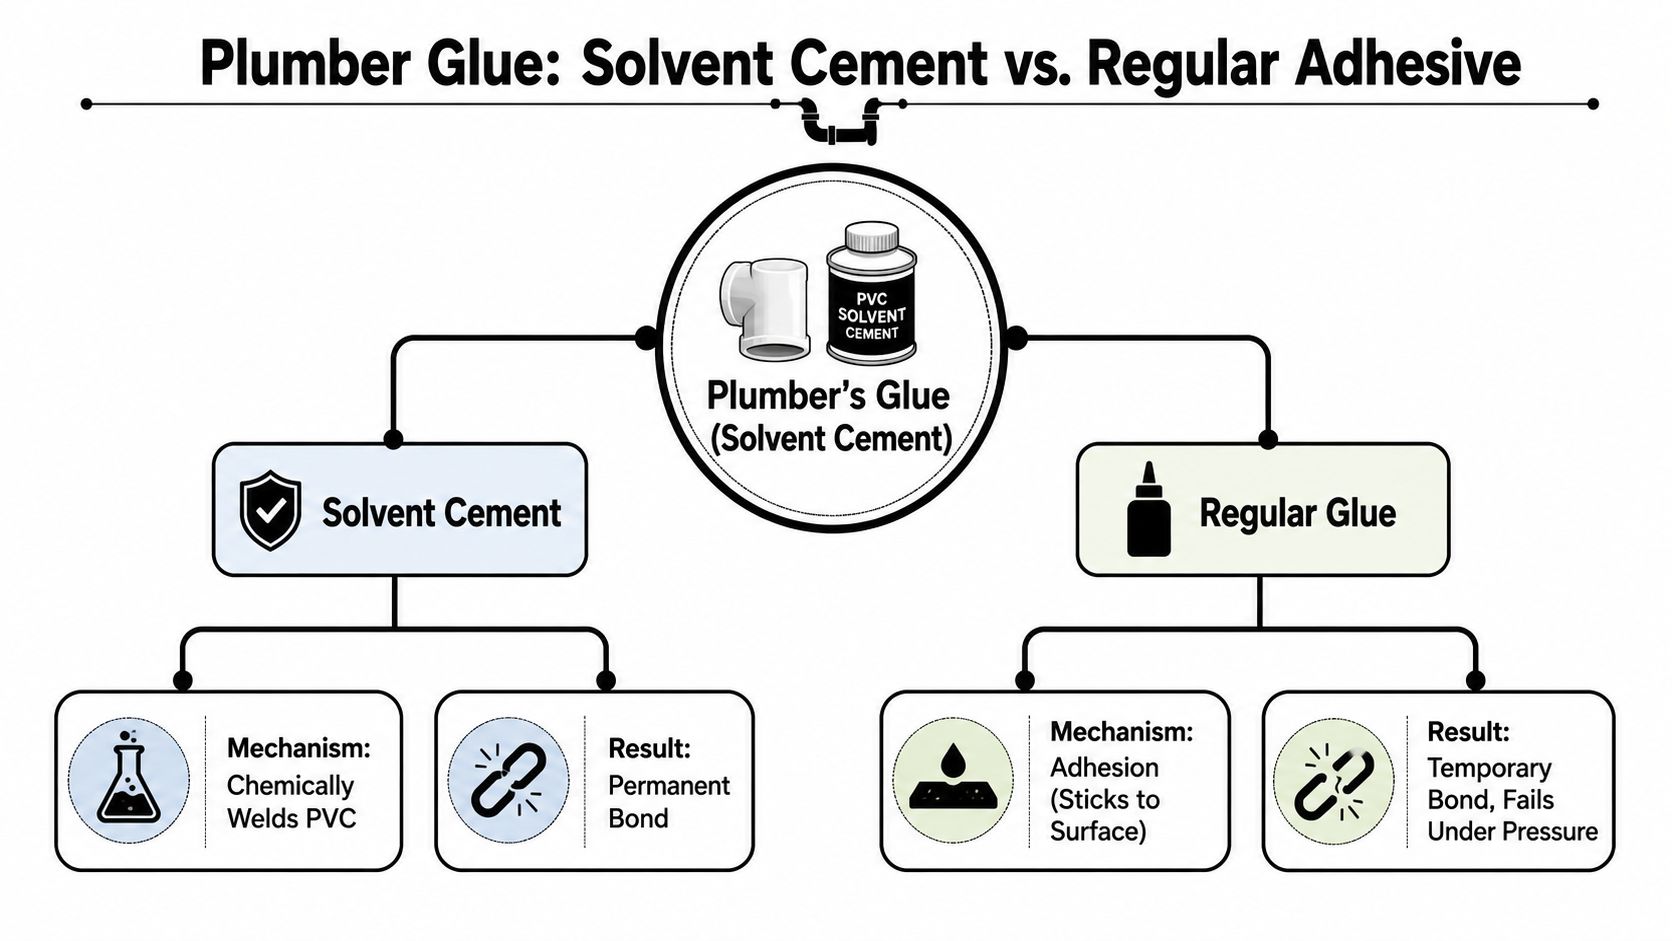
Most bad plumbing repairs start with a simple mistake. Someone reaches for craft glue, superglue, or a generic adhesive and assumes it'll behave like a normal bond. It won't, because plumber glue is really solvent cement, and plumbing joints depend on chemistry, not stickiness.
Solvent welding is the real process
On PVC, CPVC, and ABS, the cement softens the mating surfaces, then the parts are pushed together while the material is still reactive. As the solvent flashes off, the pipe and fitting fuse into a single bonded joint. That's why a correct joint can handle pressure and routine movement, while ordinary glue just sits on the surface and peels, cracks, or lets go.
A useful way to think about it is this, regular glue is like tape on the outside of the pipe, but solvent cement is more like melting the edges together and letting them harden as one piece. That's also why using general-purpose glue is not code-compliant and can fail under pressure in plumbing systems that use PVC, CPVC, or ABS Oatey's explanation of solvent cement versus glue.
Practical rule: if the label doesn't say solvent cement, it doesn't belong on a plumbing joint.
Why the code angle matters
California's plumbing history shows how central this method became as plastic piping went mainstream. Solvent cement made PVC and CPVC practical because it created a fast, code-friendly bond without heat or threading, and plastic piping later became standard for many drainage and water-distribution uses in California and across North America history of CPVC in residential plumbing. The same logic matters here in Greater Vancouver, where inspectors expect proper materials, proper prep, and joints that behave predictably after cure.
For homeowners, the takeaway is simple. Plumber glue is not an adhesive shortcut, it's a joining system with rules. Use the product designed for the pipe material, follow the primer and cure requirements, and don't assume a sticky-looking bead equals a sound joint. That's how leaks get buried behind walls and under sinks.
Comparing PVC CPVC and ABS Solvent Cements
The right can on the shelf depends on the pipe in your hand. PVC, CPVC, and ABS aren't interchangeable, and neither are their cements. A lot of DIY mistakes happen because the fitting looks close enough, but the chemistry and temperature rating are different enough to matter.
Match the cement to the pipe
PVC solvent cement is the common choice for cold-water lines and many drain, waste, and vent runs. CPVC cement is formulated for hotter water applications, which is why it shows up where temperature resistance matters more. ABS cement is for the ABS plastic family, which appears in some drainage setups, but availability and permitted use can vary by jurisdiction and product line.
The historical backdrop helps explain why these materials became so common. CPVC adoption grew to more than 13 billion feet of pipe installed in the United States history of CPVC in residential plumbing. That scale tells you this isn't a niche trick, it's a mainstream joining method built into modern plumbing practice.
Plumbing solvent cement types at a glance
| Cement Type | Compatible Pipe | Best Used For | Temperature Rating |
|---|---|---|---|
| PVC solvent cement | PVC | Cold-water, drain, waste, and vent runs | Product-specific |
| CPVC solvent cement | CPVC | Hot-water lines and higher-temperature service | Product-specific |
| ABS cement | ABS | Certain drain applications and ABS-only systems | Product-specific |
The table is the quick answer, but the fit still matters more than the brand. A PVC cement won't magically make a CPVC hot line better, and a CPVC product won't fix the wrong pipe family. If you're comparing pipe systems for a remodel, it's worth looking at how a separate material like PEX tubing installation changes the way a project is planned, especially when you want fewer solvent-welded joints in tight spaces.
Shop-floor habit: read the pipe marking first, then buy the cement. Don't reverse the order.
For Greater Vancouver homeowners, the practical difference shows up during repairs. Under-sink drain work often points to PVC or ABS, while hot-water distribution points toward CPVC or another approved system. The can must match the pipe, the fitting, and the service conditions, or the joint becomes the weak link.
How Temperature and Humidity Change Your Cure Window
Cold weather changes everything with solvent cement. A joint that feels workable in a warm basement can behave very differently in an unheated garage in January, because temperature controls how fast the solvent flashes off and how fast the joint gains usable strength.
The timing tightens in warmer conditions
For PVC solvent cement, one low-VOC medium-bodied product shows a viscosity floor of 500 cps at 73°F ± 2°F and set times that shift with temperature, 5 to 6 minutes at 30 to 50°F, 3 to 4 minutes at 50 to 70°F, and 1 to 2 minutes at 70 to 90°F technical data sheet. That matters because the installer's working rhythm has to match the room. In a warmer space, the solvent evaporates quickly and mistakes happen fast. In a colder space, the window is longer, but pressure readiness also takes longer.

Humidity and airflow still matter
Greater Vancouver's damp air doesn't change the chemistry of the cement, but it does change the job conditions. Moisture on the pipe, a cold fitting, or poor airflow can slow surface drying and make the early bond less reliable. That's why the same repair can feel easy indoors and fussy outdoors, even when the materials are identical.
A Surrey homeowner sealing a bathroom fixture in winter should keep the room within the product's recommended application range before trusting the joint. One general adhesive sheet lists 50 to 90°F (10 to 32°C) as the usable range and a 24-hour dry time, with maximum strength taking 48 to 72 hours depending on material and temperature product sheet. That kind of range reminds you that solvent-based products are condition-sensitive, not forgiving.
Field rule: if the pipe feels cold to the touch, pause and warm the work area before you rush the joint.
For homeowners in coastal BC, the safest habit is to plan the repair around the room, not just the pipe. Warm the space, dry the surfaces, stage the parts before opening the can, and don't pressurize until the cement has had time to cure under the actual job conditions. Cold damp air doesn't just slow you down, it can turn a rushed repair into a hidden leak.
The Correct Step by Step Application Process
The joint can fail before the pipe ever enters the fitting if the preparation is sloppy. Clean cuts, dry surfaces, and the right primer are often underestimated, as the cement only has a short window to do its job once applied to the pipe.
Prep the joint before you open the can
Cut the pipe square, remove burrs, and dry-fit the pieces first. You want to know the insertion depth and the final alignment before any cement touches the plastic. If primer is required for the system, apply it before cement so the solvent can properly condition the surfaces.
For PVC solvent welding, timing is unforgiving. One guide says primer and cement can leave only about ten seconds to get the pipe together, then the joint should be held for twenty seconds plumbing cement guidance. That's not much time, which is why the parts should already be staged before the first brush stroke.
Assemble fast, then hold steady
Brush on the cement evenly, cover both mating surfaces, and seat the pipe with a short quarter-turn twist if the product directions allow it. Push it fully home right away. A Vancouver DIYer doing a sink-drain repair can't stop to check a phone or wipe the counter halfway through, because waiting too long lets the solvent flash off and weakens the weld.
Do this instead: assemble immediately, then hold the joint firmly so it doesn't creep back out while the plastic is still soft.
After that, patience matters more than force. The same guidance notes that handling may be possible after about fifteen minutes, while pressure readiness is generally at least two hours above 60°F plumbing cement guidance. Full strength can take much longer depending on the pipe, the cement, and the room temperature, so turning the water back on too soon is a common self-inflicted leak.
Use a simple go no-go check
- Check the fit: the pipe should seat fully without forcing.
- Check the surfaces: they should be clean and dry.
- Check the temperature: cold rooms need more cure patience.
- Check the clock: don't pressurize early.
- Check the alignment: a twisted joint that's out of line now is hard to fix later.
A solid solvent-welded joint looks ordinary from the outside. That's the point. The reliability comes from prep, speed, and cure time, not from a thick layer of visible adhesive.
Why Plumbing Joints Fail and How to Prevent It
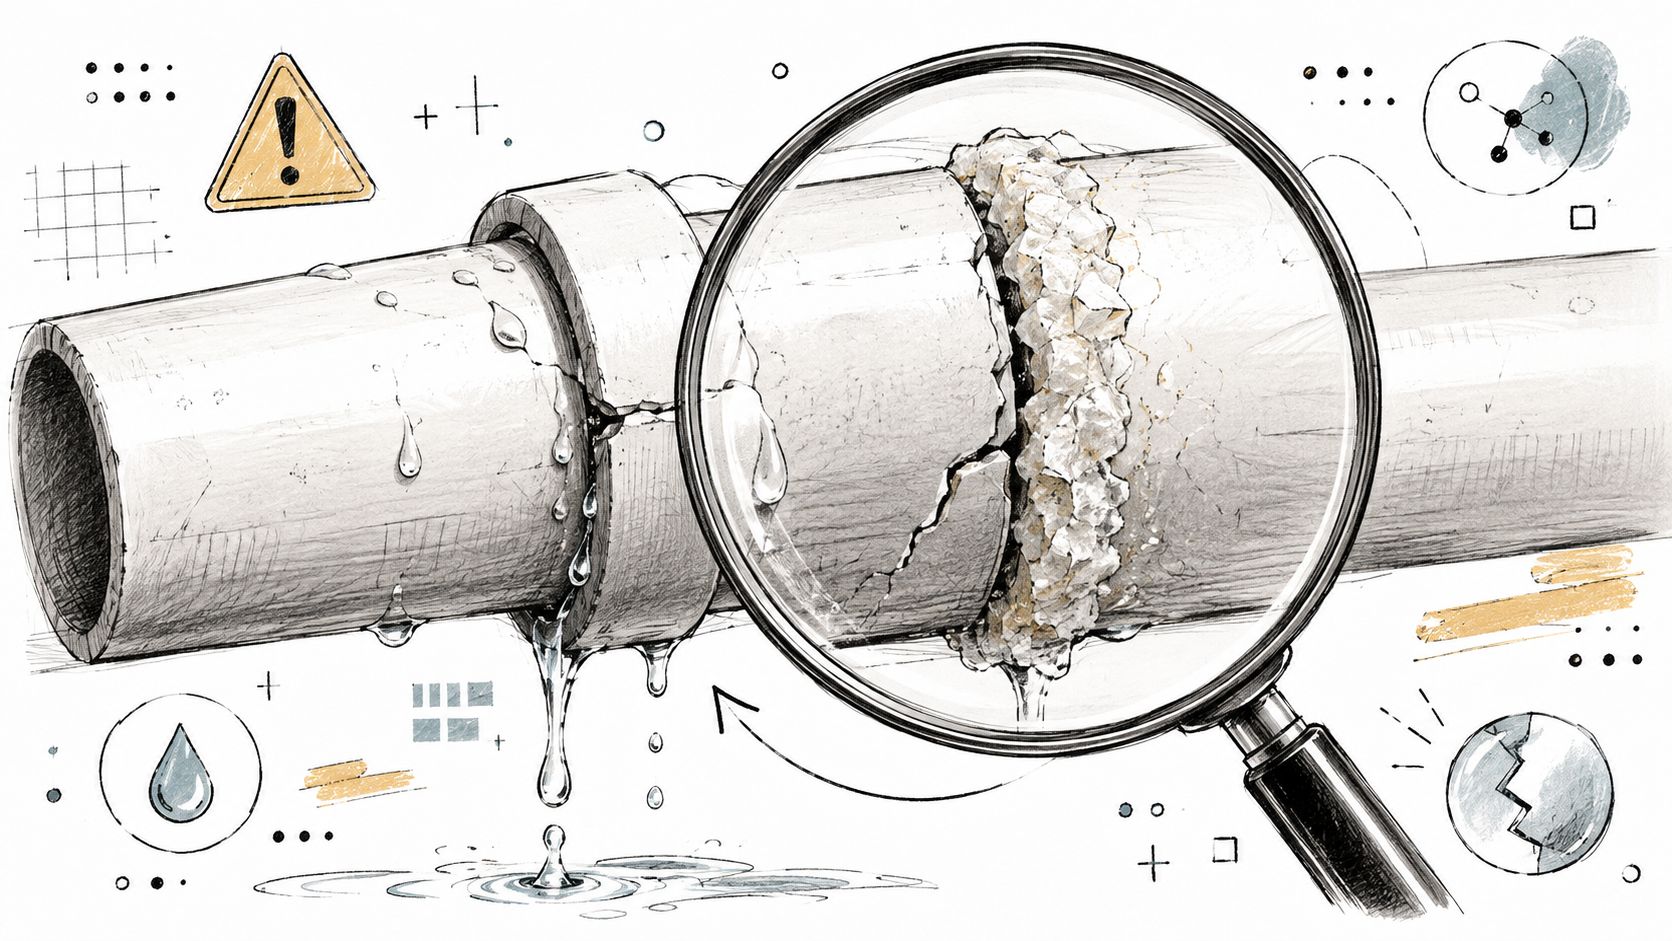
A joint can look fine and still be weak inside. That's the problem with plumbing leaks after a rushed repair, the damage often starts with a chemical or timing error that isn't visible until the system is back under pressure.
The most common failure patterns
Primer gets skipped on many PVC and CPVC systems, and that leaves the solvent with less help doing its job adhesive mistakes that cause plumbing leaks. Another failure comes from pressurizing too early, before the cement has finished curing. A third comes from moving too slowly, because the installer only has a short working window before the solvent flashes off.
The mistake I see most often on cold, rushed jobs in Greater Vancouver is simple, the person wants the water back on too soon. The joint may hold for a while, then seep at the edge or pull apart under vibration and normal use.
Prevent the failure before it starts
Practical rule: if the repair needed primer and you skipped it, don't talk yourself into trusting the joint.
A short preventive checklist keeps the job honest:
- Use primer where required: especially on systems that call for it.
- Respect the fit: a sloppy socket or poor insertion depth is a bad start.
- Keep the surfaces dry: moisture inside the socket can compromise the bond.
- Wait for cure: pressurizing early is how small mistakes become soaked cabinets.
- Control the environment: cold spaces and damp surfaces slow the process.
If you're trying to diagnose a suspicious leak, the issue may be hidden rather than obvious. A good starting point is a careful inspection for residue, staining, and dampness around the joint, and this guide to spotting hidden plumbing leaks in your home can help you separate surface condensation from an actual joint failure.
The key is to stop treating solvent cement like a forgiving household adhesive. It isn't forgiving, and that's why the right prep and patience matter so much. When the chemistry is right and the cure time is respected, the joint usually disappears into the system and does its job effectively.
When a DIY Repair Makes Sense and When to Call a Professional Plumber
Some plumbing fixes are well within reach if you've got the right cement, the right pipe, and the time to let it cure. A small drain-line repair under a sink, a simple vent adjustment, or a straightforward non-pressurized fitting replacement can be manageable for a careful homeowner in a warm, dry space.
Good candidates for DIY
The work is usually reasonable when the pipe is small, accessible, and not carrying pressurised hot water. You also want room to dry-fit the parts, enough light to inspect the sockets, and enough uninterrupted time to let the joint sit before service returns.
Red flags that point to a pro
Pressurised supply lines are a different category. So are repairs inside walls, under slabs, or in places where a leak would cause hidden damage before anyone notices. Any joint that must pass inspection, any transition between different pipe materials, and any job in an unheated space during a Greater Vancouver cold spell is a strong case for professional help.
If you're unsure where the line is, when to call an emergency plumber is the right question to ask before you turn a small leak into a bigger one.
A Richmond homeowner once asked me about a same-day repair on a pressurised supply line in a cold garage. That kind of job often seems simple until the cure window closes and the system gets put back into service too early. Two days later, the weak joint starts showing its mistake.
My rule on site: if the repair can flood a room, fail a building inspection, or leave you guessing about the cure, it's not a casual DIY job.
For code-sensitive, indoor, or pressure-bearing work, the safer call is to bring in a licensed crew that can test, isolate, and verify the repair properly. Encano Plumbing & Drainage Ltd. handles complex plumbing, drainage, and leak issues across Vancouver, Richmond, Burnaby, New Westminster, Delta, Surrey, and nearby communities, with 24/7 emergency response and 10-plus years of experience. If you want the joint repaired right the first time, visit Encano Plumbing & Drainage Ltd. and get the work handled by a team that deals with these failures every day.