
You wake up to water across the basement floor, or you turn on a tap after a water-main interruption and notice the water looks discoloured. In both situations, the visible problem may be only the final symptom. The underlying issue can involve reverse flow, sewage movement, an incorrectly selected valve, or a device that was installed without enough access for inspection.
Check valve installation sounds simple because the valve itself is often compact. The difficult part is choosing the correct device, positioning it in the right section of pipe, keeping it serviceable, and documenting work where backflow protection is part of a building's compliance program. In Greater Vancouver, that means considering the BC Plumbing Code, CSA B64.10, drainage conditions, and the responsibilities of homeowners, landlords, strata councils, and facility managers.
Table of Contents
- What a Check Valve Does and Why It Matters
- Choosing the Right Check Valve for Your Application
- Tools and Materials You Will Need
- Step-by-Step Installation for Common Scenarios
- Navigating BC Plumbing Code and Compliance Requirements
- Testing and Troubleshooting Your Check Valve
- Maintenance, Lifespan, and When to Call a Professional
What a Check Valve Does and Why It Matters
A check valve is a one-way control. It allows water or another fluid to move in the intended direction, then closes when flow tries to reverse. British Columbia's Plumbing Code defines a check valve as “a valve that permits flow in one direction but prevents a return flow,” while a backwater valve is “a check valve designed for use in a gravity drainage system.” Those definitions are set out in the BC Plumbing Code terminology.
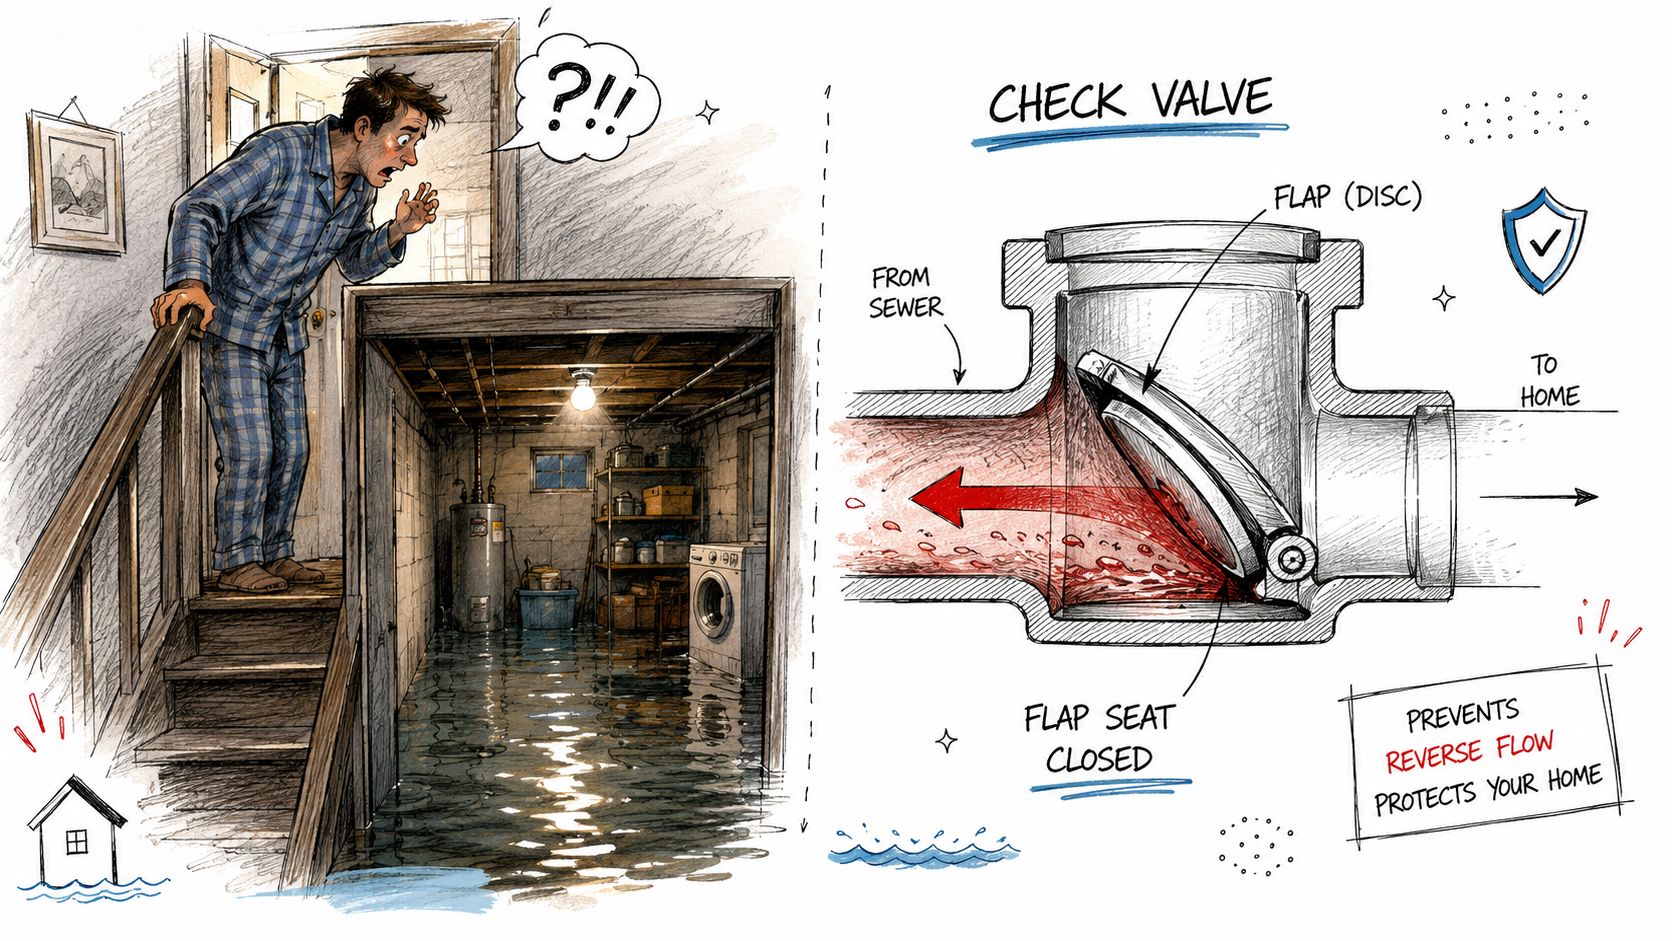
That distinction matters. A standard check valve belongs in a pressurised piping application, such as a pump discharge or a water service arrangement. A backwater valve belongs in a gravity drainage system where sewage could move back toward a lower fixture. Treating them as interchangeable is one of the most common mistakes in DIY plumbing advice.
Backflow and backwater are different problems
Backflow concerns unwanted movement through a potable-water or pressurised piping system. It can draw contaminated water into a clean supply if a cross connection exists. Backwater concerns drainage. It happens when a public sewer or building drain pushes wastewater back toward a basement fixture.
A practical example is a basement laundry drain below adjoining street level. If public-sewer backflow is possible, the fixture drain may need a backwater valve, not a generic inline check valve. The valve must suit the drainage layout, remain serviceable, and be installed without creating a venting or access problem.
Practical rule: Identify whether the hazard is reverse flow in a pressurised pipe or sewage movement in a gravity drain before buying a valve.
A valve can reduce risk, but it isn't a universal flood-proofing device. The pipe arrangement, fixture location, dwelling-unit configuration, and applicable code provisions all affect the correct solution.
Choosing the Right Check Valve for Your Application
Valve selection starts with the system, not the shelf label. A spring-loaded valve that works well in a compact pressurised line may create unwanted resistance in another application. A swing check can suit a larger-flow arrangement, yet its internal disc still needs the correct orientation and enough flow to close reliably.
For residential and light commercial work, the main choices usually include swing check valves, spring-loaded check valves, dual check assemblies, and backwater valves. Their body material, connection type, allowable pressure, installation position, and approval requirements must match the actual piping system.
| Valve Type | Material | Pressure Rating | Common Use |
|---|---|---|---|
| Swing check | Brass, stainless steel, or cast metal, depending on the product | Product-specific, verify the manufacturer's rating | Pump discharge and larger water or mechanical piping |
| Spring-loaded check | Brass, stainless steel, or engineered polymer | Product-specific, selected for the system pressure | Compact pressurised lines and equipment connections |
| Dual check | Approved metal or polymer assembly | Product-specific, with device requirements determined by the application | Service-line and cross-connection protection |
| Backwater valve | Drainage-rated metal or polymer body | Drainage application, not a substitute for a potable-water rating | Basement fixtures and building drains vulnerable to sewer backflow |
Match the device to the hazard
A pump line needs a valve that stops the column of water from dropping back when the pump stops. A boiler or circulation line needs a device compatible with the equipment, flow direction, temperature, and service clearances. A drainage line needs a backwater valve designed for gravity flow, with an access cover that can be opened later.
The Regional District of Nanaimo cross-connection control program states that an approved backflow prevention device must be selected and installed in conformance with CSA B64.10 when a cross connection can't feasibly be eliminated. It also requires a non-testable dual check valve on every RDN water service line, while higher-risk connections need a testable backflow preventer.
Consider a homeowner adding irrigation with fertilizer injection. A standard dual check may not provide the level of protection required for that higher-risk cross connection. The correct assembly must be selected for the hazard and installed where it can be tested and maintained. Buying the cheapest one-way valve doesn't solve the compliance problem.
Tools and Materials You Will Need
A clean installation depends as much on preparation as on the valve. Before shutting down a water service or opening a drainage line, confirm the pipe size, connection style, flow direction, available clearance, and access requirements. Check the valve's markings and installation instructions rather than relying on appearance.
Prepare the basic kit
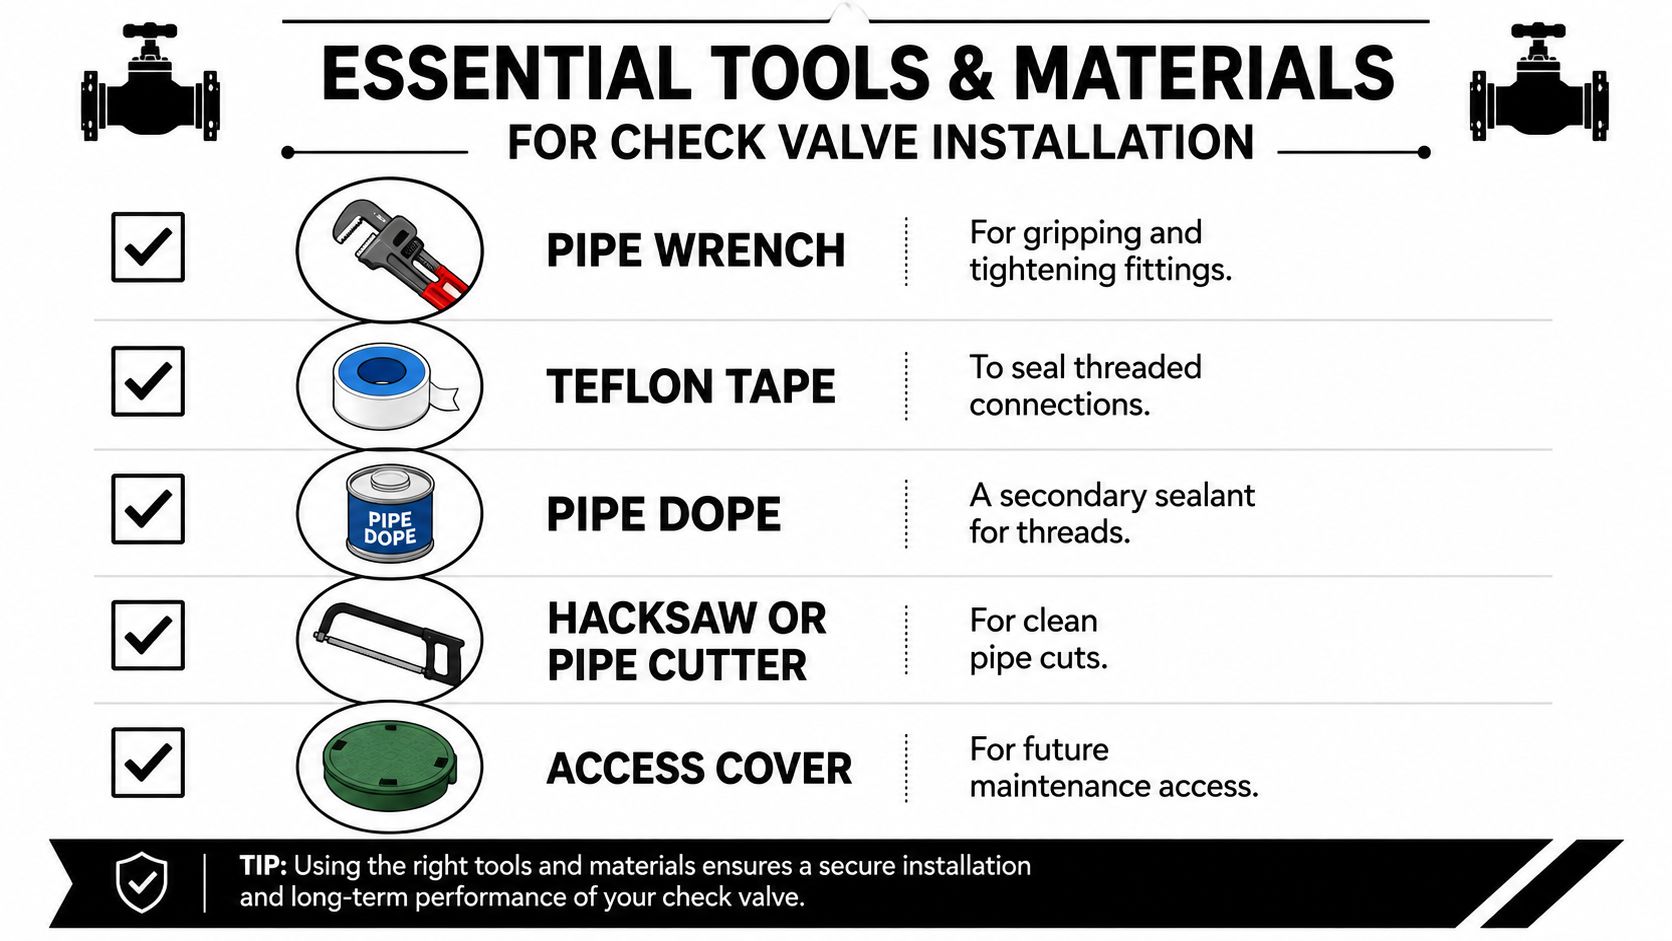
- Pipe wrenches: Use properly sized wrenches to hold the existing fitting and tighten the new connection without twisting the pipe.
- Teflon tape: Apply it to compatible threaded connections in the correct direction, keeping it away from the pipe opening.
- Pipe dope: Use a compatible thread sealant where the fitting or manufacturer permits it. Combining tape and compound isn't automatically suitable for every material.
- Hacksaw or pipe cutter: Make a square cut, then remove burrs so the valve seat and fittings aren't damaged.
- Deburring tool: Clean the inside and outside edge of cut pipe before assembly.
- Adjustable wrench and screwdrivers: These are useful for unions, clamps, access covers, and pump connections.
- Access cover and fasteners: Drainage valves need a cover that remains reachable for inspection and cleaning.
- Replacement gaskets: Bolted, gasketed covers need the correct gasket. Reusing a compressed or damaged gasket often leads to seepage.
- Isolation valves and unions: These make future servicing less disruptive where the system design allows them.
- Relief valve: Pressure-protection arrangements may require a relief valve beside the check valve.
Installation warning: A check valve can stop reverse movement while also restricting expansion in a closed section of pipe. California plumbing guidance for pumped or mechanically circulated systems requires check valves or equivalent devices for flow direction, correct stem positioning, maintenance clearance, and relief protection in relevant water-heater configurations. Review the general-duty valve requirements before copying a detail from another jurisdiction.
A contractor who installs a check valve on a water-heater line but forgets the adjacent relief protection can create excessive pressure buildup. That isn't a minor finishing issue. It changes how the closed section behaves and can put the equipment and occupants at risk.
For related pipe preparation and joining considerations, review this guide to PEX tubing installation.
Step-by-Step Installation for Common Scenarios
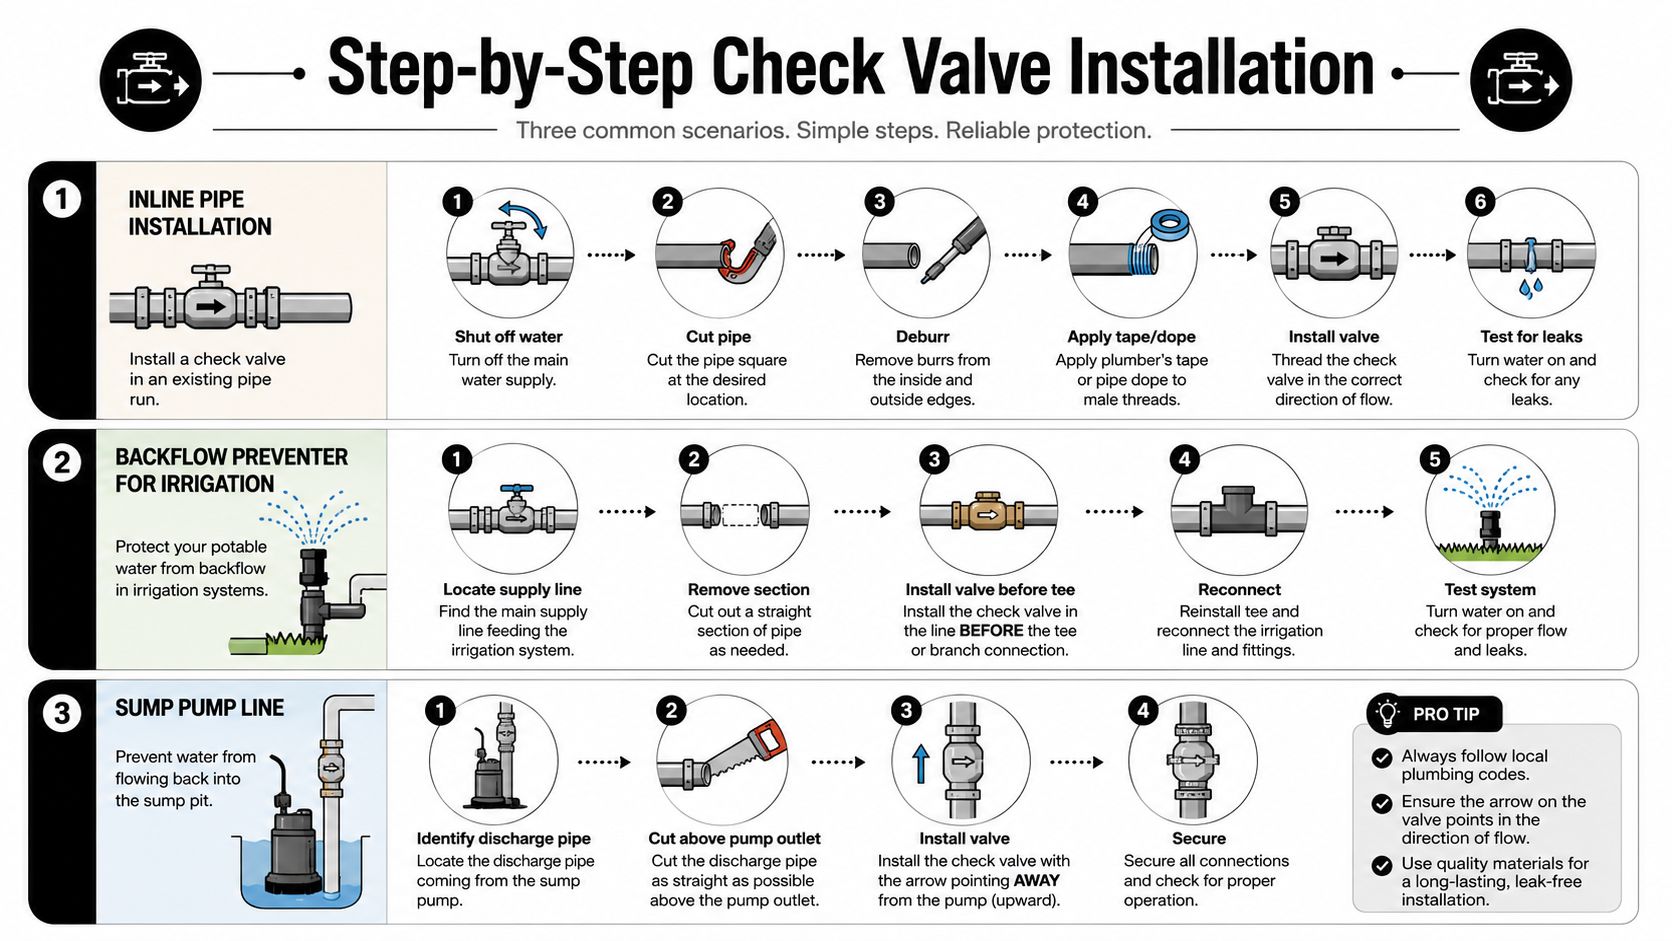
Shut down the supply, relieve pressure, and verify the pipe is empty before cutting. Take a photo of the original arrangement, identify the flow direction with a marker, and check the arrow on the valve body. Don't bury a valve or close it behind a finished wall when the design requires inspection access.
Inline pipe installation
- Isolate the line. Close the upstream shutoff and open a downstream fixture to release trapped pressure.
- Confirm the arrow. The valve arrow must point in the normal direction of flow.
- Cut and deburr. Remove only enough pipe to fit the valve and its connectors. Clean every cut edge.
- Seal the connections. Apply tape or approved pipe compound to compatible threaded joints. Follow the valve manufacturer's instructions for plastic, brass, or steel.
- Install with clearance. Keep the body accessible and orient it as specified. Don't invert a valve that requires an upright or horizontal position.
- Restore pressure slowly. Watch each joint, then operate the system and check for restricted flow or reverse movement.
Irrigation backflow protection
Locate the supply branch before the irrigation tee and determine whether the connection creates a cross-connection hazard. Remove the required pipe section, install the approved backflow assembly in the specified direction, reconnect the line, and leave enough room for testing and service.
A fertilizer-injection system is a practical example where a basic dual check may be inadequate. The device must reflect the hazard, not just the pipe diameter.
Sump pump and boiler lines
For a sump pump, identify the discharge pipe above the pump outlet, cut the line, and install a compatible check valve in the discharge direction. Secure the pipe so the valve's weight and pump vibration don't stress the outlet. For a boiler or circulation loop, verify temperature compatibility, flow direction, service access, and any required relief arrangement before commissioning.
A basement laundry drain below street level is a different job. It may require an automatic backwater valve or a manually operated gate valve where public-sewer backflow is possible. BCAB #1235 confirms that the choice can rest with the owner or contractor when the code condition is met.
Watch the installation walkthrough below for a visual overview, then compare it with the actual valve instructions and local requirements.
Navigating BC Plumbing Code and Compliance Requirements
In British Columbia, check valve installation at the building end of a water service pipe is explicitly required when the pipe is plastic suitable for cold-water use only. The BC Plumbing Code also requires backflow preventers to be selected and installed in conformance with CSA B64.10, the national standard for selecting and installing backflow prevention devices. The requirement applies across the province, including Vancouver, Richmond, Burnaby, New Westminster, Delta, and Surrey, so it is foundational for residential and commercial plumbing work.
The BC Plumbing Code provision for service pipes and backflow preventers treats this as a prescriptive safety requirement, not merely a preferred upgrade. The practical question is whether the installed device matches the pipe material, building configuration, hazard, and applicable approval requirements.
The paperwork is part of the job
Homeowners often focus on the physical valve and overlook the administrative side. Strata councils, landlords, commercial operators, and government facility managers may need to coordinate:
- Scope review: Confirm which device protects which connection and whether the work affects common property or a regulated system.
- Permit and inspection planning: Determine whether a permit, inspection, or authority review applies before work begins.
- Test scheduling: Arrange testing for testable backflow assemblies through a qualified tester where required.
- Record control: Keep installation details, test reports, repairs, and follow-up dates in an organised file.
- Responsibility assignment: Identify whether the owner, building manager, strata council, tenant, or contractor will arrange future testing.
A property manager overseeing a multi-unit building might schedule backflow testing, collect the completed report, record any failed device, and track the repair until a passing result is documented. The valve can be physically sound and the building can still have a compliance gap if nobody can demonstrate that the device was commissioned, tested, or maintained.
Recent Canadian code and utility materials continue to place emphasis on backflow controls and records. The National Plumbing Code of Canada 2025 publication is part of that broader code context. For property managers, the durable solution is a written process, not a reminder scribbled on a maintenance calendar.
For installation decisions involving testable devices, review backflow preventer installation and confirm the local authority's requirements before proceeding.
Testing and Troubleshooting Your Check Valve
Test the completed installation before closing walls, replacing flooring, or returning a mechanical room to service. Start with a visual inspection. Confirm the arrow, look for damaged threads or gaskets, check that the access cover opens, and make sure insulation or nearby equipment won't prevent future maintenance.
Use a simple commissioning sequence
- Open the supply gradually. Listen for hammering, watch the joints, and inspect the valve body.
- Run the downstream fixture or equipment. Confirm that water moves without unusual restriction.
- Stop the flow. A pump should stop without allowing the discharge column to fall back. A drainage valve should close when reverse movement occurs.
- Check pressure where appropriate. A qualified plumber can compare operating pressure and investigate abnormal drops or surges.
- Document the result. Record the valve model, location, orientation, date, and any test or inspection information required for the property.
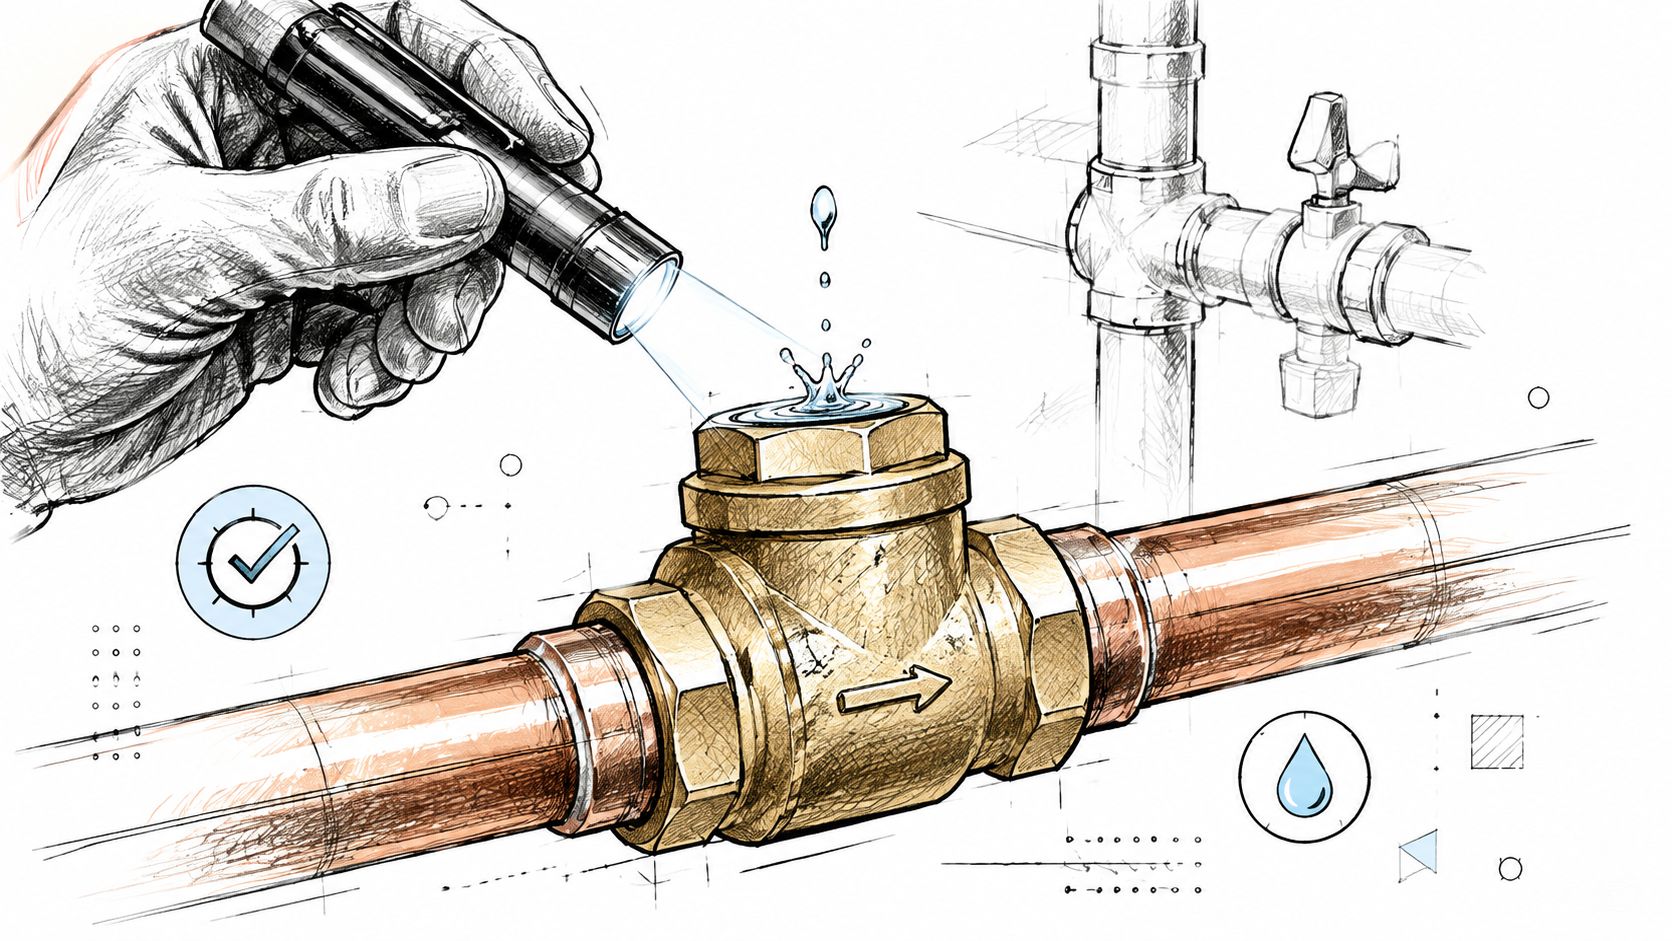
Reverse flow usually points to the wrong orientation, an unsuitable valve, debris on the sealing surface, or a damaged internal part. A swing check that sticks open can allow backflow. A spring-loaded valve that creates excessive resistance may be incorrectly sized or unsuitable for the system.
A homeowner may discover that a swing check valve is stuck because solder, pipe scale, or other debris entered the body during nearby work. Shut down and isolate the line, remove the valve if it has serviceable connections, inspect the disc and seat, clean them without gouging the sealing surfaces, and replace damaged gaskets before retesting. If the valve body can't be safely opened or the line supplies potable water, call a professional rather than forcing the mechanism.
Maintenance, Lifespan, and When to Call a Professional
No check valve lasts forever, and service life depends on water quality, cycling, temperature, installation quality, and the valve's materials. Inspect visible devices for corrosion, staining, seepage, noise, vibration, and restricted flow. Drainage backwater valves deserve particular attention because sediment can prevent the flap from closing.
The backwater valve maintenance guide is useful for planning access and cleaning. Replace a valve when the seat, disc, spring, body, or cover no longer seals reliably, or when repairs can't restore proper operation.
DIY work can be reasonable for an accessible, isolated, low-consequence line where the owner understands the fittings and testing process. Call a licensed plumber for a building water service, a testable backflow preventer, a basement drainage alteration, a concealed valve, or any installation involving permits or uncertain code requirements. A strata manager arranging multi-unit backwater valve work may choose Encano Plumbing & Drainage Ltd. to coordinate the installation, access, testing, and documentation as one project rather than treating each suite as an isolated repair.
Encano Plumbing & Drainage Ltd. provides check valve, backflow preventer, backwater valve, sump pump, and drainage services for homes, strata properties, commercial buildings, and government facilities across Greater Vancouver. Visit Encano Plumbing & Drainage Ltd. to arrange an inspection, confirm the right device for your application, and organise compliant installation and documentation.