
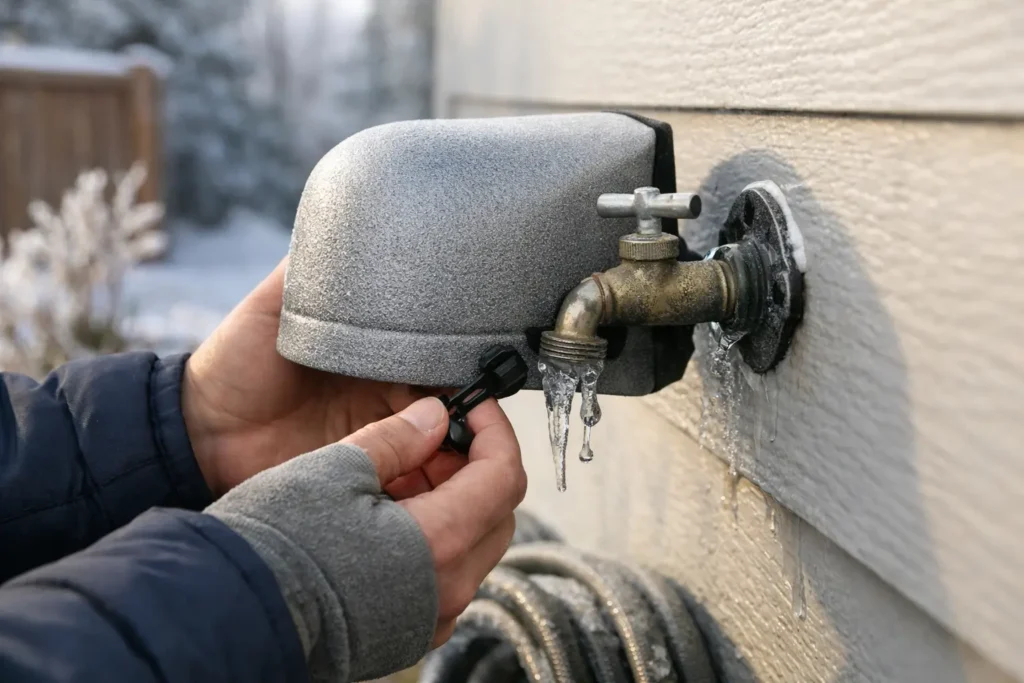
A hard freeze can turn one overlooked outdoor faucet into a burst pipe behind a finished wall. The faucet may be outside, but the water line serving it often runs through a garage, crawl space, basement, or exterior wall where damage can spread before anyone sees it. Knowing how to winterize outdoor faucets is a simple seasonal task that can prevent an expensive plumbing emergency.
For most homes, the job takes less than an hour. The key is not just covering the faucet. You need to remove anything connected to it, shut off the water supply when possible, and drain the line so water has no place to freeze and expand.
Why outdoor faucets freeze and fail
Water expands as it freezes. If water remains trapped inside a hose bib, hose, or short branch pipe, that expansion creates pressure the plumbing was never meant to handle. The faucet can split, but the more serious break may happen farther inside the wall, where you cannot spot it right away.
A broken outdoor faucet line may not leak immediately. It can stay hidden until temperatures rise and the water supply is turned back on. Then water can pour into a wall cavity, crawl space, or utility room. That delayed damage is why winterizing is worth doing before the first sustained freeze, not after cold weather has already arrived.
Homes with frost-free faucets have more protection, but they are not maintenance-free. A frost-free faucet only drains properly when the hose is disconnected and the faucet is allowed to close completely.
What you need before you start
Most homeowners need only a few basic items: pliers if a hose connection is stuck, a small bucket or towel for drips, and insulated faucet covers. If your home has interior shutoff valves for exterior faucets, a flathead screwdriver may also be useful for opening a small drain cap.
Do not force a stuck faucet handle or valve. Older plumbing components can crack when twisted too aggressively. If a valve is seized, leaking, or difficult to identify, it is better to have it checked than risk creating a larger repair.
How to winterize outdoor faucets step by step
1. Disconnect every hose and attachment
Start by removing garden hoses, splitters, spray nozzles, timers, pressure washers, and irrigation attachments from every outdoor faucet. This includes hoses that look empty. A hose can hold enough water to freeze, expand, and damage both the hose and faucet connection.
Drain each hose fully before storing it in a garage, shed, or other protected area. Lift one end and walk the length of the hose to encourage trapped water to run out. Coiling up a water-filled hose and leaving it outdoors is one of the most common causes of winter faucet problems.
2. Turn off the indoor shutoff valve
Look for an interior shutoff valve that controls each exterior faucet. It may be located near the front or back wall of a basement, crawl space, utility room, garage, or under a sink. Some homes have clearly labeled valves, while others have no labels at all.
Turn the valve clockwise until it is fully closed. Do not over-tighten it. A firm stop is enough. If you have multiple outdoor faucets, confirm that each one has been shut off. Front, side, deck, and backyard faucets may be supplied by separate lines.
Not every house has an individual interior shutoff for outdoor faucets. If yours does not, you can still disconnect hoses, drain the faucet, and install a cover. However, adding dedicated shutoffs is a worthwhile plumbing upgrade, especially in areas that receive regular freezing temperatures.
3. Open the outdoor faucet and drain the line
After shutting off the indoor valve, go outside and open the faucet. Water should run briefly, then slow to a drip and stop as the remaining water drains from the pipe. Leave the outdoor faucet open for the winter if the indoor shutoff is closed. This gives any small amount of remaining water room to expand rather than pressurizing a sealed section of pipe.
Some indoor shutoff valves have a small bleeder or drain cap on the side. With a bucket or towel underneath, carefully open this drain after the outdoor faucet is open. A little water may come out. Close the drain cap once the line has emptied.
If water continues running from the outdoor faucet, the indoor shutoff may not be fully closed, may be serving another fixture, or may not be working properly. Do not assume the line is protected. That is a good time to arrange a professional inspection.
4. Add an insulated faucet cover
Once the faucet is drained, place a fitted insulated cover over it and secure it tightly. Covers do not replace draining the line, but they reduce exposure to wind and sudden temperature drops. They are especially helpful for older hose bibs, faucets on north-facing walls, and homes in exposed locations.
Avoid wrapping a faucet with towels, plastic bags, or duct tape alone. These materials can trap moisture, deteriorate outdoors, and provide much less insulation than a purpose-made cover. Check the cover occasionally through the season to make sure it is still secure.
5. Protect connected plumbing and nearby spaces
If your outdoor plumbing runs through an unheated garage, crawl space, or utility area, make sure doors, access panels, and vents are closed appropriately before freezing weather. Insulating exposed pipe can help, but insulation slows heat loss rather than creating heat. It cannot protect a water-filled pipe indefinitely in severe cold.
Keep the indoor temperature consistent, even if you are traveling. Turning the heat down too far is a gamble, particularly in homes with plumbing along exterior walls. For vacant rentals and commercial properties, regular cold-weather checks are a smart part of property maintenance.
Frost-free faucets still need attention
A frost-free faucet has a long stem that places the shutoff point farther inside the heated part of the home. When the handle is turned off, water should drain out through the spout. That design reduces freezing risk, but a connected hose, timer, or nozzle can trap water inside the faucet and stop it from draining.
For that reason, always remove hoses from frost-free faucets before winter. If the faucet drips after it is shut off, or water continues to flow from the spout when the interior shutoff is closed, have it repaired. A worn washer, failed stem, or incorrect installation can defeat the protection the faucet was designed to provide.
Common mistakes that lead to frozen pipes
The biggest mistake is leaving a hose connected. Even a short leader hose can hold water against the faucet. Another common issue is shutting off the indoor valve but forgetting to open the outdoor faucet and drain the line afterward.
Homeowners also sometimes use a faucet cover as the only winterization step. Covers are useful, but they cannot reliably protect a pressurized line during a prolonged freeze. Finally, do not overlook faucets in less-used areas, such as side yards, balconies, garages, detached buildings, or shared outdoor spaces.
If you live in an apartment or condo, do not try to access building plumbing valves without permission. Disconnect your hose or balcony attachments, report a dripping exterior faucet to the property manager, and ask who is responsible for winter shutoffs. Landlords and property managers should document which valves serve exterior fixtures before cold weather arrives.
When to call a plumber
Call for help if an outdoor faucet is leaking from the wall, the shutoff valve will not close, the faucet handle is frozen or broken, or you suspect a line has already frozen. Warning signs include reduced water pressure, damp drywall near an exterior wall, unexplained water sounds, or a faucet that does not work normally after a freeze.
If a pipe may be frozen, do not use an open flame, propane torch, or high-heat device to thaw it. Excessive heat can damage pipes, create a fire hazard, and cause a weakened pipe to burst suddenly. A licensed plumber can locate the problem, thaw the line safely when appropriate, and repair damaged components before a small issue becomes widespread water damage.
For homeowners and property managers in Vancouver and nearby communities, Encano Plumbing & Drainage can inspect exterior plumbing, repair failed hose bibs, and install reliable shutoff valves before winter weather puts your property at risk.
A few minutes spent disconnecting, draining, and covering outdoor faucets is far easier than dealing with a hidden burst pipe in the middle of a cold night. Put the task on your seasonal checklist early, before the first freeze catches your plumbing unprepared.