

You're in a Richmond or Burnaby kitchen, the tap water looks fine, but the chlorine smell catches you every time you fill a kettle, and now you're wondering whether a filter is a smart upgrade or just another thing to maintain. That's the question behind water filtration system installation in Metro Vancouver, because the water is already treated, and the job is usually about taste, odour, plumbing condition, and building layout, not panic.
A proper install starts with the complaint, not the hole in the cabinet. If the issue is taste at the kitchen sink, that points to a different fix than sediment after a main break, or a whole-home treatment decision in an older house with tired plumbing. If you're in a condo, a strata, or a rental, access and approval can matter as much as the filter itself.
Table of Contents
- Do You Actually Need a Filter on Metro Vancouver Water
- Whole-House Versus Under-Sink Systems
- Site Assessment and Tools You Will Need
- Walking Through the Actual Installation
- Real Costs and Timelines in Greater Vancouver
- When to DIY and When to Call a Licensed Plumber
- Maintenance and Troubleshooting After Installation
Do You Actually Need a Filter on Metro Vancouver Water
A Richmond homeowner called because the new kitchen tap still had a faint chlorine bite, even though the home was on municipal supply and the plumbing had already been updated. That's a common call in this part of the Lower Mainland. The question isn't whether the water is safe in a broad sense, it's whether your home has a complaint that a filter can solve.
Metro Vancouver water is already handled against Canadian drinking-water standards, and the practical benchmark is usually a taste, odour, sediment, or plumbing-specific issue rather than a basic safety failure. Residential filtration is often a response to measurable water-quality limits already defined for things like E. coli and total coliforms at 0 CFU/100 mL, or chemical concerns such as lead and nitrates, but the homeowner rarely needs a system for every possible problem. In many homes, the issue is chlorine taste, cloudy water after work on the main, or a desire to polish the kitchen tap water.
Practical rule: if the complaint is only at the drinking tap, start with an under-sink system. If the complaint shows up at showers, laundry, and fixtures, look harder at a whole-home setup.
A 1990s Burnaby house with older branch plumbing may benefit from a different approach than a new Richmond strata unit where the municipal supply is already fine but the owner wants better-tasting water at the sink. The Burnaby home may need sediment control or a system that can handle plumbing debris and service access. The Richmond condo may only need a compact point-of-use unit, or no system at all if the concern is really filter maintenance and cartridge replacement, not water quality.
For readers comparing system types, the broad categories are laid out clearly in this water filtration system types guide. That's the right first stop if you're still deciding whether you need carbon, reverse osmosis, or nothing beyond routine plumbing maintenance.
A simple practical example helps. If you taste chlorine only in the kitchen, you're buying convenience and flavour. If you're chasing sediment after a main disturbance, you're buying protection for fixtures and appliances. If your concern is already handled by the municipal supply and the plumbing is in decent shape, the better move may be to leave the system alone and spend the money elsewhere.
Whole-House Versus Under-Sink Systems
A homeowner can spend time comparing cartridges and housings, then find the question is simpler. Do you need treated water at every fixture, or only better water at the kitchen tap? Whole-house systems handle the full house supply. Under-sink systems handle one point, usually the drinking tap. The right choice comes down to the complaint, the building type, and how much space the plumbing gives you.
Where each system fits in a Vancouver home
A whole-house unit usually belongs near the main entry, often in a basement, crawlspace, or mechanical room. It has to sit in-line with the existing plumbing line after the main shut-off and before the branches split off. That placement matters because the filter sees the entire house flow, and it also has to live with the pressure-reducing valve, the shut-off, and enough room to service the housings later. In a strata unit, that is often the point where the idea stops.
An under-sink unit sits in the cabinet below the kitchen sink, so it is much easier to fit into a condo or rental. It does not solve every water complaint in the building, but it is a realistic option when the main line is off limits or there is no approval for broader work. A Burnaby homeowner I worked with chose this route because strata would not allow work on the main, and the kitchen tap was the only outlet they cared about.
A whole-house filter is a plumbing decision. An under-sink filter is often a lifestyle decision.
Comparing the practical trade-offs
Whole-house carbon and sediment units cover bathing, laundry, and fixture protection, so they make sense when the issue reaches beyond drinking water. Under-sink reverse osmosis and carbon block systems are smaller and more targeted, which suits kitchens, condos, and rentals with limited access. Whole-house systems usually mean more pipe work and more coordination with the existing valves. Under-sink systems are easier to place, but they bring faucet holes, tubing, and cabinet organisation issues.
A Surrey homeowner with a daycare chose whole-house filtration because bath water and broader treatment mattered more than only the kitchen tap. That is the right call when people are washing, bathing, and living in the water all day. If the only complaint is taste at one faucet, full-house treatment can be extra cost and extra work for little return.
For a whole-house install reference, the layout details in this whole-house water filter installation guide match the way these systems are usually placed in homes.
| Factor | Whole-House | Under-Sink |
|---|---|---|
| Water coverage | Every fixture and appliance | One tap, usually the kitchen |
| Footprint | Main-line space, often basement or crawlspace | Cabinet space under the sink |
| Install complexity | Higher, especially with bypass and line cuts | Lower, but cabinet access matters |
| Ongoing cost | Bigger cartridges or media, broader service access | Smaller cartridges, point-of-use upkeep |
| Best fit | Broad water complaints, fixture protection, family-wide use | Taste, drinking water, condo and strata limitations |
Site Assessment and Tools You Will Need
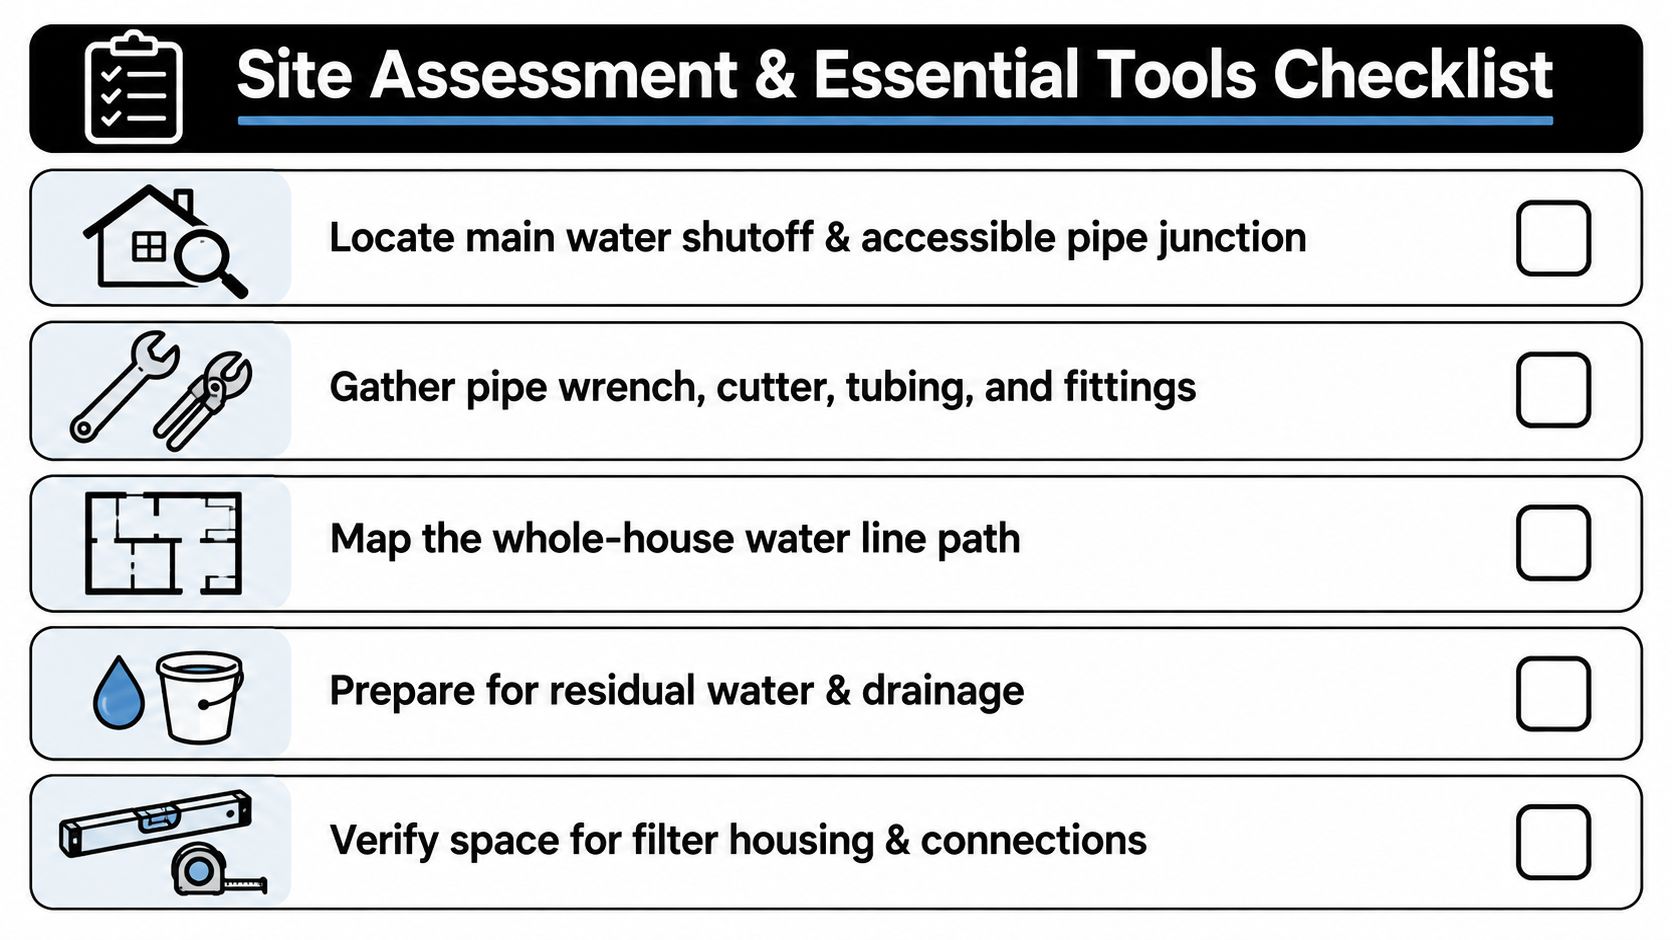
A clean install starts before the first cut. I always want to know where the main shut-off is, whether there's already a pressure-reducing valve, and how much working room exists around the pipe run. In a typical Vancouver special, the shut-off may be in a basement mechanical area, a crawlspace, or tucked awkwardly beside the meter, and that changes the whole job.
The pressure check matters too. If a home already has low pressure, adding filter head loss without measuring first is how you end up with a kitchen tap that feels weak after the install. A gauge on the line tells you whether the system has room for a filter, or whether a tired pressure-reducing valve needs attention before the new equipment goes in.
What I look for before opening a toolbox
A proper site walk tells you more than the customer phone call does. I want to see whether there's a drain nearby for flushing, whether the crawlspace is dry enough to work in, and whether the wall or joist can support a loaded housing. Older homes sometimes have no drip pan, no floor drain, and barely enough room to swing a wrench, which is where a simple job turns messy fast.
The tool list is different for whole-house and under-sink work, but the basics overlap. You'll want pipe cutters, a deburring tool, PTFE tape, adjustable wrenches, tubing cutters, and a pressure gauge for the finish test. For under-sink work, a basin wrench saves time, especially around tight faucet hardware and compression fittings.
- Pipe access and shut-off location: Find the main valve, confirm which fixture can relieve pressure, and check whether the line is copper, PEX, or something older.
- Support and service space: Make sure there's room to remove housings later, not just enough room to install them today.
- Drain and cleanup plan: Residual water is normal, so you need a bucket, a towel stack, and a place to flush the system afterwards.
- Fitting compatibility: Match adapters to the actual pipe size instead of assuming the box contents will fit.
When the site is assessed properly, the install becomes predictable. When it isn't, the job usually fails at a fitting, a shut-off, or the first attempt to change a cartridge later.
Walking Through the Actual Installation
The first thing I do on a whole-house job is shut the main supply, then open a downstream faucet to take pressure off the line. Once the pipe is safe to cut, the section near the entry point gets measured carefully, because a filter housing needs room for the body, the brackets, and the bypass valves. A sloppy cut forces bad alignment, and bad alignment is how you end up chasing leaks after re-pressurisation.
Before the water goes back on, the filter has to be oriented correctly, with the IN and OUT ports matched to the flow direction. Then the bypass is built so the house can keep running while the filter is serviced later. That bypass is not a luxury. It's what keeps the next cartridge change from becoming a full-house shutdown.
On whole-house systems, the bypass is the service win. Without it, every maintenance visit becomes an interruption.
The first few minutes after pressurisation tell you if the plumbing is right. If you see weeping around threaded joints, shut down and correct the seal rather than hoping the drip stops. If the house pressure feels weak across the filter, the head loss is too much for the system or the upstream pressure is already marginal. On carbon units, a cloudy first glass of water usually means carbon fines, so the line needs a proper flush before anyone uses it normally.
Under-sink work is more compact, but it has its own traps. The cold supply gets isolated, then a tee is installed at the supply branch or saddle point, and the filter body is mounted to the cabinet wall or a clean corner where cartridges can be changed later. The faucet hole has to be drilled cleanly, because a ragged opening makes the hardware sit poorly and can create vibration over time. Tubing should run with smooth bends, not tight kinks, and an RO system needs the drain saddle checked carefully so the reject line doesn't leak under the sink.
A live install view can help homeowners understand the moving parts, especially around shut-off and valve layout.
Under the sink, the common failures show up fast. An under-tightened compression fitting will weep after pressure comes back. Tubing that's cut too short will pull sideways on a connection. A cramped cabinet that leaves no room for cartridge changes turns a simple service into a headache, which is why access matters as much as the install itself.
Practical example: a homeowner can get a neat-looking RO install that still fails if the drain saddle is loose or the tubing is forced around a sharp cabinet edge.
The final check is not just a visual leak inspection. Flow, pressure, and treated-water performance all need to be verified. If the water looks fine but pressure has dropped too much, or if the first cartridge stage is loading up too fast, the job isn't finished yet.
Real Costs and Timelines in Greater Vancouver
A homeowner in Vancouver can spend more time choosing the right filter than installing it. On Metro Vancouver's treated municipal supply, the decision is whether the water complaint calls for a point-of-use unit under the sink, or a whole-house setup that treats every tap. That choice changes the labour, the fittings, and the amount of cabinet or mechanical-room space you need.
The market is moving, and that shapes what shows up on supplier shelves and what gets booked on the calendar. In North America, the water-filtration installation market was valued at US$8.4 billion in 2025, is projected to grow at 9.7% CAGR from 2025 to 2033, and is projected to reach US$14.1 billion by 2033 (HTF Market Insights). That broader demand affects product availability in the Lower Mainland, especially for the common under-sink and whole-house kits homeowners ask for most often.
What homeowners usually budget for
For Greater Vancouver planning, a quality whole-house carbon unit typically lands around $800 to $1,500, while a mid-range under-sink reverse osmosis system usually sits around $250 to $600. Those figures cover the equipment only. Labour sits on top, and it changes with access, pipe condition, and whether the install is a clean tie-in or a fight with old valves and cramped framing.
A neat under-sink job is usually simpler than people expect. A whole-house unit in a tight crawlspace is the opposite. The box-store instructions do not account for a shut-off that won't budge, a line that was buried too close to the wall, or a cabinet full of disposal and dishwasher plumbing that leaves no room to work.
The timeline follows the same pattern. A simple under-sink RO install is often a 1.5 to 2 hour job, while a complete whole-house system usually takes 3 to 4 hours when the plumbing is accessible. In a tight Vancouver crawlspace, the same whole-house job can take a full day once access, cuts, bypass work, and cleanup are all counted.
For homeowners comparing systems, the practical question is often whether the job stays at the sink or moves to the main line. If you want a closer look at the parts involved in a compact point-of-use setup, this under-sink water filter installation guide shows the type of cabinet layout and fitting sequence that keeps the work manageable.
The hidden costs people miss
Permit and inspection questions depend on the municipality and the scope of the plumbing changes. Point-of-use systems usually do not trigger much paperwork, but whole-house modifications can. Low pressure can push the job toward a new pressure-reducing valve or, in rare cases, an electrician if a boost pump is part of the plan.
There is also the ongoing side of the install. Under-sink systems need cartridges replaced on schedule, and a metered strata has to think about any reverse osmosis water waste before choosing the system. A homeowner who only budgets for the box often gets surprised later by the maintenance run-rate.
Encano Plumbing & Drainage Ltd. handles these installs as part of normal plumbing service, which means the setup can be assessed, fitted, and tested without the homeowner guessing which parts of the job are simple and which parts need a professional hand.
When to DIY and When to Call a Licensed Plumber
Some homeowners can handle an under-sink system without drama. If the cabinet is roomy, the shut-off works properly, the tubing is straightforward, and the job is limited to a compact point-of-use unit, DIY can make sense. The moment the install crosses into the main plumbing line, the risk goes up fast.
BC plumbing work beyond basic fixture replacement can require a licensed professional, and strata plumbing changes usually need written approval before anyone touches the system. That alone rules out a lot of weekend projects. It also protects you from the kind of mistake that only shows up once the line is back under pressure.
The physical red flags are easy to recognise. An old galvanized main that starts crumbling when touched is a professional job. A finished basement with no floor drain makes whole-house work harder because cleanup and flushing become awkward. A tight under-sink cabinet with disposal plumbing, a dishwasher line, and almost no service space is where a good-looking DIY job turns into a recurring leak complaint.
Five-minute decision check
- Main line access: If you can't find or safely isolate the main shut-off, call a plumber.
- Pipe condition: If the pipe is brittle, corroded, or unfamiliar, don't cut first and think later.
- Building rules: If it's a strata or rental, get approval before you buy fittings.
- Space for service: If the filter can't be changed without dismantling other plumbing, the layout is wrong.
- Pressure concerns: If the house already feels weak at the tap, the install needs a pressure check before it goes in.
A licensed plumber earns the fee by preventing damage, not by making the job sound mysterious. A punctual arrival, clear pricing, and a tidy worksite matter because this kind of install often touches finished spaces, cabinets, and walls. When a video inspection or another diagnostic tool helps verify the line condition first, that saves time and avoids opening the wrong section of pipe. That's the sort of work homeowners in Richmond and Vancouver usually want when they're deciding whether to book the job or wrestle with PEX at 9 p.m. on a Sunday.
Encano's under-sink installation guidance is a useful reference if you're deciding whether your cabinet layout and plumbing access are suitable for a DIY attempt or should be handled by a licensed plumber.
Maintenance and Troubleshooting After Installation
The first service call usually comes from neglect, not failure. Under-sink carbon filters are commonly changed every six to twelve months, reverse osmosis membranes every twelve months, and whole-house carbon tanks every three to five years. In a Vancouver home, that might mean a quick under-sink swap at the cabinet door, or a bigger service visit at the main line if the whole-house media is due.
A slow kitchen tap usually points to a clogged first-stage cartridge. A sulfur smell later on often means the carbon tank has exhausted and is no longer doing its job. A leak at an under-sink compression fitting after a year of vibration is a connection issue, not a mystery failure.
Practical rule: if the water flow drops, check the first cartridge before you suspect the faucet.
Homeowners can safely change standard cartridges with the manufacturer's kit if the housing is accessible and the shut-off works cleanly. They can also watch for wet fittings, clean the area, and verify the dated sticker on the housing still matches the service interval. Anything involving cracked housings, repeated leaks, or pressure issues belongs with a plumber.
A dated sticker on the filter housing pays for itself. Nobody in the household has to guess when the next service is due, and you don't end up running a clogged cartridge longer than you should.
If you're weighing a new filter or troubleshooting one that's already installed, Encano Plumbing & Drainage Ltd. can assess the plumbing, recommend the right system for your home, and install it cleanly with proper leak testing and service access. Visit Encano Plumbing & Drainage Ltd. to book a water filtration system installation for your Vancouver, Richmond, Burnaby, or Surrey home.