
You wake to a faint sulphur smell near the furnace. It may seem too weak to justify an emergency call, especially if the odour disappears when you move upstairs. Treat it seriously anyway. Natural gas is normally odourless, and the added smell is an early warning that gives you a chance to leave before a small fault becomes a fire, explosion, or health hazard.
Gas leak repair starts with safe evacuation, not with finding the failed fitting. The technician's job begins only after everyone is outside and the building has been assessed. What follows is a practical walkthrough of what homeowners can expect, from the first call through pressure testing, line purging, appliance relighting, and the paperwork that closes the visit.
Table of Contents
- A Late-Night Call That Started With a Faint Smell
- What a Gas Leak Actually Is and Why It Is So Dangerous
- Immediate Safety Steps the Moment You Suspect a Leak
- What Happens During a Professional Gas Leak Repair
- Typical Costs Timelines and What Changes the Numbers
- Why a Licensed Technician Is Non-Negotiable
- Staying Safe After the Repair Crew Leaves
A Late-Night Call That Started With a Faint Smell
At 11:40 p.m., a Richmond homeowner woke to a faint sulphur odour near the basement furnace. The smell wasn't overwhelming. They walked through the rooms to check whether a forgotten egg or food bin might be responsible, then stopped looking and moved the family outside.
That decision matters. A homeowner doesn't need to prove there's a leak before leaving. Once outside, they called 911 first, rather than walking back in to call the utility from the kitchen. The emergency response and gas utility dispatch then coordinated the next step, and the gas company sent a technician within the hour.
Practical rule: The person who smells gas shouldn't become the person who investigates it indoors.
The technician began outside, confirmed the occupants were clear, and checked the meter area before entering. Where the exterior arrangement allowed it, the technician isolated the meter with a quarter-turn valve. That stopped the supply while the source was identified, but it didn't make the property safe to occupy until testing was complete.
Following the odour to the fault
A combustible gas detector helped narrow the search around the basement mechanical area. The strongest reading appeared behind the water heater, where a cracked black-iron nipple had opened at the connection. The fault was hidden from normal view, which is common in older mechanical rooms where fittings sit behind appliances, insulation, or access panels.
The homeowner hadn't caused the problem by failing to notice it earlier. Gas components can loosen, corrode, or crack, and odour can travel through a room before it reaches a person. A faint smell still deserves the same first response: leave, call from outside, and wait for clearance.
The technician's repair plan included isolating the affected section, replacing the damaged fitting, testing the line, and confirming that connected appliances could be safely restored. The discovery also showed why tightening a visible fitting isn't a complete repair. A system can appear sound at one joint while losing pressure elsewhere.
What a Gas Leak Actually Is and Why It Is So Dangerous
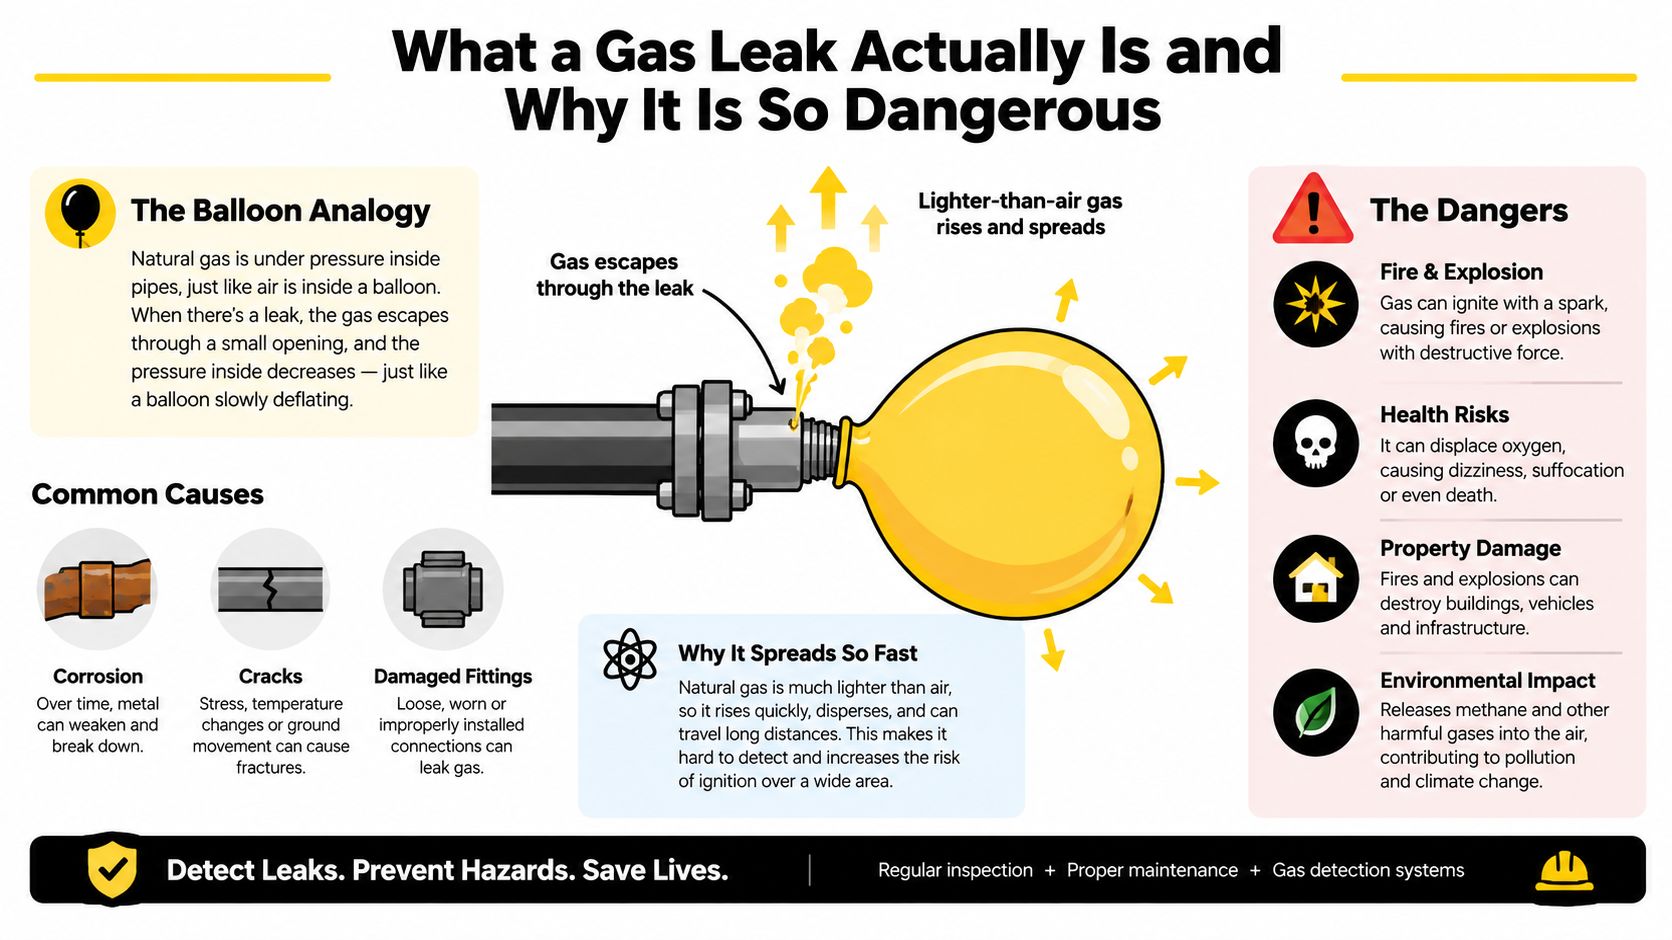
Think of a gas line as a balloon under pressure. If the pipe, valve, nipple, connector, or fitting develops a crack or loose connection, the gas starts escaping immediately. It doesn't wait for a large opening. It moves through the easiest available path, including sideways through joints and upward through wall or floor cavities, until it reaches open air or a possible ignition source.
The danger depends on concentration, ventilation, ignition, and exposure time. A leak inside an enclosed basement can create a combustible mixture before anyone notices the smell. A spark from a light switch, appliance control, motor, or other electrical contact can then ignite that mixture.
Natural gas suppliers add mercaptan, an odorant with a sulphur-like smell, because untreated natural gas has no useful warning odour. Propane behaves differently from natural gas because it is heavier than air. It can collect in low areas such as pits, crawl spaces, and floor-level voids, while natural gas generally rises and spreads upward when released indoors.
Three hazards people underestimate
Explosion and fire: Gas doesn't need to be visible to be dangerous. In a confined space, an accumulation can ignite suddenly when it reaches a flame, spark, or hot surface.
Carbon monoxide: A leak and carbon monoxide aren't the same fault. Carbon monoxide is produced when fuel burns incompletely, so a damaged appliance, blocked vent, poor combustion, or incorrect air supply can create a separate hazard. A carbon monoxide alarm is important, but it doesn't replace a response to a gas odour.
Asphyxiation: Escaping gas can displace breathable air in an unventilated room. Someone who stays inside to search for the source may become confused, weak, or unconscious before reaching a door.
Small leaks deserve attention because a low release can continue for a long time. The immediate odour may be mild, but the leak can worsen, migrate into a confined cavity, or affect combustion near an appliance. For more warning signs, review this guide to signs of a gas leak in a house, then treat any suspected odour as an active safety issue rather than a home-maintenance question.
Immediate Safety Steps the Moment You Suspect a Leak
Keep the response simple. You don't need to identify the appliance, estimate the leak size, or decide whether the smell is strong enough. Your first task is to remove people from the possible danger zone without creating an ignition source.
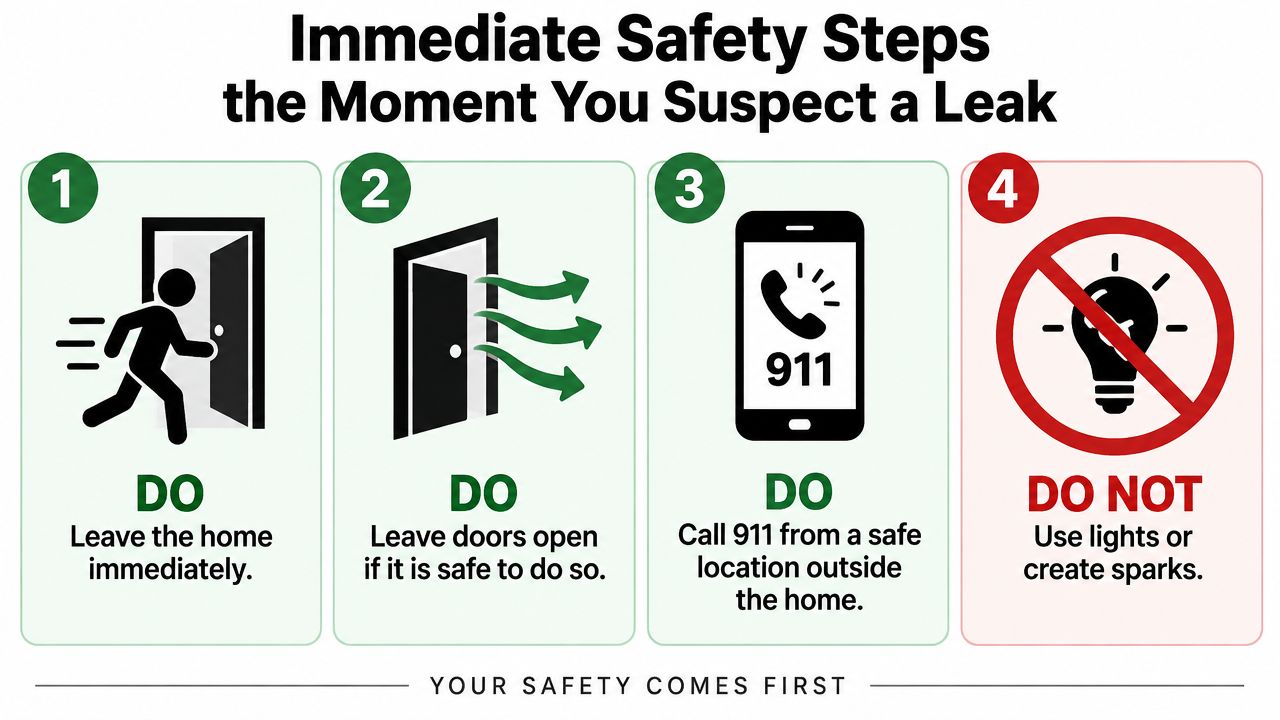
Leave immediately: Take everyone outside, including pets, using the nearest safe exit. Don't stop to collect belongings or inspect the furnace room.
Leave doors open only if safe: An open door can help disperse gas, but don't stay inside to ventilate the property. If opening it requires walking toward the smell or operating a lock, leave it alone.
Call from outside: Call 911 or the gas utility once you're away from the building. In British Columbia, FortisBC's gas-leak guidance tells people to go outside first and call the 24-hour emergency line at 1-800-663-9911 or 911 from outside.
Stay out until cleared: Don't re-enter because the smell seems weaker. Wait for the fire department, utility, or qualified gas professional to say it's safe.
What not to operate
Don't flip light switches, use a cellphone or flashlight indoors, smoke, light a candle, start an appliance, operate a garage door opener, or use any other electronic device inside. A small spark can ignite a gas-air mixture, which is why BC gas leak safety advice specifically warns against switches, phones, matches, smoking, and electronics.
If the meter valve is outside and directly accessible without re-entering, you may close it if you can do so safely. Don't turn it off if reaching it means approaching a strong odour, entering a building, crossing an unsafe area, or handling unfamiliar equipment.
Don't search for the leak with soap, a lighter, a detector, or your nose. A trained technician has the equipment and procedure to identify the source after the area has been made safe. A helpful practical summary is what to do first when you smell gas, but the immediate priorities remain evacuation, an outside call, and no ignition sources.
What Happens During a Professional Gas Leak Repair
A professional visit should be methodical, even when the original call sounds straightforward. The technician needs to protect occupants, locate the fault, confirm the repair, and restore appliances without leaving an untested connection behind.
Arrival and isolation
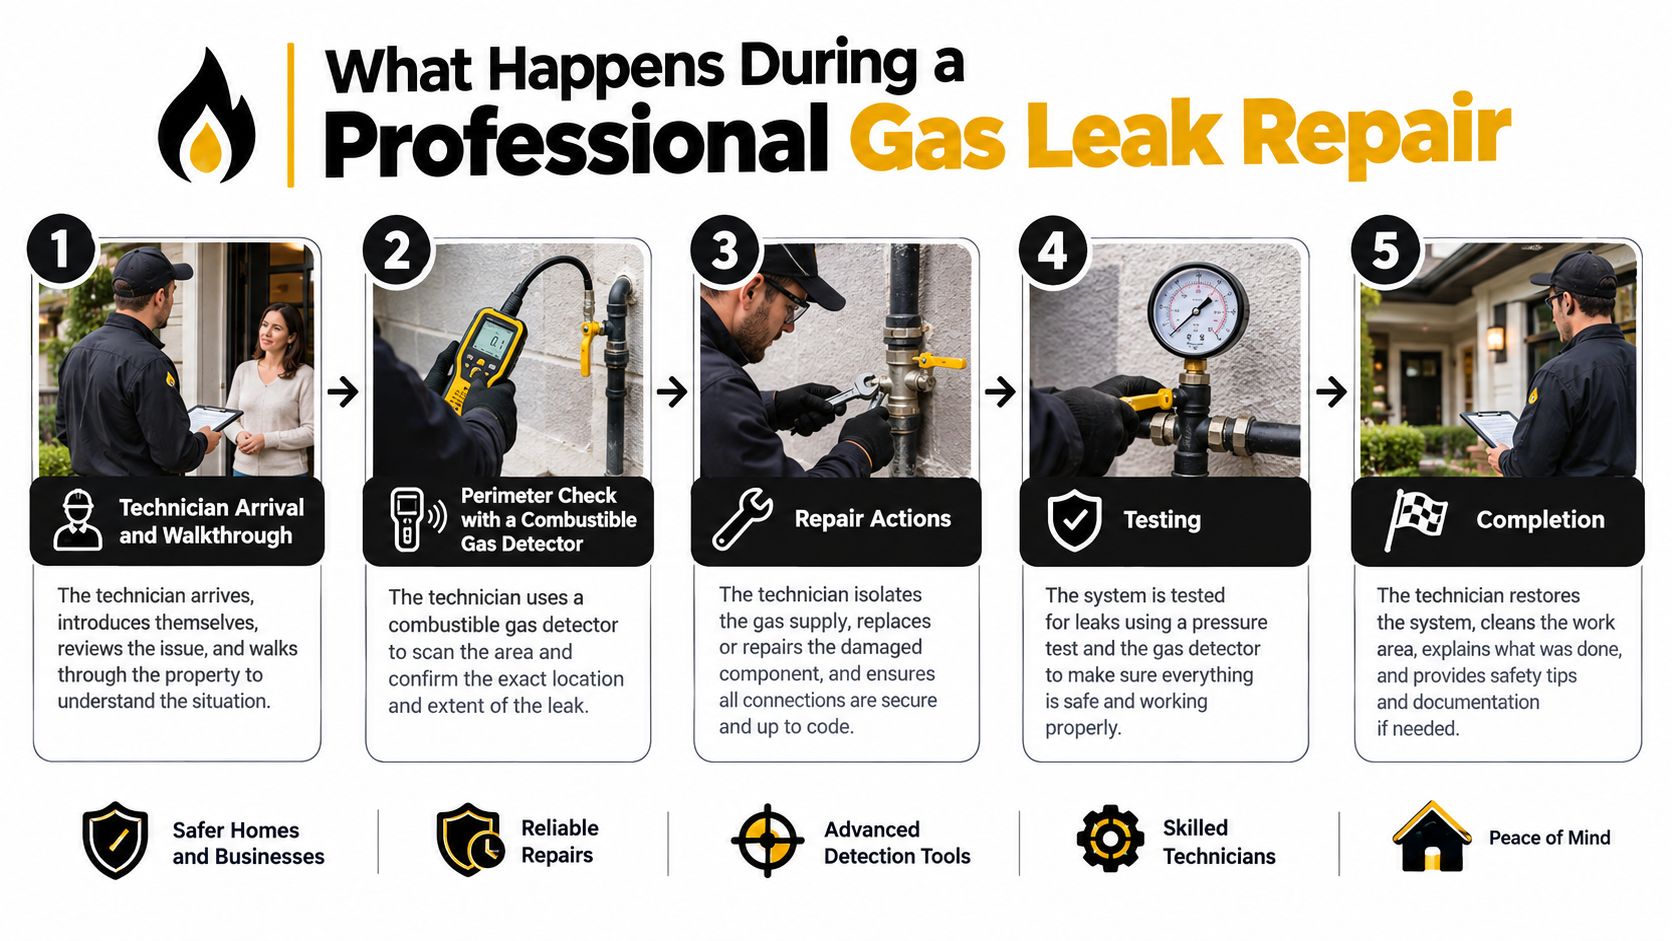
The first walkthrough covers the reported odour, appliance locations, meter position, recent work, and any symptoms occupants noticed. The technician checks the perimeter and accessible mechanical areas with a combustible gas leak detector, looking for readings around regulators, shut-off valves, unions, appliance connectors, and concealed transitions.
If the gas hasn't already been isolated, the technician shuts it off at the meter or the appropriate upstream valve. They then isolate sections of the system so the test can distinguish a faulty branch from a sound one. This prevents a vague diagnosis such as “there may be gas somewhere near the furnace.”
The next step is pressure testing. The technician connects a calibrated manometer and pressurizes the isolated line with air or nitrogen, according to the applicable procedure and equipment. A stable pressure reading supports a sound section, while a pressure drop indicates that gas is escaping and helps narrow the location.
Repair, retest, and restoration
The physical repair depends on what the testing and inspection reveal:
- Loose flare fitting: The technician disassembles and inspects the connection, then tightens or replaces the fitting if its sealing surfaces are damaged.
- Corroded union: The union is removed and replaced with approved components rather than coated or forced back into service.
- Damaged black-iron pipe: The affected section is cut out, new threaded pipe is installed, and supports and clearances are checked.
- Faulty valve: The valve is replaced when it doesn't close, leaks at the stem, or fails the required test.
After the repair, the technician repeats the pressure test. They also apply a soap solution at every accessible joint and watch for bubbles. A silent detector reading isn't enough if a connection can be checked directly.
The line purge comes next. Once gas service is restored under controlled conditions, air in the repaired or isolated pipe must be displaced with fresh gas in a safe, managed way. The technician then relights appliances in sequence, such as the furnace, water heater, and range, checking flame quality and operation as each appliance returns to service.
The technician may leave a work order describing the fault, repair, test result, appliance status, and any follow-up required. Where permits or inspection apply, compliance paperwork and restoration arrangements should also be explained before the crew leaves.
A visual overview can help you understand the order of operations before a visit:
Typical Costs Timelines and What Changes the Numbers
A responsible contractor should separate the emergency response, diagnosis, testing, parts, labour, permits, and restoration work on the estimate. The exact amount depends heavily on access and the fault, so homeowners should be cautious about any quote that promises one universal price before the line has been tested.
The table below uses qualitative budgeting categories rather than invented dollar figures. Canadian contractors may quote in Canadian dollars, while comparison material may use US dollars, so ask which currency, fees, and taxes are included.
Gas Leak Repair Costs and Timelines by Scenario
| Scenario | Typical Cost (USD) | Typical Timeline | What Drives the Price |
|---|---|---|---|
| Loose fitting or accessible valve connection | Lower end of the repair range | Often under an hour once isolated | Emergency dispatch, diagnosis, access, and a small adjustment or replacement |
| Appliance-side connector or valve replacement | Moderate | Usually a same-day visit | Connector or valve type, appliance access, testing, and relighting |
| A section of exposed pipe | Moderate to higher | Often half a day | Cutting, threading, supports, fittings, pressure testing, and finishing work |
| Buried or underground service-line leak | Higher | Can extend beyond one visit | Excavation or trenchless work, permits, utility coordination, and reinstatement |
| Full line replacement | Highest bracket | May take multiple days | Route, access, replacement method, inspections, parts, and restoration |
For broader context on the variables that influence estimates, see this gas line repair cost guide. The useful question isn't “What does a gas leak cost?” It's “Which part of my system is leaking, how accessible is it, and what must be done before service can be restored?”
Why a simple job becomes a larger project
An accessible loose connection may be corrected quickly after the technician confirms the line holds pressure. A buried leak is different. The contractor may need to locate the route, coordinate with the gas utility, obtain municipal permission, protect a public right of way, and restore the surface after the repair.
Time of day also affects emergency dispatch charges. Region, permit requirements, whether parts are on the truck, special-order components, and the need for utility involvement can all change the invoice. A homeowner should request a written breakdown showing the diagnostic charge, pressure-test charge, parts, labour, permits, excavation or restoration, and any return visit.
Don't choose on the lowest first number alone. A cheap visit that skips pressure testing can become a second emergency, while a properly scoped repair explains both the immediate fix and the work needed to make the system safe for continued use.
Why a Licensed Technician Is Non-Negotiable
Gas work belongs in a different category from replacing a tap or clearing a sink. The system stores and distributes a flammable fuel, and a connection that looks tight can still leak under pressure. The person doing the repair needs regulated training, the right tools, liability insurance, and the legal authority required in the local jurisdiction.
A licensed gas fitter can assess the installation against applicable code, pull permits where required, perform the pressure test, document the repair, and coordinate inspection or utility restoration. A handyman may tighten a fitting and leave, but that doesn't establish that the line holds pressure, that the fitting is approved, or that the appliance can be safely relit.
A gas repair isn't complete because the odour disappeared. It's complete when the system has been tested, restored correctly, and documented.
The real cost of unqualified work
A homeowner who performs an unpermitted repair may create problems long after the visit. An insurer can question coverage after a fire if the gas work wasn't authorized or documented. An appliance warranty may be affected by improper installation, and a claim can become more complicated if a tenant, guest, or worker is injured.
Utilities and municipal inspectors may also require proof of licensed work before restoring service. That can leave the homeowner paying for a second assessment, opening finished walls, or correcting a repair that should have been done properly the first time.
DIY leak detection has a similar weakness. A homeowner can smell gas, but they can't reliably confirm the full extent of a leak by checking one visible joint. Gas can travel through cavities, and an appliance-side problem may coexist with a pipe or valve defect.
What a proper visit should include
Expect the technician to explain:
- Who is doing the work: Ask for the licence or trade credentials relevant to the area, insurance confirmation, and the company identity on the work order.
- How the fault was confirmed: The explanation should cover detector readings, isolation, pressure testing, or other appropriate diagnostic steps.
- What will be repaired: The scope should identify the fitting, valve, connector, pipe section, appliance, or buried line involved.
- How service will return: The technician should explain purging, relighting, testing, permits, and utility coordination.
- What you receive: Keep the invoice, test results, repair description, permit information, and follow-up recommendations.
The practical trade-off is clear. Saving money by skipping a licensed repair removes the checks designed to catch hidden failures. In a gas system, the cost of failure is measured in lives, not dollars, which is exactly why licensing and documentation matter.
Staying Safe After the Repair Crew Leaves
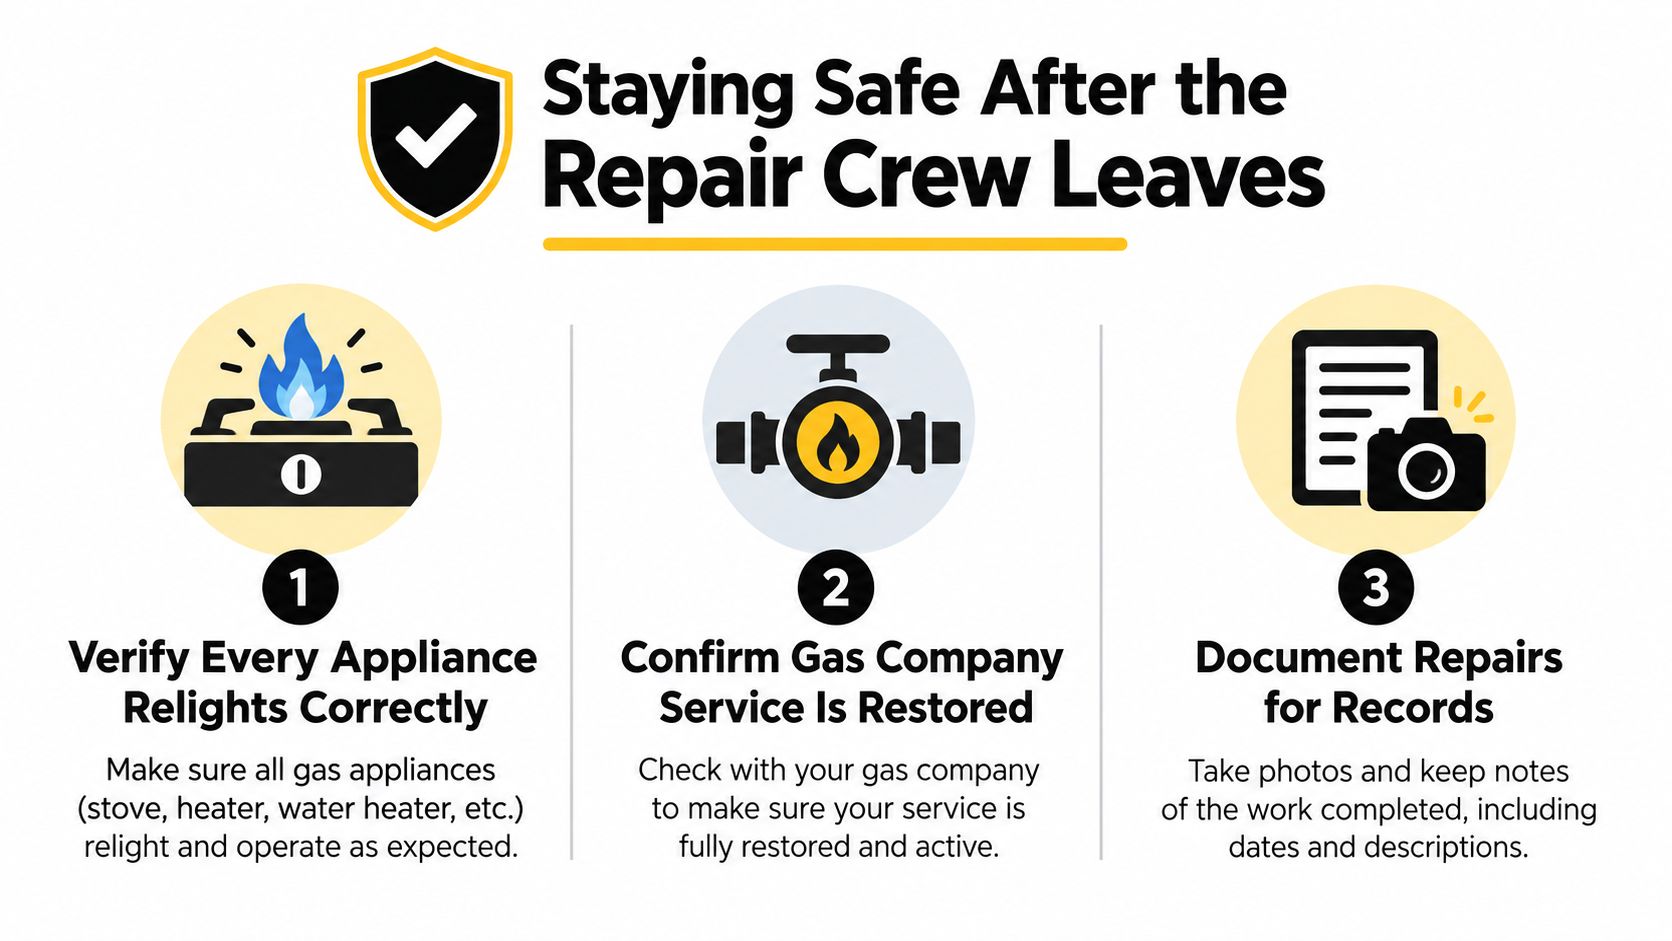
A repaired line still needs a controlled handoff. Before the crew leaves, verify that every appliance they touched relights correctly and that the flames look and sound normal. If the utility shut off service, confirm who restores it and whether a utility representative or licensed technician must complete that step.
Ask for the findings in writing. The record should identify the failed component, the work performed, the pressure-test result, any soap-bubble checks, which appliances were relit, and whether a permit or inspection remains outstanding. Keep the work order with your home records because it may help with future maintenance, an insurance question, or a property sale.
A small routine prevents a large interruption
Use a short maintenance checklist:
- Look at flexible connectors: During a routine visual check, look for corrosion, kinks, abrasion, or signs that a connector has been disturbed. Don't test or move a gas connection yourself.
- Know the shut-off location: Learn where the exterior meter valve and appliance shut-offs are, but operate them only when emergency guidance and safe access permit it.
- Maintain alarms: Replace detector batteries twice a year and follow the manufacturer's placement and replacement instructions.
- Act on the first odour: Don't wait for the smell to become strong or persistent. Leave first, then call from outside.
In British Columbia, restoring gas after an emergency shutoff isn't a homeowner relight exercise. Guidance explains that the utility or licensed gas fitter must confirm the leak is repaired, purge air from the lines, and relight each appliance in a controlled sequence. A homeowner in Delta may safely close an accessible labelled appliance valve if doing so doesn't require entering danger, but they shouldn't open fittings, relight the system, or restore gas at the meter themselves.
Gas systems are safe when they're installed, tested, maintained, and respected. The aim after gas leak repair isn't to live in fear of the system. It's to leave the home with a verified repair, working appliances, clear records, and the confidence to respond promptly if the odour ever returns.
If you smell gas in Richmond, Vancouver, Burnaby, or nearby communities, Encano Plumbing & Drainage Ltd. provides emergency gas fitting support, leak diagnosis, appliance-side inspection, repair, testing, and service coordination. Contact the team for a safe assessment rather than attempting to locate or repair a suspected leak yourself.