

You notice it when the heat starts running steadily. Your skin feels tight, your throat is rough in the morning, and every fleece blanket in the house seems to build static. That catches a lot of Vancouver homeowners off guard because outside air doesn't feel dry here. Indoors is different. Once your furnace warms cool winter air, the relative humidity can drop fast.
A whole-house humidifier can solve that problem, but in Greater Vancouver it has to be installed with more care than most generic guides admit. This isn't just about comfort. It's about adding moisture without pushing a damp coastal home into window condensation, hidden mould, or wet ductwork. House tightness, airflow, drain routing, control placement, and local plumbing details all matter.
If you're considering humidifier installation, start by understanding how your home loses heat and air in the first place. A drafty house behaves very differently from a tight one, and that changes how a humidifier performs. This guide on how to test your house for heat loss is worth reading before you cut into any duct.
Table of Contents
- Why Your Vancouver Home Feels So Dry in Winter
- Choosing Your Humidifier for a Vancouver Climate
- Gathering Your Tools and Preparing for Installation
- The Core Humidifier Installation Process
- BC Codes Strata Rules and When to Call Encano
- Commissioning Testing and Long-Term Maintenance
Why Your Vancouver Home Feels So Dry in Winter
Vancouver winters are damp outdoors, but heated indoor air tells a different story. Your furnace or air handler warms incoming air, and the relative humidity drops as the temperature rises. That's why a home can feel dry even during a rainy week.
The mistake I see most often is assuming that because the Lower Mainland is wet, adding indoor humidity is automatically harmless. It isn't. In this climate, a humidifier has to do two jobs at once. It has to improve comfort, and it has to avoid feeding condensation on windows, cool corners, and older exterior walls.
Dry air comfort versus wet building surfaces
A homeowner in Burnaby might complain about dry sinuses and static, then crank a portable unit beside the stairs and leave it running all day. The bedroom feels better, but the north-facing window starts collecting moisture overnight. That's the trade-off in a coastal climate. Moisture that helps people can also stress the building envelope.
Whole-house humidifier installation works better because it lets the heating system distribute moisture more evenly. You're not flooding one room. You're controlling the whole air stream.
Practical rule: If you're seeing regular winter condensation on windows already, don't install a humidifier until you've dealt with airflow, insulation, or ventilation issues that are causing the problem.
Why whole-house control matters
A duct-mounted system gives you a humidistat, controlled water feed, and a predictable place to manage drainage. That's far better than chasing room-to-room dryness with plug-in units. It also makes troubleshooting easier. If the house feels too dry, you can inspect one integrated system instead of five scattered appliances.
What doesn't work is treating humidifier installation like a simple accessory. In Vancouver homes, especially older wood-frame houses and strata suites, moisture has a way of finding weak points fast. A humidifier should be installed as part of the HVAC system, not beside it.
Choosing Your Humidifier for a Vancouver Climate
The right unit depends less on marketing categories and more on how your house behaves. In Greater Vancouver, I'd choose based on furnace runtime, available duct space, maintenance tolerance, and how much control you need over moisture.
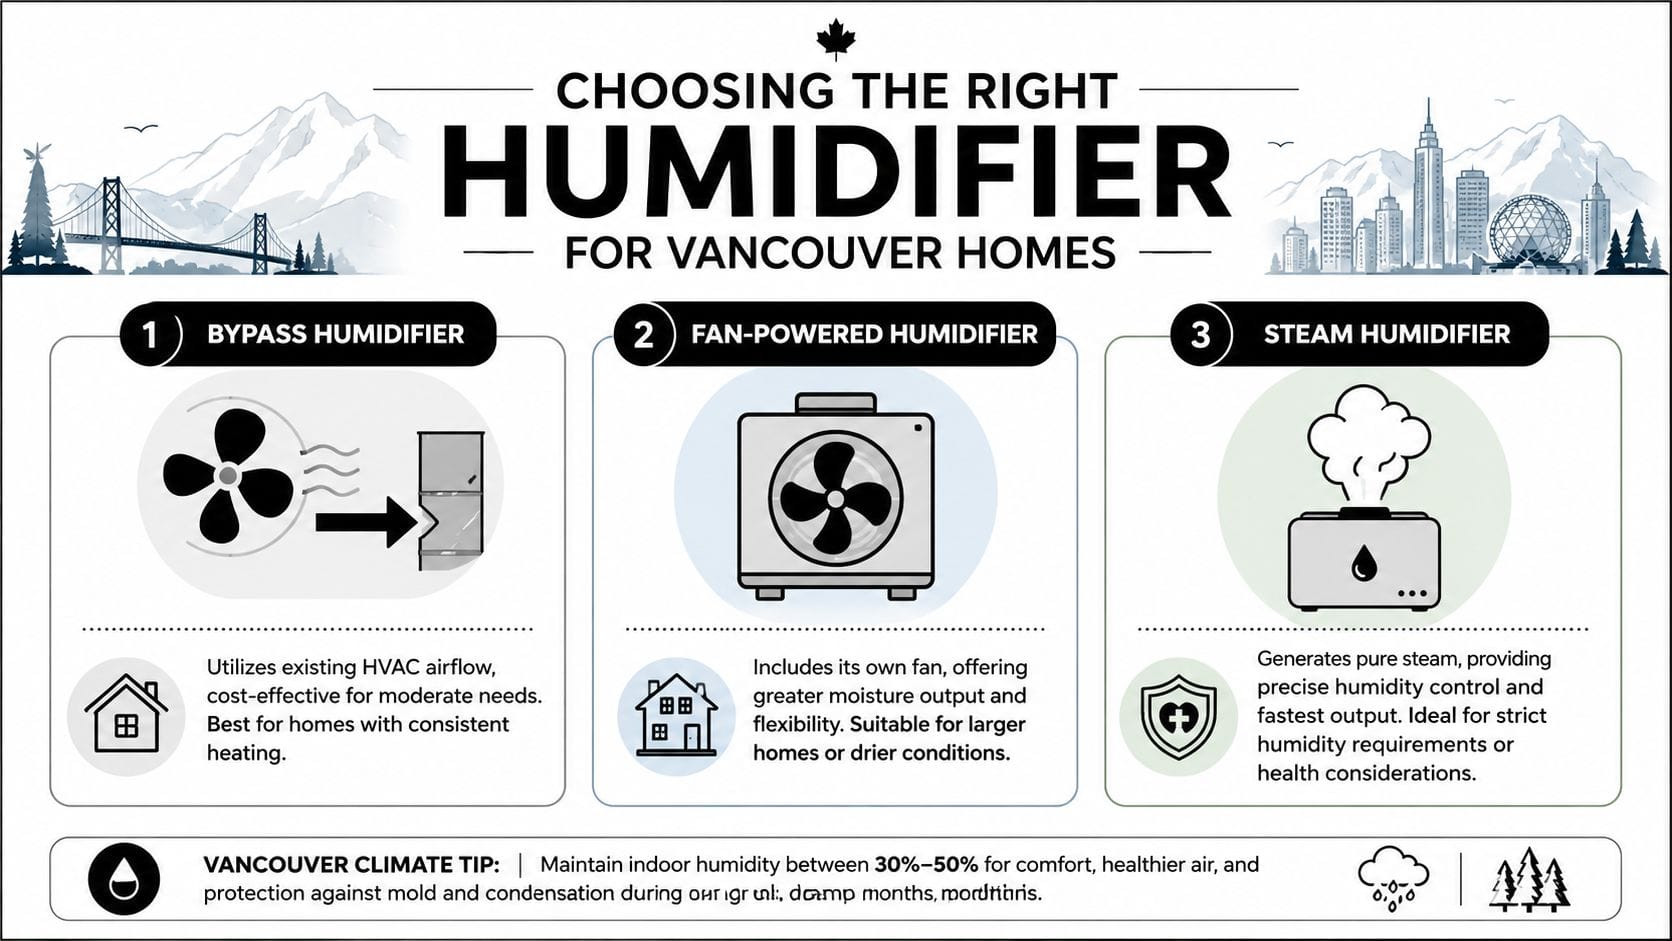
ASHRAE recommends keeping occupied indoor relative humidity between 30% and 60% in its humidifier guidance, while Consumer Reports, citing Energy Star, says 30% to 50% is ideal and 30% to 40% may be better in colder conditions to limit window condensation. For Vancouver homes, that lower winter end matters because damp outdoor conditions don't protect you from indoor condensation once the heat is on, as outlined by ASHRAE's humidifier guidance.
For broader system planning, it also helps to look at your full heating setup, not just the humidifier. This overview of heating and cooling systems for local homes gives useful context.
What works in a coastal heating season
Here's the simple comparison I use when talking homeowners through humidifier installation:
| Type | Best fit | What works well | What usually trips people up |
|---|---|---|---|
| Bypass | Single-family homes with steady furnace operation | Simpler design, familiar layout, good for moderate humidity needs | Needs the right duct arrangement and proper sealing |
| Fan-powered | Homes needing more output or better flexibility | Adds moisture without relying as heavily on system airflow | Still needs careful control placement and maintenance |
| Steam | Homes that need tighter humidity control | Fast response and precise delivery | Clearance, drainage, and code details matter much more |
Bypass units are often a sensible fit for detached houses with conventional forced-air heating. They use existing furnace airflow, so they're usually the least complicated to integrate. But they still need proper placement. If the return and supply layout is awkward, or if access around the plenum is tight, the install gets messy fast.
Fan-powered units solve some of those layout problems. They're useful where the system needs more push through the evaporative media, or where a bypass connection is awkward. They can be a better answer in larger homes or where comfort complaints show up across several rooms instead of one end of the house.
A practical way to choose
Steam units are the category that most DIY guides oversimplify. They're powerful, but they're not forgiving. In a Vancouver house, that means one wrong nozzle location can lead to condensation inside ductwork instead of controlled moisture in the living space.
ASHRAE also notes that a “tight” house can be modelled at 0.5 air changes per hour, while an average house is 1 air change per hour for humidification load calculations in its technical guidance. That matters in newer BC homes because a tighter building can hold moisture longer, which sounds good until windows and cooler surfaces start telling you you've set the target too high.
A practical example. If you have a newer home in Richmond with good air sealing and fairly constant furnace operation, a bypass or fan-powered unit is often easier to control safely than steam. If you manage a larger home with stricter humidity needs, steam may be the better tool, but only if the duct geometry, drain path, and controls are handled correctly from the start.
Good humidifier installation doesn't ask only, “How much moisture can this unit add?” It asks, “Where will that moisture end up on a January morning?”
Gathering Your Tools and Preparing for Installation
Preparation decides whether this job feels controlled or sloppy. If you have to stop halfway through because you forgot foil tape, a step bit, or a drain route, you start making rushed decisions. That's when ducts get cut crooked, screws land too close to edges, and water lines end up unsupported.

Tools that make the job cleaner
A capable homeowner should have the basics before starting:
- Tin snips and a drill for cutting and fastening sheet metal cleanly.
- Manufacturer template and marker so the opening matches the cabinet exactly.
- Level and tape measure because a skewed housing can affect drainage and fit.
- Sheet-metal screws and foil HVAC tape to secure the unit and seal the plenum cut.
- Adjustable wrenches and tubing tools for the cold-water connection.
- Voltage tester so you can confirm the power is off.
- Shop vacuum and gloves because cut metal edges and filings create a mess quickly.
The manufacturer's template matters more than people think. Don't trace the cabinet by eye. A whole-house humidifier housing usually needs a precise cut so the foam seal or cabinet flange sits flat.
Safety checks before the first cut
Start at the breaker panel. Shut off power to the furnace or air handler, then verify with a voltage tester at the unit. Don't trust the thermostat being off. Don't trust the blower not running. Confirm dead power before you open the access panel.
Then check the work area itself:
- Look at access space. You need room for the cabinet door, water connection, and service access.
- Identify the right duct section. Don't cut blindly near coils, wiring, or internal supports.
- Plan the drain path. Gravity drainage is simpler when you can get it.
- Find the cold-water source. The installation sequence for whole-house units calls for a cold-water feed, not a hot-water shortcut, in Carrier's humidifier installation guidance.
A practical example. In a basement mechanical room in East Vancouver, the supply plenum may have enough flat sheet metal for the housing, but the nearby floor drain might sit behind the furnace and water heater. If you don't map that out first, you can mount the humidifier in a spot that turns a simple drain into a nuisance.
Measure service access, not just mounting space. A unit that fits the duct but blocks its own cover is installed in the wrong place.
The Core Humidifier Installation Process
Humidifier installation moves from planning into sheet metal, wiring, and water control. The broad sequence is consistent across whole-house systems. Shut off power, cut the plenum, mount the unit, install the humidistat, connect cold water and a drain, then wire into the HVAC controls. Steam units add tighter placement rules, and that's where precision matters most.
Near the opening of the job, a visual check helps keep your cuts and layout under control.
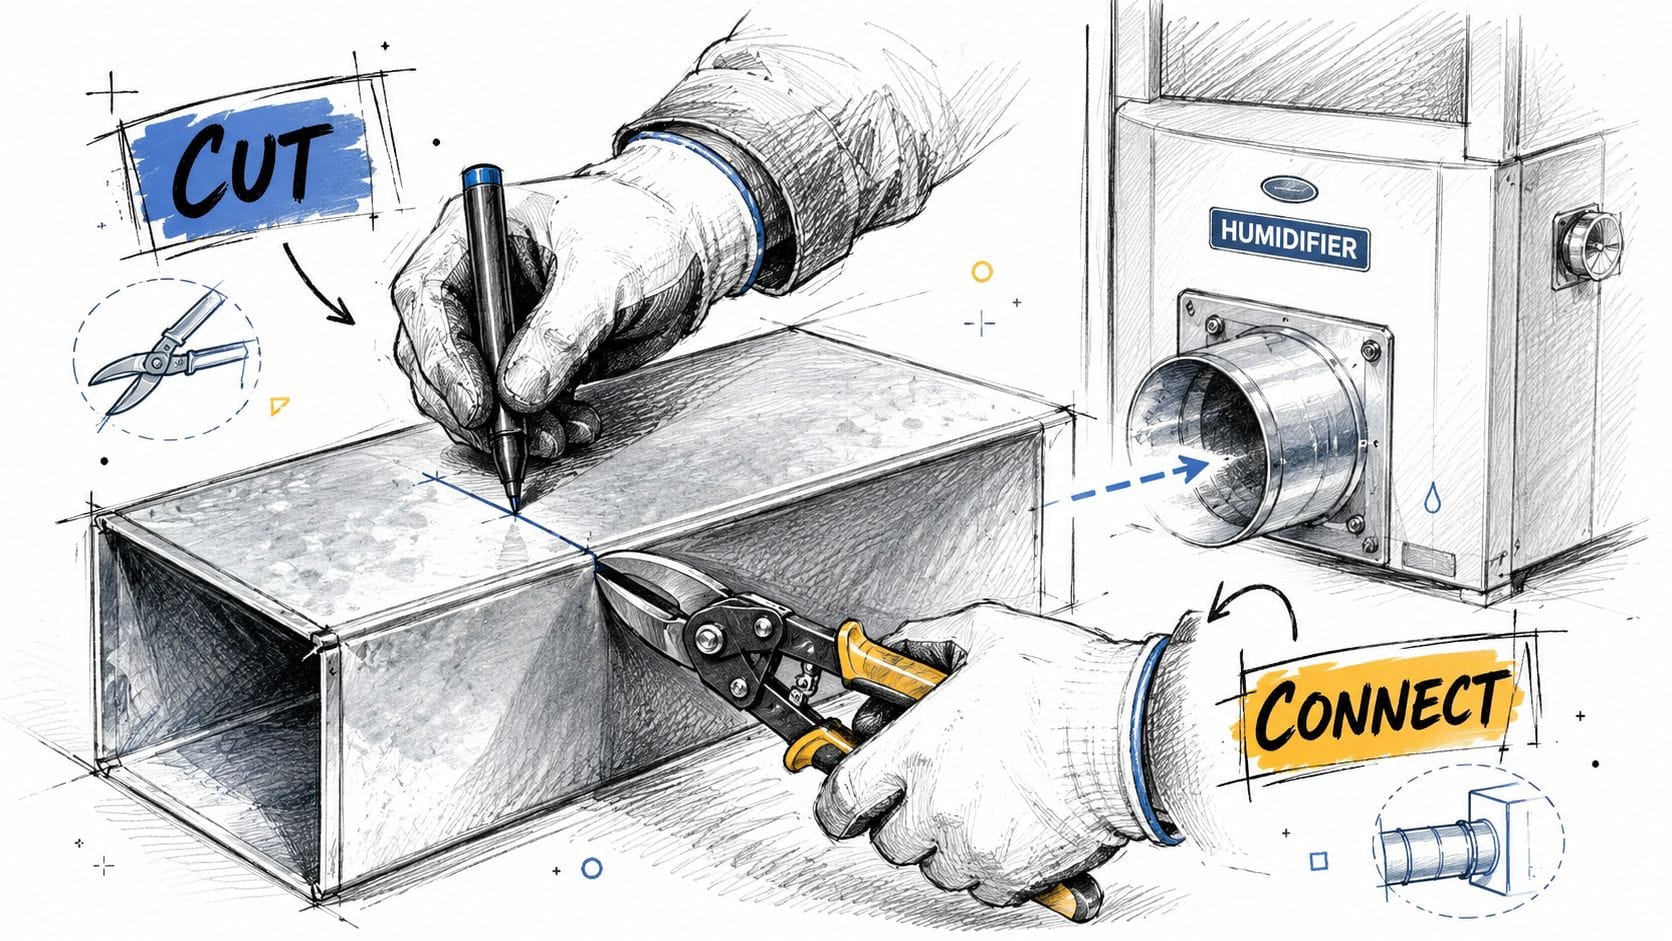
Marking and cutting your ductwork
Use the manufacturer template. Tape it to the selected duct face, check level, then mark the outline and fastener holes. Before cutting, remove the panel you can safely remove and look inside if possible. You want to know what sits behind the metal.
Cut slowly with tin snips or the correct sheet-metal cutting tool for the opening. Jagged cuts don't just look rough. They make it harder for the cabinet or mounting plate to seal tightly against the duct.
A practical example. On many furnace rooms in Vancouver specials, the available plenum face is smaller than it first appears because refrigerant lines, venting, or a nearby condensate trap limit access. In that case, the right move is often to reposition the unit, not force a poor cut.
Mounting the humidifier securely
Once the opening is clean, seat the cabinet or mounting plate flat to the duct and fasten it evenly. You're looking for a tight, stable fit with no rocking and no visible gaps around the flange. Seal the perimeter where required so you don't create an air leak in the plenum.
For steam humidifiers, the nozzle tolerances are stricter. The duct nozzle needs a minimum 4-inch clearance from any duct wall and at least 24 inches of downstream open duct space, according to Resideo's steam humidifier installation manual. The mounting bracket is fastened with four self-drilling sheet-metal screws, and the foam gasket has to seat properly to create an airtight seal.
That's one reason steam isn't a casual DIY upgrade. If the nozzle is crowded by a turning vane, elbow, coil, or branch takeoff, moisture won't behave the way you expect.
Connecting the water supply and drain
Whole-house humidifiers should be connected to a cold-water feed, and the drain should route to a proper drain point. Take your time here. Most callbacks come from leaks, poor tubing support, or drain lines with bad slope.
Key checks:
- Cold-water connection should be accessible and secure, with tubing protected from kinks.
- Drain route should slope properly and discharge to an approved location.
- Fasteners and clips should keep lines from rubbing against metal edges or hot components.
Steam units need more from the drainage side. The manual requires access to cold water, a nearby 120 VAC outlet, and a drain with a high-temperature water rating. It also tells installers to consult local plumbing codes for drainage compliance.
If you need a visual walk-through before touching the water and wiring side, this install video is useful for understanding the sequence and what the finished fit should look like.
Wiring the humidistat and solenoid
The control side is where a lot of neat-looking installs fail. The humidifier may be mounted perfectly, but if the humidistat is in the wrong place, it won't read representative air conditions and the unit will overrun or short cycle.
For standard whole-house systems, the humidistat is typically installed on the return duct or a nearby interior wall, based on the unit design. What matters is that it senses representative return-air conditions, not a dead pocket or a drafty exterior spot. Wire the control and solenoid exactly to the manufacturer diagram and the furnace control arrangement.
ASHRAE's technical guidance makes the control side more exact in engineered humidification systems. It says high-limit controls and humidity sensors should be placed at least five times the expected absorption distance downstream, and the high-limit humidistat should be about 3 m from the humidifier section to reduce moisture damage and short cycling. Those numbers matter most on more advanced systems, but the principle applies to any install. Sensor placement changes performance.
A humidifier that runs isn't necessarily a humidifier that's installed correctly. If the control reads the wrong air, the whole system lies to itself.
BC Codes Strata Rules and When to Call Encano
A Vancouver condo owner can install a humidifier neatly, wire it correctly, and still create a moisture problem behind a wall or inside a shared duct. That is the part generic DIY guides miss. In Greater Vancouver, the hard part is often not getting humidity into the air. It is controlling where that moisture goes once it is there.

Where DIY stops making sense
Moisture management failures are a frequent problem in local HVAC work, especially in tight newer BC homes and multi-unit buildings where indoor humidity has fewer escape paths. Add local plumbing requirements, drain routing rules, equipment access limits, and the odd behavior you sometimes see with tankless water heaters, and a simple humidifier install stops being simple.
Strata properties add another layer. You may need approval for duct penetrations, water connections, condensate disposal, shutdown scheduling, and who is allowed to work inside the mechanical room. If you live in a condo, this guide to air conditioning upgrades in condos shows how building restrictions can shape even straightforward HVAC projects.
I usually tell homeowners to pause and reassess if any of these conditions apply:
- Steam humidifier in a condo or townhouse where fan interlocks, duct temperature, and absorption distance have to be right to avoid condensation inside the system.
- A newer, airtight home where oversizing the humidifier can push moisture onto windows, exterior walls, or colder corners instead of improving comfort.
- A tankless-water-heater setup where pressure and flow can fluctuate enough to affect feed performance.
- An older mechanical room with limited clearance, legacy wiring, or no obvious code-compliant drain point.
- Any project inside a strata building where the installation affects common property, shared services, or another unit if something leaks.
Why Vancouver changes the risk
Our climate is damp for much of the year, but winter indoor air still dries out once the heat runs. That mix fools people. They assume a little more humidity is always harmless because the region already feels wet outside. Indoors, the risk is different. In a tight home, extra moisture can collect on cold glass, inside poorly insulated cavities, or in ductwork if the unit is oversized or the controls are poorly set.
That is why sizing and control matter more here than homeowners expect. A humidifier should match the house, the furnace airflow, and the building envelope. A leaky older house and a newer high-performance home do not tolerate the same humidity settings.
A local example
Take a Richmond townhouse with a tankless water heater, a compact utility closet, and limited access around the supply plenum. The homeowner wants whole-home humidity because the bedrooms feel dry every winter. On site, the job often turns into a code and moisture-control exercise. Water feed has to be stable. Drainage has to be reliable. The unit has to fit without compromising service access. The target humidity has to stay conservative because these homes can hold moisture longer than older draftier houses.
In strata buildings, steam systems need extra care. If steam is introduced into ductwork without the right downstream conditions, moisture can condense before it is fully absorbed into the airstream. That can lead to rust, staining, microbial growth, and complaints from neighbors if moisture migrates into shared assemblies.
In a detached house, a humidifier mistake may stay in one mechanical room. In a strata building, the same mistake can become a building issue.
When to call Encano
Call Encano Plumbing & Drainage Ltd. if the job involves strata approval, uncertain code interpretation, steam equipment, unusual plumbing behavior, or any sign that added humidity could worsen condensation in the home. Those are the points where professional judgment matters most.
A capable homeowner can handle a straightforward bypass replacement in an accessible detached house. Once the installation touches shared building rules, tight mechanical spaces, drainage compliance, or moisture risk in a well-sealed home, professional installation is the safer choice.
Commissioning Testing and Long-Term Maintenance
The install isn't finished when the screws are in. It's finished when the unit runs cleanly, the controls respond properly, and the house reaches a comfortable level without wet windows or a leaking drain.
First startup checks
Restore power, turn on the water, and watch the unit through a full call for humidity. Don't leave after a quick click test. Stay there long enough to confirm the water feed, drain flow, and shutoff all behave normally.
Check these in order:
- Look for leaks at the water connection, solenoid, cabinet, and drain.
- Confirm the humidistat response by adjusting the setpoint and watching the unit start and stop.
- Inspect the duct opening for air leakage around the mounting flange.
- Watch nearby surfaces during early operation. If you see immediate condensation concerns, lower the setting and reassess.
For initial settings, stay conservative. Consumer guidance cited earlier puts the comfort target in a moderate range, and Vancouver homes often need restraint more than maximum output. If bedroom windows start fogging overnight, the setting is too high for the current weather or the house has envelope issues that need attention.
Maintenance that keeps the system safe
A humidifier that isn't maintained becomes less predictable. Pads load up, drains collect debris, valves stick, and controls drift from what the homeowner expects.
A simple maintenance rhythm works well:
- At the start of heating season inspect the cabinet, drain path, and control operation.
- During the season look for water marks, loose tubing, or reduced output.
- When replacing service parts use the manufacturer-specified pad, canister, or internal component for the model you installed.
- After any furnace service recheck humidifier operation, because wiring or duct access may have been disturbed.
A practical example. If a bypass unit in a Vancouver basement starts leaving a dry mineral trail around the drain fitting, don't just wipe it off and move on. That's often an early sign that the connection needs tightening, cleaning, or replacement before it becomes a leak.
When a humidifier is installed properly, tuned carefully, and maintained on schedule, it improves winter comfort without creating a moisture problem somewhere else in the house.
If your humidifier installation involves tight ductwork, steam equipment, condo restrictions, drainage concerns, or a tankless-water-heater setup, it's worth having the job done properly the first time. Encano Plumbing & Drainage Ltd. handles plumbing, heating, and HVAC work across Vancouver, Richmond, Burnaby, Delta, Surrey, and nearby communities, with practical help for both homeowners and strata-managed properties.