

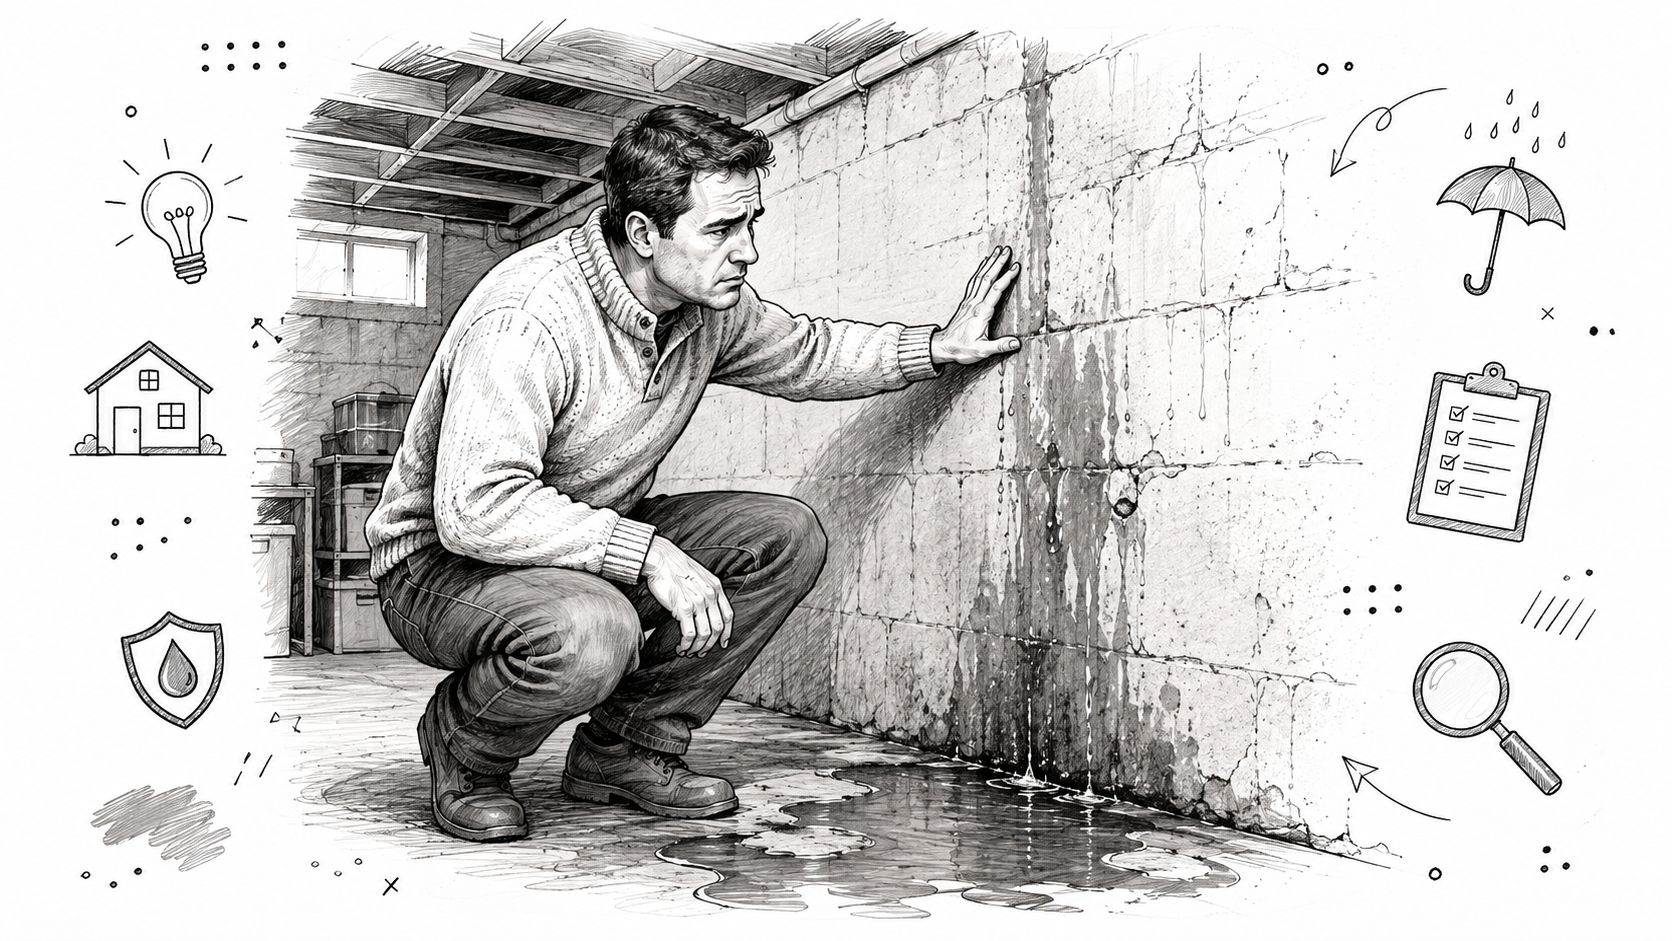
The first clue is usually a damp corner in the basement after a hard November rain. By the time a homeowner in Vancouver notices a musty smell, a faint tide line on concrete, or water collecting where the slab meets the wall, the ground around the foundation has often been holding water for a while. In this climate, weeping tile installation is rarely an abstract upgrade, it's a practical response to the way coastal rainfall pushes groundwater toward homes.
A properly built drainage system collects groundwater before it reaches the foundation wall and directs it away. The federal government groups weeping tiles with French drains and trench drains as flood-prevention measures for basements and foundations, which is the right lens for Greater Vancouver homes because this market lives with persistent rainfall and saturated soils, not occasional wet spells alone. If you want a plain-language overview of how the system behaves in real homes, this explainer on how weeping tiles work gives useful context before you look at pipes and trenches.
Table of Contents
- Understanding Weeping Tile and Why Vancouver Homes Need It
- When to Install Weeping Tile and Pre-Installation Checks
- Step-by-Step Exterior Weeping Tile Installation Process
- Interior Weeping Tile Retrofit as an Alternative Approach
- Common Installation Mistakes That Cause System Failure
- Cost Breakdown and Hiring the Right Contractor
Understanding Weeping Tile and Why Vancouver Homes Need It
A homeowner calls after a stormy weekend and says the basement wall feels cold and clammy. The baseboard is damp, there's a line of white residue on the block wall, and the smell is unmistakable. That's usually the point where drainage stops being a background issue and starts becoming a foundation problem.
How the system actually works
Weeping tile is a perforated pipe installed around a foundation to collect groundwater and move it away before it can build pressure against the wall. In Canadian guidance, the pipe sits in a trench with gravel and filter fabric, usually below basement floor level so it can intercept water early and keep it out of the structure Canada.ca. On well-built systems, the drain path leads to a sump pump or a storm discharge point, depending on site conditions and local rules.
In Vancouver, that matters because the climate pushes drainage systems harder than many homeowners expect. Older homes, finished basements, and properties on slopes all tend to show the same pattern, water moving where gravity and saturated soil tell it to go, not where the owner hoped it would stay. A foundation drain only works if it gives water an easier path than the wall itself.
Which homes benefit most
Older construction is the obvious candidate, especially places built before modern drainage expectations were common. Finished basements also deserve attention because even a small seepage issue can damage drywall, flooring, trim, and stored contents long before the homeowner sees obvious structural damage. Sloped lots are another common problem in Greater Vancouver, since runoff from uphill can concentrate at the foundation line.
A practical rule from the field is simple.
If the basement is being used as living space, the drainage system has to behave like part of the building envelope, not a garden accessory.
A common mistake is treating water entry as a cosmetic issue. Once the foundation is taking on water repeatedly, the fix usually needs to be physical and continuous, not a quick patch with sealant on the inside.
When to Install Weeping Tile and Pre-Installation Checks
Many homes don't require a full excavation immediately. Some only need grading correction, downspout adjustments, or a small repair to a failed connection. The issue is that basement moisture symptoms overlap, so the wrong fix can waste money and leave the underlying failure unaddressed.
Signs that point to drainage failure
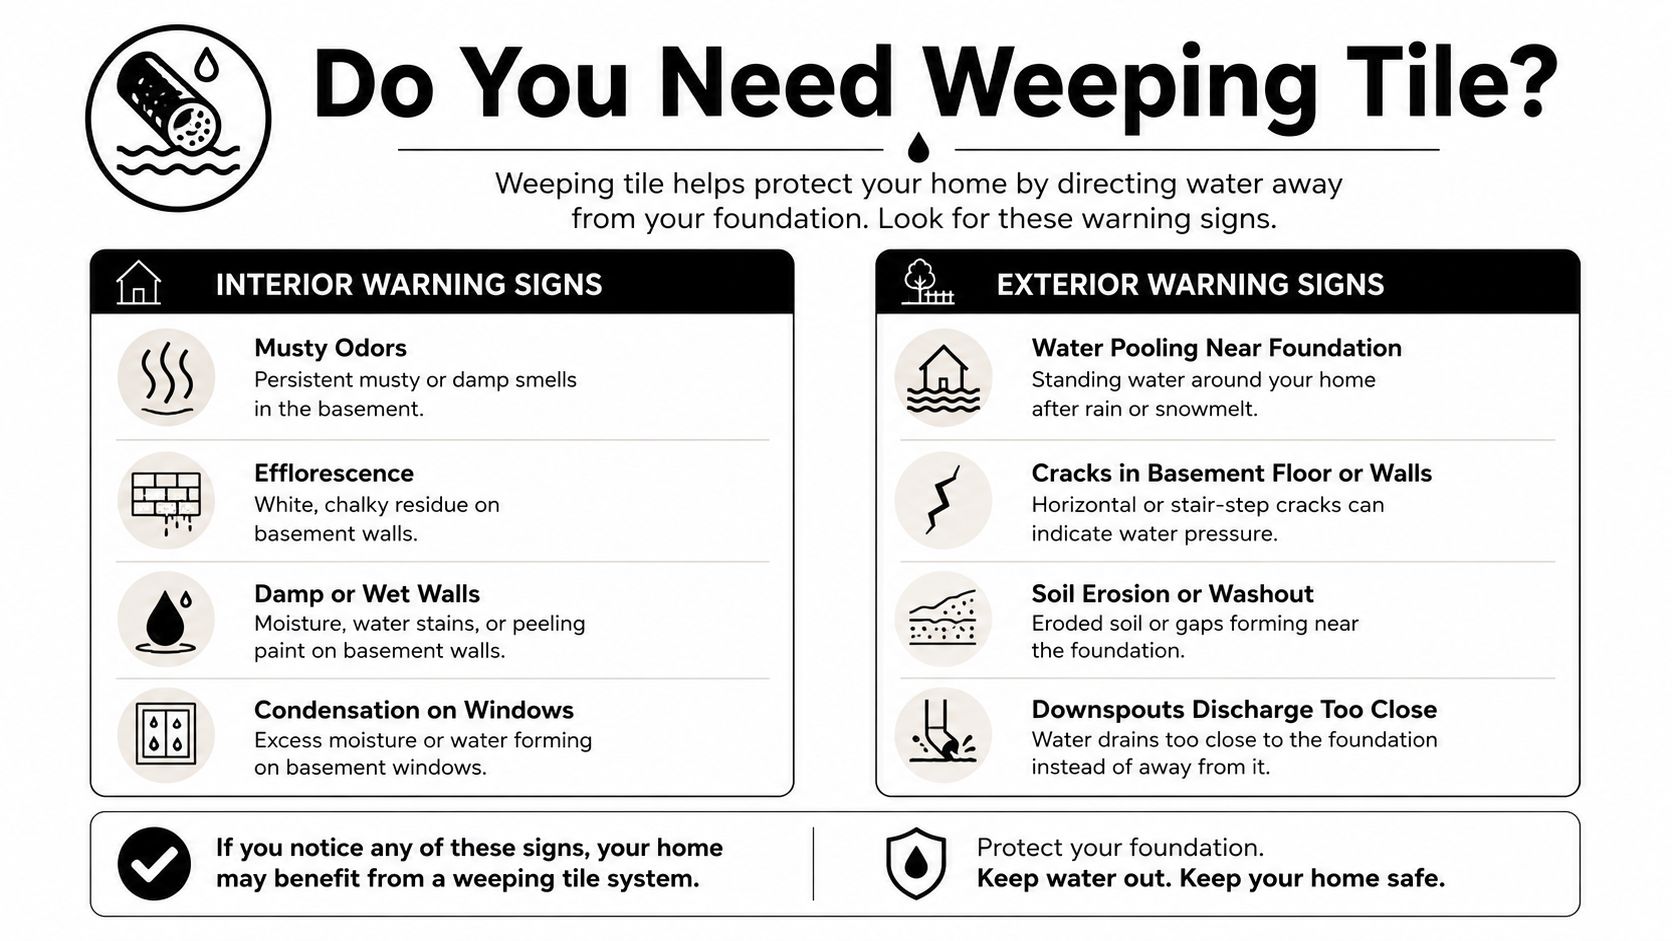
Efflorescence on basement walls, musty odours, water at the floor-wall joint, and damp lower walls are all signals that the foundation is trying to shed moisture unsuccessfully. Exterior clues matter too, especially pooling near the foundation, grading that slopes toward the house, or a spot where water always collects after rain. If the problem only shows up in one corner, that doesn't make it minor, it usually means the drainage path is failing at a specific point.
Before anyone digs, the foundation needs to be inspected for cracks and obvious structural movement. Cracks often need repair first, because a drain system can't solve a wall that's actively letting water through. Soil conditions matter as well, and in Vancouver that means looking at how quickly the ground accepts water, how high groundwater sits, and whether the existing drainage has already been overloaded.
Choosing the right scope
Some jobs call for a full exterior excavation. Others are better handled with an interior retrofit or a smaller correction to the existing outlet path. Tight urban lots, shared walls, yards, and driveway constraints can all tilt the decision toward an interior approach.
Municipal requirements also need checking before work starts, especially in Vancouver, Richmond, Burnaby, and nearby municipalities where stormwater discharge and sewer connection rules can differ. A contractor who skips that step is forcing the owner to solve a compliance problem later, and that's a bad trade in a drainage project.
If you're also seeing slow drains or backing up at basement fixtures, this basement drain backup reference helps distinguish plumbing symptoms from foundation drainage symptoms. The overlap is real, but the fix isn't always the same.
Practical rule: if the water issue appears after rain and starts at the foundation perimeter, drainage comes first. If it appears after fixture use, plumbing inspection comes first.
Step-by-Step Exterior Weeping Tile Installation Process
Exterior work is still the cleanest way to keep groundwater from ever loading up the foundation wall, but only if it's built carefully. In Greater Vancouver soil, shortcuts don't hide for long, because wet weather keeps testing every weak point.
Excavation and trench setup
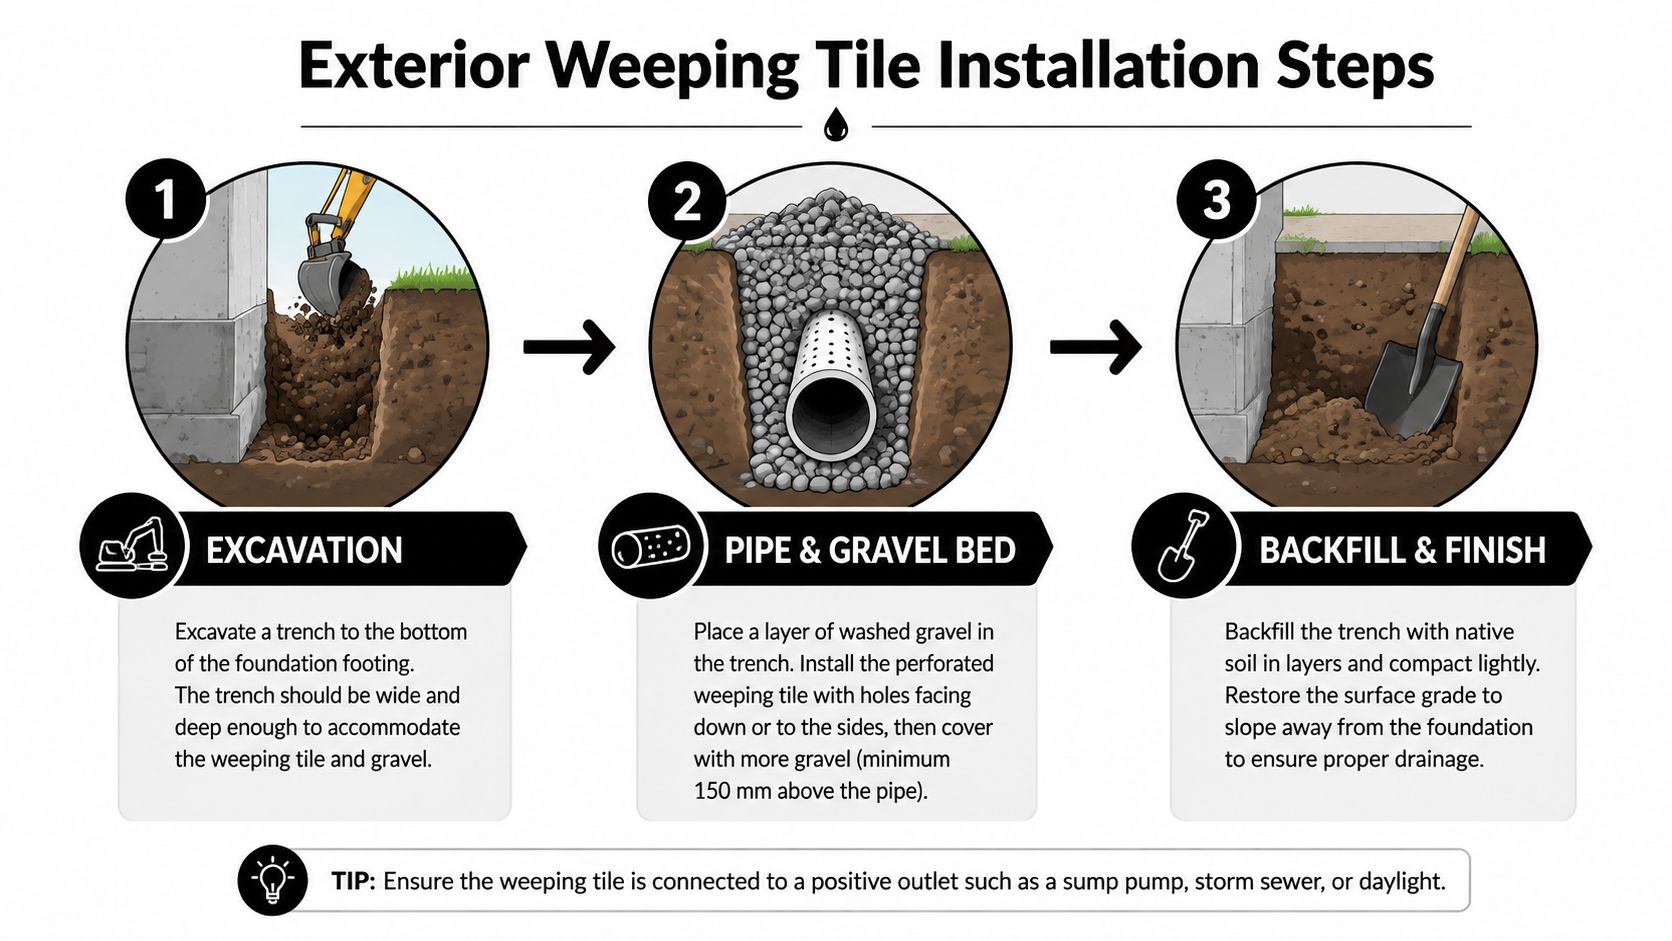
The trench should be dug to the footing level, not just to a convenient depth, because the drain has to intercept water where it collects around the foundation base. Canadian guidance commonly places the trench at about 1 inch of fall per 8 feet of run, which is roughly a 1% slope Dry Space Waterproofing. On a 32-foot foundation run, that means about 4 inches of drop from the high end to the low end, enough to keep water moving toward the outlet.
A typical trench is around 12 inches wide, and the work area needs room for the wall, the bedding stone, the pipe, and safe backfill handling AquaMaster Plumbing. Safety matters here. Excavation near footings can be unstable, utilities may be buried nearby, and wet clay can collapse faster than people expect.
Pipe, stone, and fabric
A proper setup starts with 3/4-inch clear stone or washed gravel as the drainage bed, then the perforated pipe is laid with the holes facing downward so water enters from the gravel bed below G1000 Home. Filter fabric goes around the system to keep fines from migrating into the stone and clogging the pipe. Some Canadian guides specify 3 to 4 inches of gravel bedding, while others allow up to 6 inches above the pipe after installation, which gives the system room to drain freely while staying isolated from soil.
Discharge and finish
The line then connects to either a sump basin or a municipal storm outlet, depending on the property and local code. Where a sump is used, the discharge line should include a check valve so water doesn't flow back after the pump stops. After testing, the trench is backfilled with clean gravel and the surface is restored.
A proper contractor should be able to explain each material choice clearly. If they can't tell you why the pipe goes below the footing, or why the stone needs to be clean and washed, they're probably treating the job like a ditch rather than a foundation system.
If you want a visual sense of the drainage sequence, the short video below helps connect the trench, pipe, and backfill stages to the actual work site.
Interior Weeping Tile Retrofit as an Alternative Approach
Some homes aren't good candidates for exterior excavation. Finished basements, tight side yards, townhouses with shared walls, and properties with expensive landscaping often make an inside-first approach the smarter decision. It doesn't stop water from reaching the foundation wall, but it does capture and move that water before it damages the living space.
What the interior retrofit looks like
A Canadian interior retrofit usually starts with an approximately 18-inch basement perimeter trench, saw-cut along the slab edge and excavated to below footing level Nusite Group. The drainage bed is built with clean 3/4-inch clear stone, the perforated pipe is set with the holes facing downward, and additional gravel is added before the trench is finished. The system then ties into a sump basin, which is commonly excavated to about 30 to 36 inches deep and finished flush with the slab.
That flush finish matters because it keeps the floor usable and avoids a trip hazard. It also keeps the drainage system tied to the basement slab in a way that's easier to inspect later. If the sump pump is the heart of the system, the basin is the lungs, it needs enough capacity to handle what the trench sends it.
Trade-offs you should accept upfront
Interior systems manage water after it enters the foundation envelope. That's the honest trade-off. They're still effective, and in some properties they're the only realistic option, but they don't relieve the outside wall from groundwater pressure the way a full exterior system can.
Backup power deserves attention too. In a rain-heavy region like Greater Vancouver, a sump that loses power during a storm can leave the basement exposed at the exact wrong time. Discharge routing also matters, because a line that dumps too close to the house just recycles the problem.
If you're comparing options, Encano Plumbing & Drainage Ltd.’s sump pump installation page is a useful example of the type of work a drainage contractor may coordinate alongside interior waterproofing. The right approach depends on access, use of the basement, and how much of the surrounding property you're willing to open up.
An interior retrofit is a compromise, but it's a controlled one. A bad exterior excavation is a mess. A well-built interior system is just a different solution.
Common Installation Mistakes That Cause System Failure
The worst failures I see are usually boring ones. Nothing dramatic, just a drain line laid too flat, the wrong gravel used as fill, or fabric left out because someone wanted to save time. Those small mistakes become expensive once the basement starts getting wet again.
Where systems usually go wrong
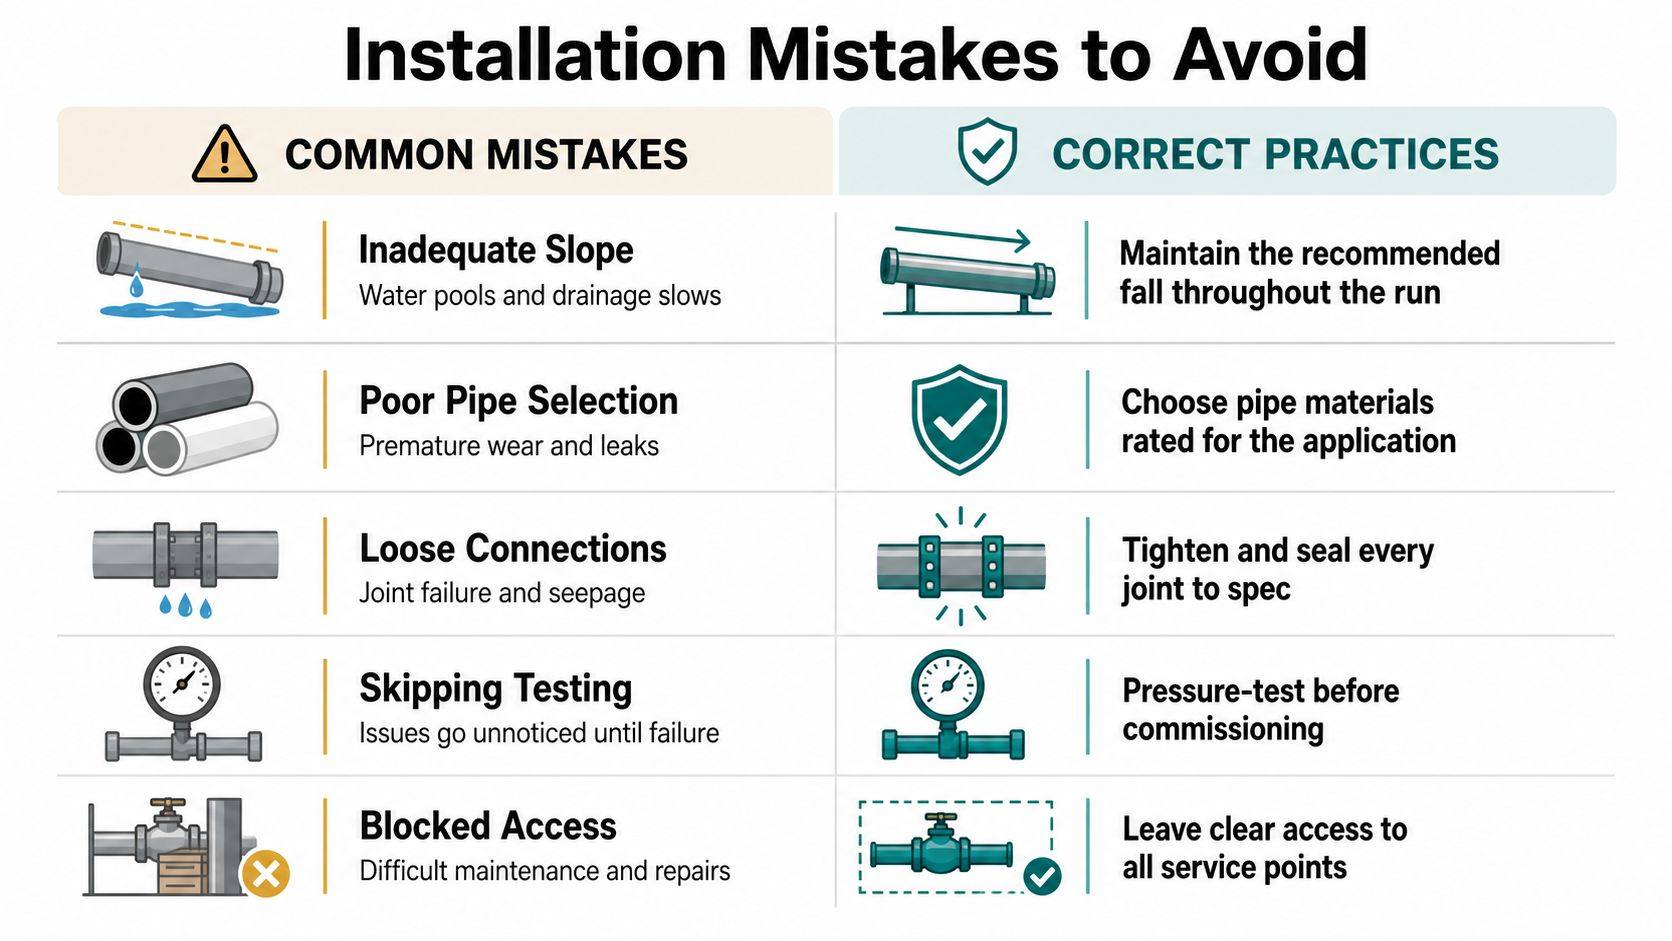
Inadequate slope leaves standing water in the line, and standing water means the system is never clearing properly. Poor bedding material lets soil fines work their way into the pipe and choke off capacity. Missing filter fabric has the same effect over time, especially in fine soils that wash easily into the trench.
Pipe orientation matters more than most homeowners realise. If the perforations face up instead of down, the line can still collect water, but it doesn't do it as efficiently and it risks clogging from above. Unwashed gravel with too many fines is another common shortcut, because the fines settle and form a silty layer that slows everything down.
Connection problems that look minor until they aren't
An undersized sump basin can't comfortably handle inflow, and a missing check valve can send water back into the line after the pump stops. Discharge lines can also freeze or back up if they're routed poorly, which turns a working system into a seasonal problem. The failure mode often isn't the pipe itself, it's the part where the pipe meets the pump, the outlet, or the soil.
A good inspection during installation should confirm clean stone around the pipe, visible slope to the discharge point, and proper sealing at any connection. If you can't see those details, ask for them before the trench is closed.
What to verify before backfill: pipe orientation, gravel type, slope, fabric placement, and the sump connection. If those five items are right, the system has a fighting chance.
Cost Breakdown and Hiring the Right Contractor
A wet basement in Greater Vancouver usually turns a weeping tile installation into a real capital project, not a small patch job. The cost depends on how hard it is to excavate, how much restoration follows, and whether the work needs a new sump or a surrounding French drain. Straightforward jobs are often priced in the range of $100 to $150 per linear foot, and a full system can start around $25,000 once digging, drainage components, and tie-ins are included. A 100-foot perimeter can still land in the rough $10,000 to $15,000 material-and-labour range before depth, access, or finish work push it higher.
Weeping Tile Installation Cost Factors
| Project Scope | Typical Cost Range | Key Variables |
|---|---|---|
| Straightforward exterior perimeter work | Roughly $10,000 to $15,000 for a 100-foot run | Depth, access, soil, disposal, labour |
| Full drainage buildout with excavation, sump, and French drain | Starting around $25,000 | Layout complexity, concrete repair, restoration |
| Longer or more complex perimeter systems | About $100 to $150 per linear foot | Wall height, obstructions, municipal rules |
That range shifts fast in Vancouver. High water tables, clay-heavy pockets, tight side yards, and limited machine access all add labour and disposal time. Restoration also matters, because a cheap drainage quote can leave out the concrete patching, landscaping, and cleanup that make the yard usable again. Permit fees and stormwater compliance can also change the total, especially where discharge routing needs to meet local rules. The cheapest bid is often the one that left out the parts that cost the most to fix later.
How to hire well
A serious contractor should give you a written scope, proof of insurance, local references, and a plain explanation of what gets dug up, what gets restored, and where the water will go. Warranties matter too, especially the coverage on pipe, sump components, and workmanship. DIY can make sense for very small, simple drainage repairs, but full foundation work is not the place to learn trenching, slope, and discharge rules on the fly.
Look closely at the proposal language. If it does not mention slope, bedding stone, filter fabric, or the discharge destination, the quote is probably too vague to trust. A proper estimate should read like a plan, not a guess.
Encano Plumbing & Drainage Ltd. offers drainage and related plumbing services in Greater Vancouver, so it is one option homeowners can compare with other qualified local contractors when they need drainage work tied to a basement or foundation issue.