

If you're in a Vancouver house that still relies on baseboards, an older furnace, or no cooling at all, the problem usually shows up the same way. One room gets stuffy in the afternoon, another stays cold in winter, and nobody wants to open walls just to add ductwork. That's where a ductless mini split starts making sense.
In Greater Vancouver, mini split installation isn't just about hanging a wall unit and setting a condenser outside. Local homes bring real constraints. Strata rules, narrow side yards, heritage details, balcony limits, neighbour noise, and awkward line-set routes can turn a simple-looking job into a messy one if it isn't planned properly. A good install solves comfort problems without creating drainage issues, code issues, or a constant hum under somebody's bedroom window.
Table of Contents
- Why a Mini Split is Your Best Bet for Vancouver Climate
- Planning Your Installation What to Know Before You Start
- The Mini Split Installation Process Unpacked
- Electrical and Refrigerant Work The Non-Negotiable Pro Tasks
- Costs Permits and Timelines in Greater Vancouver
- After Installation Care and When to Call Encano
Why a Mini Split is Your Best Bet for Vancouver Climate
A mini split fits this region because many homes weren't built around central air. Vancouver Specials, older bungalows, laneway homes, suites, and plenty of condos need a system that can heat and cool without tearing apart ceilings for ducts. That's the core advantage. You get targeted comfort where you need it most.
It also suits the way people live here. A west-facing living room in Burnaby can overheat on a warm afternoon while a back bedroom in the same home stays comfortable. Zoned operation helps deal with that uneven load better than a one-temperature-for-the-whole-house approach.
The wider market tells the same story. The mini split air conditioning system market was valued at USD 7.4 billion in 2024 and is projected to reach USD 12.5 billion by 2034, growing at a 5.5% CAGR, according to Global Market Insights on the mini split air conditioning system market. That doesn't mean every home needs one, but it does show mini splits have moved well beyond niche status.
Where they work especially well in Vancouver
- Older homes without ducts: You avoid the cost and disruption of adding full duct runs.
- Condos and suites: One or two indoor heads can solve a comfort issue in a limited footprint.
- Additions and converted spaces: Sunrooms, attic rooms, garages, and basement areas often need their own control.
- Mixed-use layouts: Homes with one hot zone and one cool zone benefit from independent temperature control.
A mini split is often the cleanest answer when the house doesn't support central equipment well.
One practical point homeowners miss is installation disruption. A well-planned mini split job usually needs a small wall penetration, thoughtful line routing, and solid equipment placement. It doesn't usually mean opening large sections of the house. That matters when you're trying to improve comfort without turning a retrofit into a renovation.
If you're comparing options, it helps to look at heating and cooling solutions for Vancouver homes in the context of your actual layout, not just equipment brochures. The right answer depends on where the heat builds up, where outdoor equipment can legally and safely go, and how much visible installation work you're willing to accept.
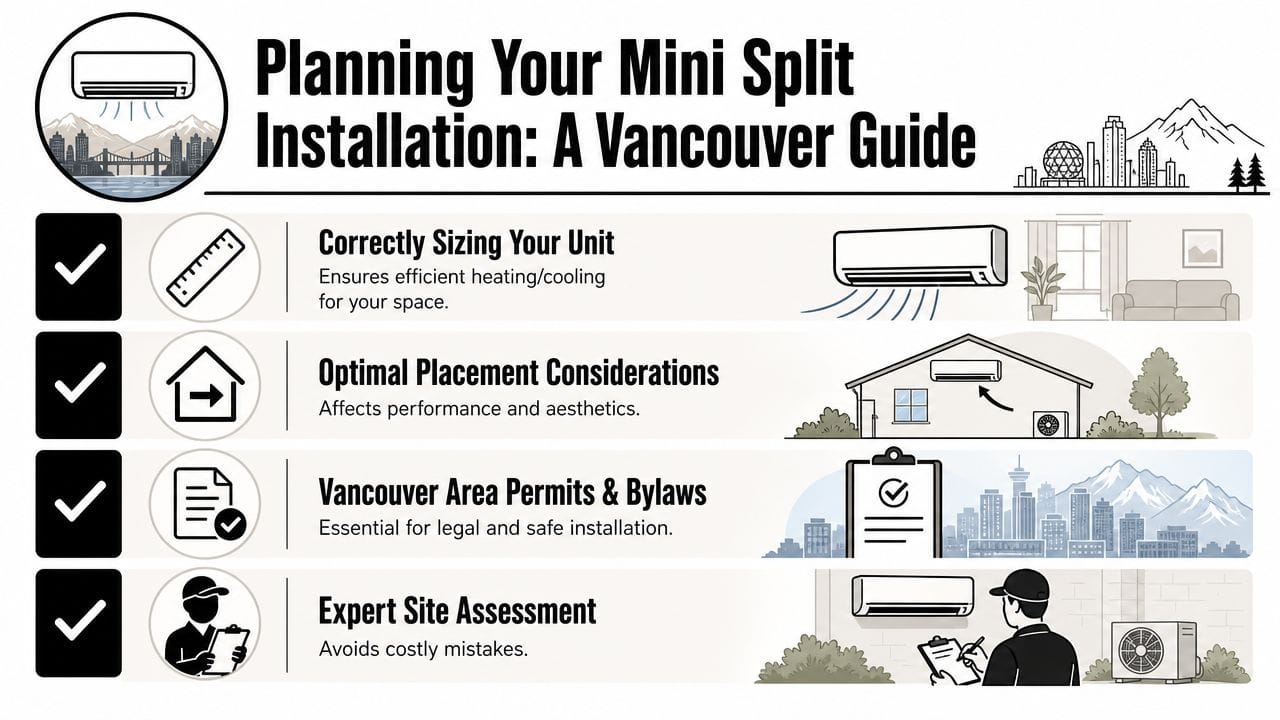
Planning Your Installation What to Know Before You Start
Most mini split problems start before installation day. Bad sizing, poor placement, ignored bylaws, and rushed routing decisions are what lead to disappointing results. In Greater Vancouver, planning matters more than most online guides admit.
Start with the house, not the brochure
A proper mini split installation starts with load sizing. That means looking at insulation, window area, sun exposure, ceiling height, room use, and air leakage. A unit that's too small will struggle. One that's too large can short-cycle and leave comfort uneven.
For a practical example, think about a typical Vancouver Special around 1,200 sq. ft. The front living area may get strong afternoon sun, while the lower level runs cooler. On paper, someone might ask for one large wall head to “do the whole house.” In practice, that often isn't the cleanest design. The better option may be a different layout, more than one conditioned zone, or a different placement strategy so air can reach the occupied spaces.
The Vancouver constraints that change the job
Many installation guides overlook Vancouver-area housing constraints. In Metro Vancouver, where clean-heating incentives are accelerating heat pump adoption, the practical question is often where the system can go. Home Depot's mini split installation guide reflects the general wall-mount process, but dense local housing creates more placement trade-offs than generic guides usually cover.
Here are the issues that tend to decide the job:
- Strata approval: Condos and townhomes often restrict exterior penetrations, balcony equipment, visible line covers, and work on common property.
- Outdoor space limits: A narrow side yard, back lane, or small patio can make condenser placement much harder than it looks.
- Drain routing: Condensate has to discharge properly. You can't just let it drip where it creates staining, slipping hazards, or neighbour complaints.
- Noise and vibration: The shortest line-set route isn't always the smartest location if it transfers vibration into a wall assembly or points sound toward another unit.
- Service access: If a technician can't safely reach the outdoor unit later, the installation wasn't planned well.
Practical rule: The best location is the one that balances airflow, drainage, appearance, neighbour impact, and future service access.
If you're in a condo or townhouse, it helps to review air conditioning options for condos before finalising equipment choices. The physical space, building rules, and common-property boundaries often narrow the options quickly.
A practical planning example
Take a Burnaby townhouse with a small fenced patio and bedrooms above grade. The homeowner wants cooling in the main living area and one bedroom. The obvious idea is to put the outdoor unit right outside the patio door because the line run is shortest.
That placement often creates three problems. It can crowd the patio, increase perceived noise near seating areas, and make condensate and service access awkward. A better solution may be a side location with cleaner airflow and less vibration transfer, even if the line-set route is a bit longer and needs more finishing work.
A simple pre-install checklist helps:
| Item | What to confirm |
|---|---|
| Indoor location | Clear airflow, suitable wall structure, practical condensate route |
| Outdoor location | Stable base, airflow clearance, neighbour and strata impact |
| Electrical path | Panel capacity, disconnect location, clean wire routing |
| Exterior finish | Line-hide route, siding type, penetration details, appearance |
| Approvals | Strata sign-off, site access, contractor scheduling |
Planning is where a mini split installation gets won or lost. Once equipment locations are fixed badly, every later step becomes harder.
The Mini Split Installation Process Unpacked
A professional mini split installation follows a clear sequence. The details matter, but the order matters too. Good installers don't start by drilling holes at random and figuring the rest out later.

What happens first on install day
The job begins with confirming the final layout on site. That includes indoor head location, outdoor condenser placement, line-set path, drain route, and electrical path. On older Vancouver homes, walls are not always as straightforward as they look. Stud location, hidden obstacles, cladding type, and exterior grade can all change the plan.
A technically sound workflow includes mounting the indoor unit high on the wall, drilling a 2- to 3-inch pass-through for the line set, wiring, and drain, then setting the outdoor unit on a stable, level base, according to Filterbuy's guide to mini split installation workflow.
The indoor bracket has to be level. If it isn't, you can end up with drainage trouble, a crooked head, or both. That sounds minor until condensate starts behaving badly inside a finished room.
How the indoor and outdoor units are set
The indoor head needs room to move air properly. Tucking it into a cramped corner because it's “out of the way” often reduces performance. Placement should respect clearances, but it should also suit the room's shape and furniture layout.
On the outdoor side, the condenser needs a base that stays level and stable. Depending on the property, that may be a pad or a wall bracket. In Vancouver, the right choice often comes down to drainage, snow splash, tight walkways, visual impact, and vibration transfer into the building.
Here's where experience shows. A neat exterior line route takes time. On a townhouse, for example, the line set may need to run along a side wall where it's less visible from the street and less exposed to accidental damage. That route may not be the shortest, but it often looks better and avoids a line-hide running across the home's main façade.
Clean-looking mini split installation is rarely accidental. Someone planned the route before the first hole was drilled.
This walkthrough gives a good visual of the basic setup sequence:
Why final commissioning matters
Mounting the equipment is only part of the work. The refrigerant connections must be made correctly and tightened to the manufacturer's specification. After that, the lines need to be evacuated with a vacuum pump before startup. That step removes air and moisture from the system.
Skipping or rushing commissioning is one of the fastest ways to shorten equipment life. The homeowner may not notice a problem on day one. The damage shows up later as poor performance, fault issues, or compressor trouble.
A proper finish also includes the details homeowners care about every day:
- Line-hide alignment: Straight, tidy exterior covers look intentional instead of patched-on.
- Wall sealing: Penetrations need to be weather-tight and cleanly finished.
- Drain management: Water should leave the system in a controlled way.
- Startup checks: The unit should be tested through operating modes, not powered on and abandoned.
In a dense neighbourhood, workmanship isn't just about performance. It's also about leaving behind an installation that doesn't look improvised.
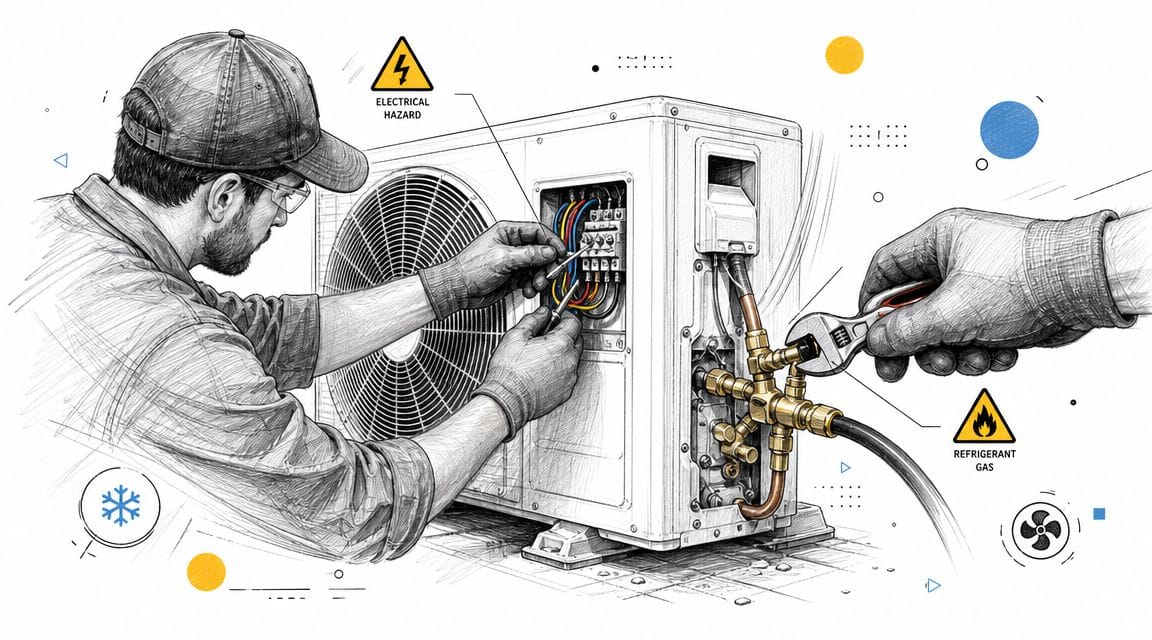
Electrical and Refrigerant Work The Non-Negotiable Pro Tasks
A wall cassette can be level, the line-hide can look tidy, and the system can still be installed wrong. The problems that cost homeowners money later usually start in the electrical and refrigerant work, not in the mounting.
Electrical work has to be correct from the start
Mini splits need a dedicated circuit, correct overcurrent protection, proper grounding, and a disconnect installed where code and service access allow it. In Greater Vancouver homes, that can get complicated fast. Older panels may have limited capacity, finished basements can make wire routing harder, and strata buildings often restrict where exterior conduit or disconnects can be placed.
A system that powers on is not proof the electrical side was done properly. Loose terminations, wrong breaker sizing, poor conductor selection, or a disconnect installed in the wrong location can lead to nuisance trips, service problems, or safety concerns.
Appearance matters too. On a front-facing wall in East Vancouver or a tight side yard in Burnaby, the shortest route is often the one that looks worst. Good installers balance code, serviceability, and curb appeal. That usually means spending more time planning the run before any wire is pulled.
Refrigerant work is where installation quality really shows
Refrigerant piping has to be cut cleanly, protected from kinks, flared correctly where the manufacturer requires it, and tightened to the specified torque. After that, the system needs a pressure test and a full evacuation with a vacuum pump before startup. Moisture left in the lines can damage the compressor and create performance issues that do not show up on day one.
I see this mistake more than homeowners expect. A flare connection is slightly uneven, or a line set gets bent too aggressively to fit a tight exterior corner. The unit may still run at first. Later, the system loses charge, cooling drops off, heating output suffers in winter, and the repair becomes far more expensive than doing the piping properly during installation.
Dense Vancouver-area sites add another layer. Limited outdoor space can tempt an installer to force a tighter bend radius, hide a service valve where it is hard to reach, or crowd the outdoor unit too close to a fence or neighbour's patio. That can affect service access, airflow, and noise complaints, especially in duplexes, laneway homes, and strata properties.
The expensive part is rarely the startup. It is the callback, leak search, or compressor failure that traces back to rushed technical work.
For homeowners, the practical takeaways are straightforward:
- Mounting is only one part of the job: The hidden risk sits in the wiring, protection, and refrigerant setup.
- Small refrigerant leaks still matter: Even a slow leak can reduce capacity and shorten equipment life.
- Electrical issues may show up later: Repeated heating and cooling cycles expose poor connections and sizing mistakes.
- Warranty problems are real: Manufacturers can push back when installation procedures were not followed.
- Site constraints need planning: Tight lots, strata rules, and neighbour proximity change how a proper install is laid out.
Homeowners comparing system types often focus on equipment price first, but installation scope is what changes the actual number. That same principle shows up in central air installation cost factors, and it applies even more on ductless jobs with tricky routing or limited exterior options.
Encano Plumbing & Drainage Ltd. handles this work as part of its HVAC service offering. The value is simple. The system is wired safely, the refrigerant side is commissioned correctly, and the installation is set up to pass inspection and run reliably.
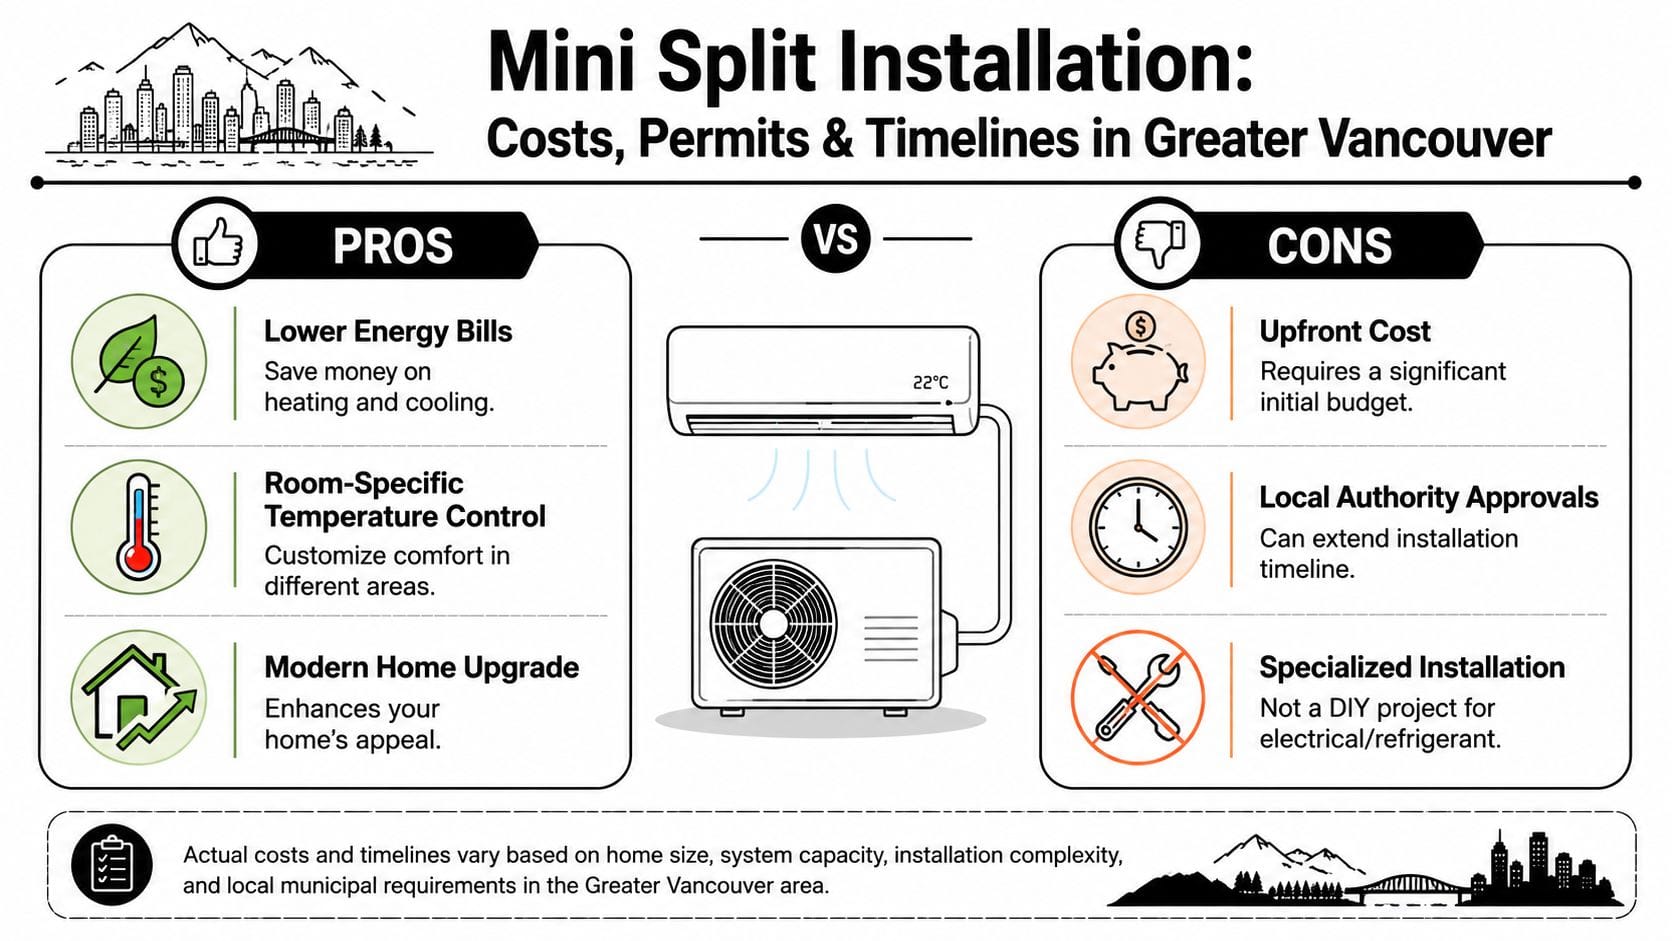
Costs Permits and Timelines in Greater Vancouver
A Vancouver homeowner gets two quotes for the same mini split and sees a gap of several thousand dollars. In practice, that usually comes down to access, approvals, electrical scope, and how difficult it is to place the outdoor unit without creating noise or appearance problems.
A useful local benchmark comes from Trufinity's overview of mini split installation cost in BC, which puts professional installs in the Okanagan in the $3,000 to $8,000 range. Greater Vancouver often pushes higher on harder jobs. Strata review, tighter side yards, limited balcony space, parking constraints, and longer material carry all add labour and planning time.
What affects the price most
Equipment matters, but site conditions usually decide whether a quote stays reasonable or climbs.
| Cost factor | Why it changes the job |
|---|---|
| Number of zones | Each indoor head adds refrigerant piping, controls, condensate planning, and commissioning time |
| Line-set complexity | Long runs, finished walls, concrete, and awkward routing increase labour and patching work |
| Electrical work | Circuit capacity, panel location, disconnect placement, and permit scope can change the job materially |
| Outdoor placement | Brackets, pads, snow clearance, service access, and neighbour proximity affect both labour and layout |
| Building type | Condos, townhomes, duplexes, and older houses often involve access limits, approvals, or concealment work |
In Greater Vancouver, outdoor placement is often the sticking point. On a detached house, the challenge may be a narrow side yard or a neighbour's bedroom window nearby. In a condo or townhome, the issue is often strata rules about what can be mounted outside, whether line covers are visible from the street, and how sound is handled on balconies or common walls.
That is why two homes with the same equipment can have very different install costs.
DIY versus professional installation
A mini split is not a plug-in appliance. It is a mechanical and electrical system that has to be set up correctly from the start.
DIY route
- Lower initial spend: That is the main reason homeowners look at it.
- Higher approval risk: Strata and permit requirements can stop the job before it starts.
- More finishing issues: Exposed lines, poor drain routing, and awkward unit placement are common on self-managed installs.
- More expensive corrections later: One routing or startup mistake can turn into wall repairs, rework, or a shortened equipment life.
Professional route
- Higher upfront cost: Labour, permits, commissioning, and trade coordination are part of the number.
- Better placement decisions: The installer can balance performance, service access, appearance, and local noise concerns.
- Fewer compliance problems: Electrical permit steps and manufacturer installation requirements are handled properly.
- Cleaner final result: Drainage, line concealment, and exterior mounting are planned as part of one job, not patched together afterward.
If you are comparing ductless against other cooling options, this guide to central air installation cost factors in Vancouver-area homes helps frame where ducted equipment may cost more, and where it may fit the house better.
A realistic project timeline
For a straightforward detached home, installation can move quickly once the equipment is chosen and the electrical plan is confirmed. The calendar gets longer when approvals are involved.
A standard house with good exterior access may only need a site visit, permit scheduling, and the install day itself. A strata property can take longer because the first version of the layout is not always the version that gets approved. I have seen outdoor units moved from a balcony wall to a less visible corner, or line routing changed because the building objected to appearance, common-property penetrations, or sound near another unit.
Permits are integral to the timeline, not an extra detail after the fact. The electrical portion has to be filed and completed properly. If the home needs panel work, access upgrades, or a more complicated wiring route, that can affect both schedule and final price.
The shortest quote is not always the fastest completed project. In Greater Vancouver, the jobs that stay on track are usually the ones planned around access, bylaws, and strata conditions before any holes are drilled.
After Installation Care and When to Call Encano
A lot of service calls start the same way. The system worked well through the first stretch of hot weather, then airflow dropped, water showed up below the indoor head, or the outdoor unit started sounding harsher than it did on day one. In Greater Vancouver, that often gets worse faster in tight side yards, on balconies, or in spots where leaves, cottonwood, and damp debris collect around the condenser.
Good aftercare is simple, but it has to be consistent. A mini split is not high-maintenance, though it does need basic cleaning and a homeowner who pays attention to changes early. In older Vancouver homes and strata buildings, that matters even more because access is sometimes limited and small issues can affect neighbours if drainage or noise changes.
What you can handle yourself
- Clean the indoor filters: Follow the manufacturer's instructions and clean them before dust buildup starts choking airflow.
- Keep the outdoor unit open to air: Clear away leaves, weeds, stored items, and anything else crowding the condenser.
- Check for water in the wrong place: Condensate should drain where the system was designed to drain. Water marks on the wall, floor, or balcony are a reason to act.
- Pay attention to sound: A new buzz, rattle, or vibration usually points to a mounting issue, fan problem, or debris in the unit.
One practical note for Vancouver condos and townhomes. If your outdoor unit sits near a neighbour's patio, bedroom window, or a shared walkway, do not ignore a noise change just because the system still heats or cools. Sound complaints are often the first sign that something has shifted.
When it's time to book service
Book service if output drops, the head starts icing, the unit short cycles, drainage looks wrong, or the outdoor section gets louder than it was after commissioning. Those are early fault signs, not good wait-and-see problems.
I also tell homeowners to call if they smell anything unusual, see error codes, or notice the breaker tripping. Those issues need proper electrical and diagnostic work. They are not DIY jobs.
A mini split should run with minimal noise, hold temperature steadily, and drain cleanly. When it stops doing one of those things, the repair is usually smaller and cheaper if it is caught early.
If you need help with mini split installation, placement planning, or service for an existing system, Encano Plumbing & Drainage Ltd. handles heating and HVAC work for homeowners and property managers across Greater Vancouver. A proper site review helps sort out the problems generic install guides miss, especially in strata properties, homes with limited exterior mounting space, and neighbour-sensitive locations where drainage and sound both matter.